This is a noob question. I just got a Luzbot Mini and they recommended HIPS filament to start off with. It works great with their version of Cura, but I couldn’t find any settings in Simplify3D for HIPS. I did a test print using a setting for ABS since it was close to HIPS secs, but it didn’t adhere well and the filament came out on nonuniform strings so I had to abort the print. Has anyone here used HIPS as a main filament? Do you have any recommendations? Would it be better just to go with ABS?
Thanks for any help.
I’ve been using a fair bit of HIPS, mostly on Cura, but I’m working on getting Simplify3D dialed in.
When you say it doesn’t adhere, what are you talking about? The bed? Between each layer? Does the auto-leveling probe work properly?
I can get a decent print with the extruder temp set to 245, bed to 110, fan at 100% from the second layer. It’s not as nice as I would like right now, I get a better surface finish with Cura, in spite of so many reports saying how great Simplify3D is. It might be, once set up properly, but out of the box, I find Cura works well. Interestingly, I got better results with Nylon in S3D than in Cura… 
If you aren’t getting good bed adhesion, try adjusting the Z offset in the G-Code tab. You might want to try a -0.02 to get closer to the bed. With HIPS, I needed to get away a bit, it was sticking too well. Increasing first layer height/width might help as well. As usual, try one thing at a time and test with a small print.
Before starting, try opening the jog controls and heat the extruder. Once it’s at temp, extrude 10mm at a time manually till you get a good even extrusion. It seems to help the beginning of the print to prime the nozzle this way. I also increase the skirt for the same reason, adding width.
Never used HIPS went right to ABS… But that was a big mistake. If you need something done that needs strength order a roll of eSun solid black PETG. Same settings as ABS except the bed should be 70-80 C. Let it cool down below 50 before you try to remove.
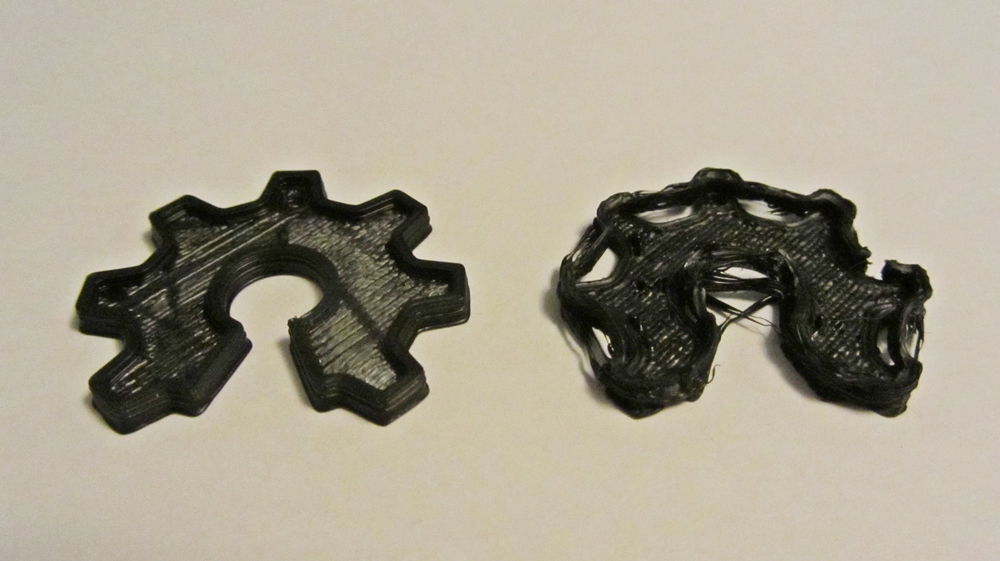
Thanks for your responses. I downloaded and used the Lulz-Cura HIPS Profiles for the Mini and that seems to have helped a bit but I’m still getting some warping of larger flat layers. I printed the Rocktopus sample in standard detail right out of the box and it turned out great. I printed the key chain sample in standard detail with less impressive results. The first photo print on the left was with Cura and the one on the right is with Simplify3D.
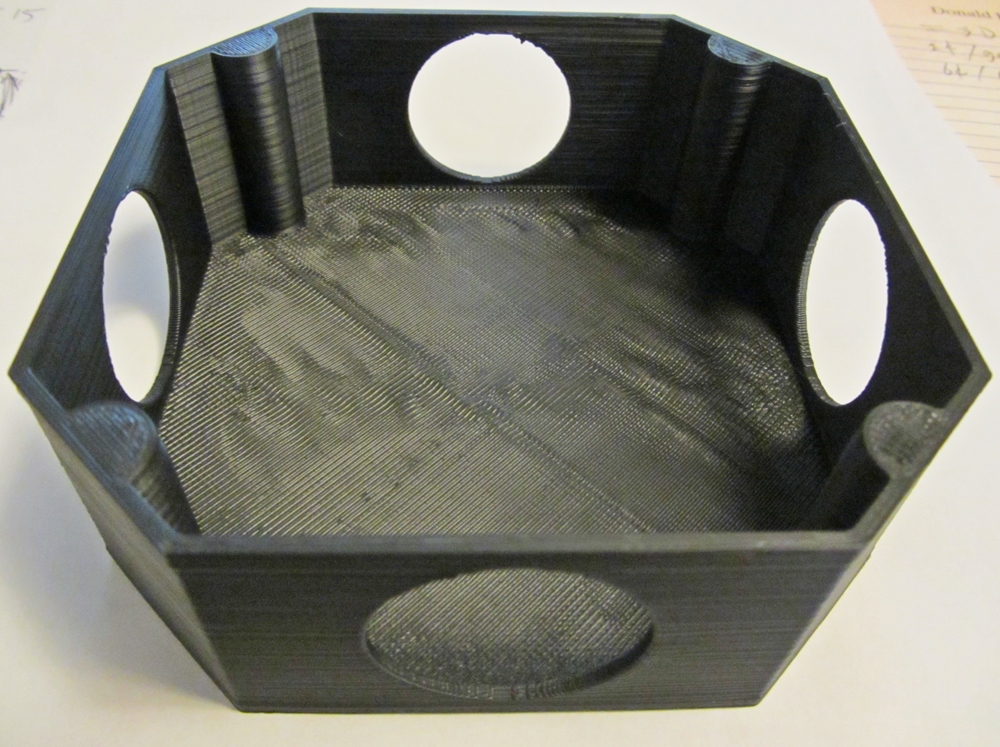
I got the Mini to make project boxes but the larger flat surfaces are wrinkled and distorted. Here is a box I printed with HIPS using standard detail. The sides, holes, etc, look pretty good, but the floor of the box is wavey and has a large seam.
The temps are the stock HIPS profile temps of 240 for the print head and 110 for the bed. Do I need to increase the bed temp perhaps? I’ve been scouring the web for clues, but so far, not much luck.
I was experimenting with Simplify 3D last night. I printed the same part a number of times with little settings changes. I’ll try to remember them now, but I’ll post the file tonight.
I started with the ABS medium profile built into the program. Save a copy, so you can always get back where you were.
Extrusion multiplier. This depends on your machine and filament, but I ended up settling at 0.87. It really cleaned up the walls and such.
Retraction, I lowered the speed and increased the distance to 3mm. The speed is about half what Simplify3D defaults to, which is really fast compared to Cura. Simplify3D says faster is better, so I might still increase the speed. I also enabled coasting with the default value, I think it’s 0.2mm.
Temp I changed to 230 on the extruder and 115 on the bed.
First layer height 115%, width 105%. Again, varies a bit for each machine and setup.
Fan is 0 (off) for a few layers, 10 I believe. Then 20%, scaling up slowly to top out at 60%. With the max set to 80% and increase with short layer time at 45sec. I also increased the layer slowdown to 30sec. It seems to help a lot with small areas getting too hot and sagging. It increases print time, but I’d rather have the print take 30% longer than have to print it again.
On the “additions” tab, I increased the skirt to 4 passes. It helps prime the extruder, the first one often has very little plastic, but by the 4th I get good solid extrusion. I bumped up the solid layers top/bottom/walls as well. I think they are all 4 right now. Good values for this seem to vary a lot based on what I’m printing.
On Advanced, I think it is, I disabled retract only when crossing open spaces. There’s also a setting to avoid crossing the perimeter for travel moves. I increased that to 10.
On G-Code tab I set the Z offset to -0.01. This is the one of the left of the screen, not the machine definition one. This helped with bed adhesion for corners and small areas that were lifting after a number of layers. This is another one you just have to experiment with. Negative numbers get the nozzle closer to the bed, positive moves it away. Small changes at a time here, too close can gouge the PEI from what I’ve read.
Under scripts I copied the end script from Cura and replaced what they had in there. This restored the behavior that moves the bed to the front when it’s cooled down. The included the wipe and probe for the startup script, but left that bit out of the end script. Made no sense to me, and it helps let me know the part is OK to remove.
I’m still a bit of a newbie, but this setup gives me a good print with HIPS on the mini, at least for the test part I was using. I may have forgotten some stuff, so I’ll post the factory file. But if you are wanting to experiment before I get a chance, that should help document the changes.
TT-HIPS-Med.factory.zip (34.6 KB)
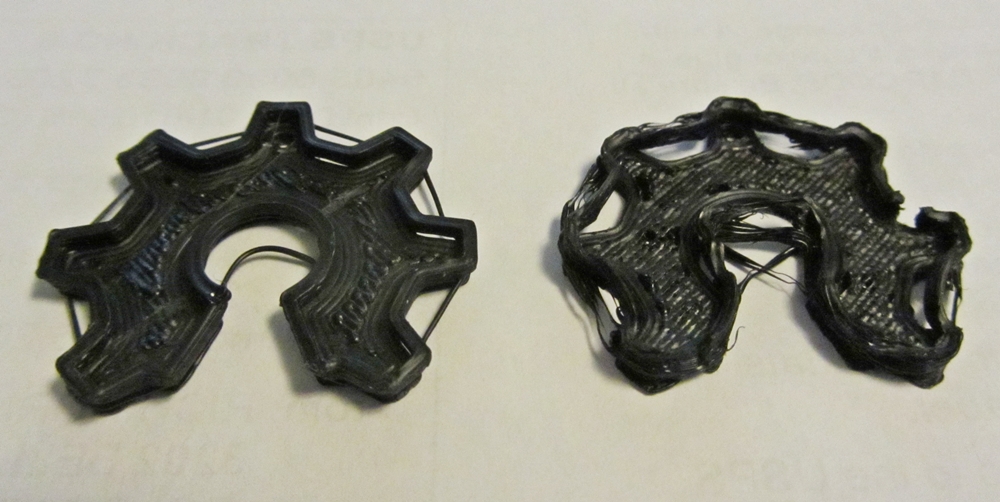
Thanks you so much for that, ttabbal! I loaded your factory file in Simplify3D and ran a sample print. In the photo the one on the right was with the stock S3D file and the one on the left is your file. Of course there’s some tweaking to do but this gives me a much better place to start.
I’ve been tweaking my Cura settings and am getting much better prints in that now, so I’m going to start playing with S3D and see how that goes. Once I finally get HIPS dialed in, maybe I’ll move on to ABS. I know you have to walk before you can run, but this helps a lot. Thanks again for all your help!
I’m glad it was helpful. I have been making changes to the profile since that post and I’ll include the latest version. I also realized I haven’t tried to print the keychain yet, so I tried it with my latest version. There is still room for improvement on that print, but I did some others that turned out quite well.

TT-HIPS-Med.factory.zip (89.7 KB)
Thanks again ttabbal, you have been very helpful and now I have a good place to work from in S3D. I have been getting much better prints and now have the tools to work with to make them even better. I can’t tell you how much I appreciate your kindness. 
Great! That’s what we’re here for, helping each other out. Please let me know if you find some other settings that improve HIPS prints on the mini in S3D. I’m still tinkering, but am pretty happy with the results so far.
Will do, my friend, it’s a never ending journey! I did drop my extruder temp to 220 and notice a little cleaner top layer.
@CoParaTech - You may have already resolved this, but the problem you’re having with S3D printing that OSHW keychain is actually a problem with the STL mesh. I encountered the same issue.
That’s the model from the USB stick that came with the Lulzbot Mini, right? That model has some sort of self-intersecting face issue that gives the S3D slicer a problem. If you look at the print preview carefully in S3D, you’ll notice a bunch of “air” between layers 5 and 6 (assuming a .25mm layer height, 0.425mm first layer). The filament on layer 6 doesn’t have anything to stick to because layer 5 is so far away, hence the “stringing” you are getting. The root of that problem is a bad model.
By default, Cura has the “Fix horrible - Type A” logic enabled, which corrects that problem during slicing and the model then prints OK. If you turn that feature OFF in Cura, then this model will exhibit the same problem as it does in S3D.
Cura does seem a bit better at automatically “fixing” certain kinds of model problems than S3D (although S3D may be better at others). For this model, and it’s specific problem, you need to use S3D’s “Mesh, Separate Connected Surfaces” feature. That will split the intersecting faces into (2) models, put both in the current process, and (ta-da) the keychain will print perfectly!!! Give it a try.
Here’s what that model looks like for me, printed from S3D in HIPS – after using S3D’s “Mesh, Separate Connected Surfaces” feature. No strings! 

I’ve been working with S3D quite a bit. The biggest problem I had with S3D’s default Lulzbot Mini profile was that the “Autoconfigure Material” only remembers/tracks (4) parameters (Temp, BedTemp, ExtrusionMultiplier, FanSpeed), and the “Autoconfigure Quality” only remembers/tracks (6) parameters (LayerHeight, SolidTopLayers, SolidBottomLayers, SkirtLayers, SupportInfillPct). All the other parameters are “global”, meaning they don’t change when you change the Material or Quality dropdown choice.
I was able to fix that by editing an exported XML profile and then re-importing it. A lot of work, but it produced a pretty decent S3D profile for Lulzbot Mini that remembers (20) parameters for each Material choice (including different start/end scripts for each material, with appropriate clean/probe and removal temps taken from the Lulzbot Cura profiles), and (30) parameters for each Quality choice. It’s still a work in progress, but I’m getting pretty good results with it.
Here’s a link to the S3D FFF profile file. Right-click and “save target as…”, then import the file into S3D if you want to try it. There are Material Choices for ABS, HIPS, PETG, Ngen, Alloy910, Cheetah, and PLA (with Fast, Medium, Detail quality choices for each), plus T-Glase (with Clarity/Strength quality choices).
https://1drv.ms/u/s!Aj5_Sqpk1E8cvGxCK1m2Bjli1Oxq
And here’s a link to a spreadsheet that explains the profile design, including which settings are tied to “Material” choices and which are tied to “Quality” choices, along with the specific settings used. Of course you can change any of the settings – and as I said, this is a “work in progress” so some fine-tuning may be needed. Most of the existing settings were gleaned from the default Lulzbot Cura profiles, although I altered a few based on testing results, or simply because certain Cura settings don’t have a one-to-one relationship to an S3D setting.
https://1drv.ms/b/s!Aj5_Sqpk1E8cvG2cTNvm0d3VgDIY
Let me know if any of that that helps!
That is awesome, thank you, ScottW! I will try these out the next few days. I have been working with S3D quite a bit the last few days and am making some headway and I’m finally getting some acceptable prints with HIPS. I did not know that about the key chain model. I should have checked it in Netfab first, but I’ve been using test squares, domes, & flats to hone the settings and they are getting better. I truly appreciate all your work on the .FFF file and that will give me a huge leg up as I’m getting ready to move into other filaments like ABS, Nylon Bridge, & PETG. Thank you for sharing your knowledge and expertise, it will not be wasted.
That’s an interesting idea. I didn’t know you could export the profiles to XML. I’ve just been making new FFF profiles for each filament type and layer height, ignoring the preset material/quality options. I’m going to have to check that out.
@ttabbal - Yep, that’s what I was doing initially. There were too many parameters that weren’t tied to Material or Quality, so I ended up just saving a new profile for every combination of material and quality. But then I read some tips on the S3D forum that explained how to associate additional settings with Material/Quality, and I decided to see if I could create a “single profile” that handled most of my needs.
There is always the issue that SOME settings could be related either to Material or Quality, depending on the circumstance. S3D’s AutoConfigure system doesn’t really accommodate that real well – because it treats Material and Quality choices as completely independent, when sometimes they are related. Still, I’m trying to make a single profile that will handle most of my needs. I’m sure there will be specific cases where I’ll still create another profile to get a special combination of settings.
The file I posted is a “work in progress” – and I am still tweaking the parameters (and would value feedback/help from other Mini users). The main feature at this point is just being able to associate more specific settings with each Material and Quality choice. As for the settings, they need some work. For example, I just realized last night that increasing/decreasing a couple of the layer parameters in S3D don’t have the same effect I thought they did… So I will be changing those and uploading a new version of the profile and spreadsheet later today.
Very interesting. I’ll read up on how to do that and see if I can contribute to your file. I would like to have a known good starting point for the Mini with S3D for a lot of materials. There will always be times you need to adjust things for a particular print or whatever, but a good starting point helps a ton.
One thing I may not have made clear… The manual XML editing is only required to associate additional settings with each of the Material and Quality choices. Once you’ve added a setting to Materials or Qualities and re-imported the XML file, you can then manage/change those settings through the GUI as normal. S3D will properly update that setting and change it for each Material/Quality.
I hope that S3D will eventually provide a capability within the GUI to designate which settings you want managed by Material, and which by Quality, and which are global. The underlying code and data structure of the XML already supports that, but right now you have to edit the XML to change what settings are global, vs. which ones are tied to the Material/Quality choices.
ScottW, thanks for sharing! I bought S3D this past weekend and had tried porting over my PetG settings and spent hours trying to get it working have decent… found this topic and imported your FFF file… BAM! It works wonderful now. Kudos to your for all the hard work.
CoParaTech, you had mentioned that you had good success printing HIPS with Cura. I am not, but my issues may also be printer setup and my own inexperience. Would you mind posting your Cura HIPS settings so I can compare. I’d like to try your settings and see if I can get a good print. Haven’t had much luck.
Thanks!