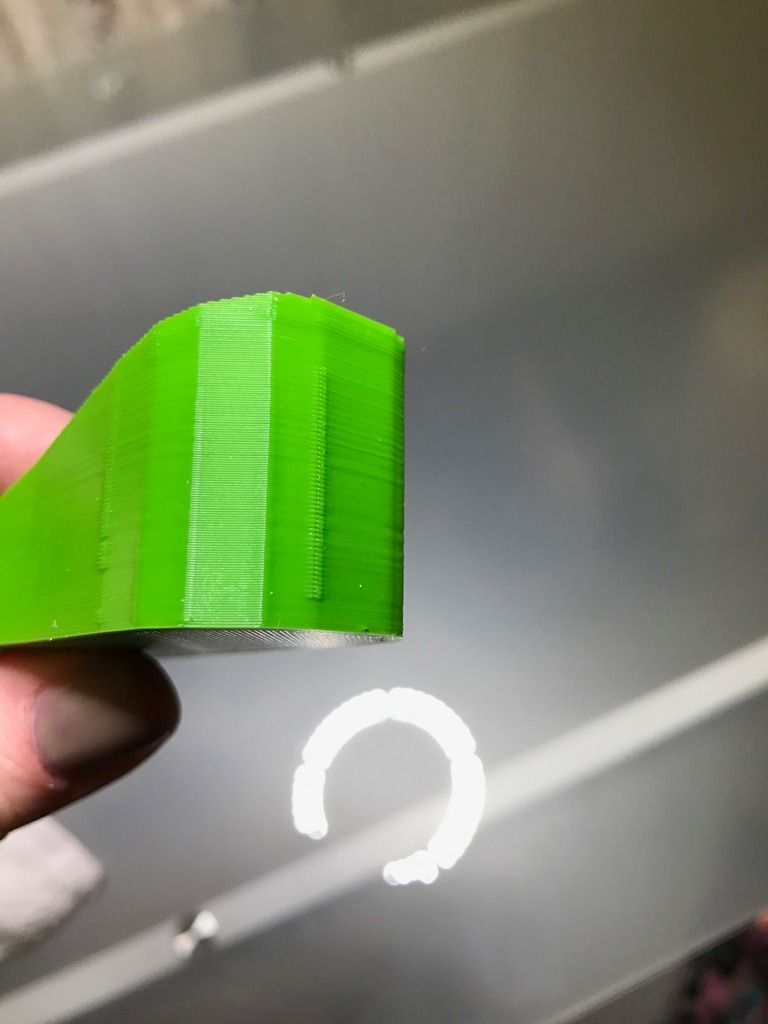
I am confused why I am seeing these vertical lines show up on every print I do. It looks even worse when I do a print that is circular. Is there any adjustments I can make? I am currently using Simplify 3D, using Verbatim PLA, 205c 60c on bed. It appears to be an over extrusion, but it’s very uniform. I know that is where the extruder is starting and stopping but I don’t know how to adjust so the line of “bump” goes down. I used to have a Zortrax and never had a problem like this. Any ideas?
That looks like where the print starts or stops on each layer. There are a few things to try.
Under the extruder tab, you want to mess with Extra Restart Distance and Coasting distance.
If you look under the Layer tab, check in the window labeled “Start points”. My guess is you have Optimize start points for fastest printing speed. Try changing it to random start points to see if that gets rid of the line. It doesn’t fix the initial issue, but you’ll know it’s start point related. Once you see that your line is not as noticeable, turn back on optimize for fastest print and then go into:
Extra restart distance and try putting in a small negative number like -.03. Did the defect get better or worse? If it got better, make the negative number more negative until it goes away. If it doesn’t seem to have an effect, reset the extra reset distance to 0 and check the box that enables Coasting distance. Start making the coasting distance bigger and run test prints. Is the defect getting better or worse.
The problem you’re seeing here is the beginning and end of print layers. Unfortunately you can’t tell by looking at a print whether the extruder is pushing out too much plastic at the beginning of the layer, at the end of they layer, or both. You’ll need to print some test cubes and dial it in.
Putting in a negative number for extra restart distance pushes a little less plastic into the nozzle at the beginning of a layer. Similarly if you noticed you had gaps at the start of layers, you could put in a positive number here to prime the nozzle a bit more at the start of a print layer. Since you have plastic flashing out of the print, it says to me you have too much plastic.
Putting a positive number for coasting distance tells the extruder to stop pushing plastic X mm’s before the end of the layer. This allows pressure to be removed off the nozzle so when the head stops at the end of a layer extra plastic isn’t squeezed out.
I hope this helps! If you have any other questions let me know!
Thanks
Jim
Drove myself insane, print after print with changing settings. So I just tried the same file using Cura instead of S3D, and no over extrusion on the sides. I don’t get it.
Look at your layer preview in that area. It should show that area is the beginning or the end of the line. If you want, move the slicer down to those areas where you’re seeing the line and post a screen shot.
In S3D, check the “Start Point” setting in the Layer tab. Choose Random to see if it helps. Or if the object has a corner, try hiding the seam using the coordinates… a back or front corner is probably the easiest if possible.
If the visualizer shows that lline as the layer transitions, try setting a .2mm “Coast at End”. This will stop the extruder .2mm before the layer change allowing a more gradual layer change (extrusion will continue due to existing pressure in the heater block chamber).
Hope that helps.
