Or issue the M92 EXXX followed by a M500 to save. M501 to validate the new value was stored in firmware. See Step 7 of the the following guide: > https://ohai.lulzbot.com/project/extrud > … libration/
Yeah, see, there’s where I run into the frustrations I was talking about. I can’t do step 7, because I can’t get past step 1.
1 Getting Started
Items Needed
Ruler (included with the TAZ 3D Printer toolkit)
Digital calipers if you prefer
Marker
Calculator
USB Cable (included with the TAZ)
Pronterface
Computer with drivers installed (Windows)
Ruler: check. Calipers: check. Marker, calculator, USB Cable: check. Pronterface…wait, what? Okay, there’s a download link. Nothing anywhere that says “Pronterface” anywhere in the entire downloads section that’s linked to. Full stop.
See my problem? I have no Pronterface. Or maybe I do, but I can’t find it. I have no idea what it is. Its name turns up randomly in sets of instructions, sometimes halfway through with no previous warning that it was going to be there. It haunts me. It seems like everyone knows what it is but me; it’s some secret code word only the popular kids know the meaning of, and I can never be part of their clique until I’m able to work out what it stands for.
Pronterface is just a software to control your printer. It sounds like you’re using Cura, click the “Extrude 10mm” ten times. That will advance the filament 100mm…
But it sounds like you already figured out your esteps to be 811, and flashed it through firmware. If you haven’t, then follow step 7 of the extruder calibration page.
Pronterface is just a software to control your printer.
That much I’ve figured out. And it seems like for a lot of things, like bed-leveling, it would be really nice to have. But I can’t find it. It’s not in the downloads, even though it’s mentioned all over the whole Lulzbot site, throughout the manual, and everywhere else I look trying to find out how to do what I want to do.
Where can I get Pronterface? I want to be one of the cool kids!
Haha… Pronterface is part of the Printrun package. Go to http://www.pronterface.com/, click on Download (or scroll down on the page). Download whichever file is suitable for your OS. Extract the ZIP to a known destination on the computer connected to the printer. Run pronterface.exe (if on Windows).
Haha… Pronterface is part of the Printrun package.
Well, sheesh. Printrun is right there in the Lulzbot downloads. (And I could swear I Googled it and never found pronterface.com…good grief!) See how it is? This code-talk stuff keeps the newbies in the dark. Call it Pronterface in all the instructions and help files, but list it as Printrun on the downloads page, so none of us can figure out what the heck we’re doing…
@Geek2Nurse while you now have two people asking you to chang things and test it will make it confusing for you and frustrating for those helping. For example, you didn’t need to download Pronterface. As an example, since you have and use Cura, if you want to do the estep calibration (which I think may be premature because we don’t really know what we’re working with yet from the default standpoint) then all you need to do is:
load a model into Cura (the 20x20x20 cube is fine)
Open the control window as if you were going to begin printing it
Heat the nozzle to 230 for Hatchbox ABS
Once it reaches temp, see the small text box along the bottom right of the control window, below the larger text box where you see feedback from your printer? That is where you can enter commands to your printer. Instead of hitting the extrude 10mm button 10 times you would type:
G1 E100 F50
Then press enter. F50 is the speed at which it will extrude the 100mm of filament and is what I’ve found to be the generally recommended speed because it is roughly the speed many models are printed at. The guide you’re referring to runs the test at a speed of 100 and I see many comments about inaccurate results. You need to issue an “M92 E0” command before you can run it again (if you’re averaging).
I would like you to set you steps back to the factory setting on the tool head.
Not really necessary, just use what you have already and adjust from there. The guides were written back when they still used Printrun and slicer. They have since went with Cura for control and slicing, but have not yet gotten new guides made.
The extruder calibration is a good place to start if you are getting bad looking prints. The feed setting affects many of the height and rates you use to print with, so is always best to check as a starting point in looking at improvements. They have grown a lot in the last year or so, and have many new people that sometimes may make an error that can involve the calibration settings.
I’m not denying that, but, I’m also not going to assume it is off and/or in need of calibration as you automatically have. In other words, I like to taste my food before I salt it. So to your “The extruder calibration is a good place to start” point, we needed to see where the factory setting has it and adjust from there. Part of the reason the OP created this post is because of everyone assuming and saying everything needs changing/adjusting without actually going through the steps of how to verify, etc. Look at the difference just the filament diameter setting made. And, if you read through this thread it could throw the current steps setting into question. So it only makes sense to go back to factory to find out if it was even off to begin with!
@Geek2Nurse, I’d still like to help you but there’s too much interference/noise now. We can either take this offline, or, I’ll leave you in their capable hands. Let me know what you want to do via PM. Sorry about all of this.
Once it reaches temp, see the small text box along the bottom right of the control window, below the larger text box where you see feedback from your printer? That is where you can enter commands to your printer.
Hmmm. It sounds like you can also use Cura directly linked via USB, is that what you’re talking about? Until recently I only had my one laptop, which I take to work with me, so I couldn’t leave it tethered to the printer for long print jobs. So I’ve always printed from the SD card. One of the reasons I thought I needed the mysteriously elusive Pronterface was that it’s the one that was always referenced for sending manual Gcode commands to the printer.
Let me know what you want to do
I definitely want to go through this with you, step by step. I know there are lots of people out there with great advice, and I am VERy grateful for anyone who takes the time to contribute. I will be listening and learning from what everyone has to say, but I also know everyone has their own approach. So far I’ve been trying to do this piecemeal, using advice from all different sources I’ve found online, and all it’s done is confuse me and make things worse. What I’m hoping to learn here is a methodical step by step approach to fixing my issues, with the logic behind each step, which requires sticking with you as my primary guide for the time being.
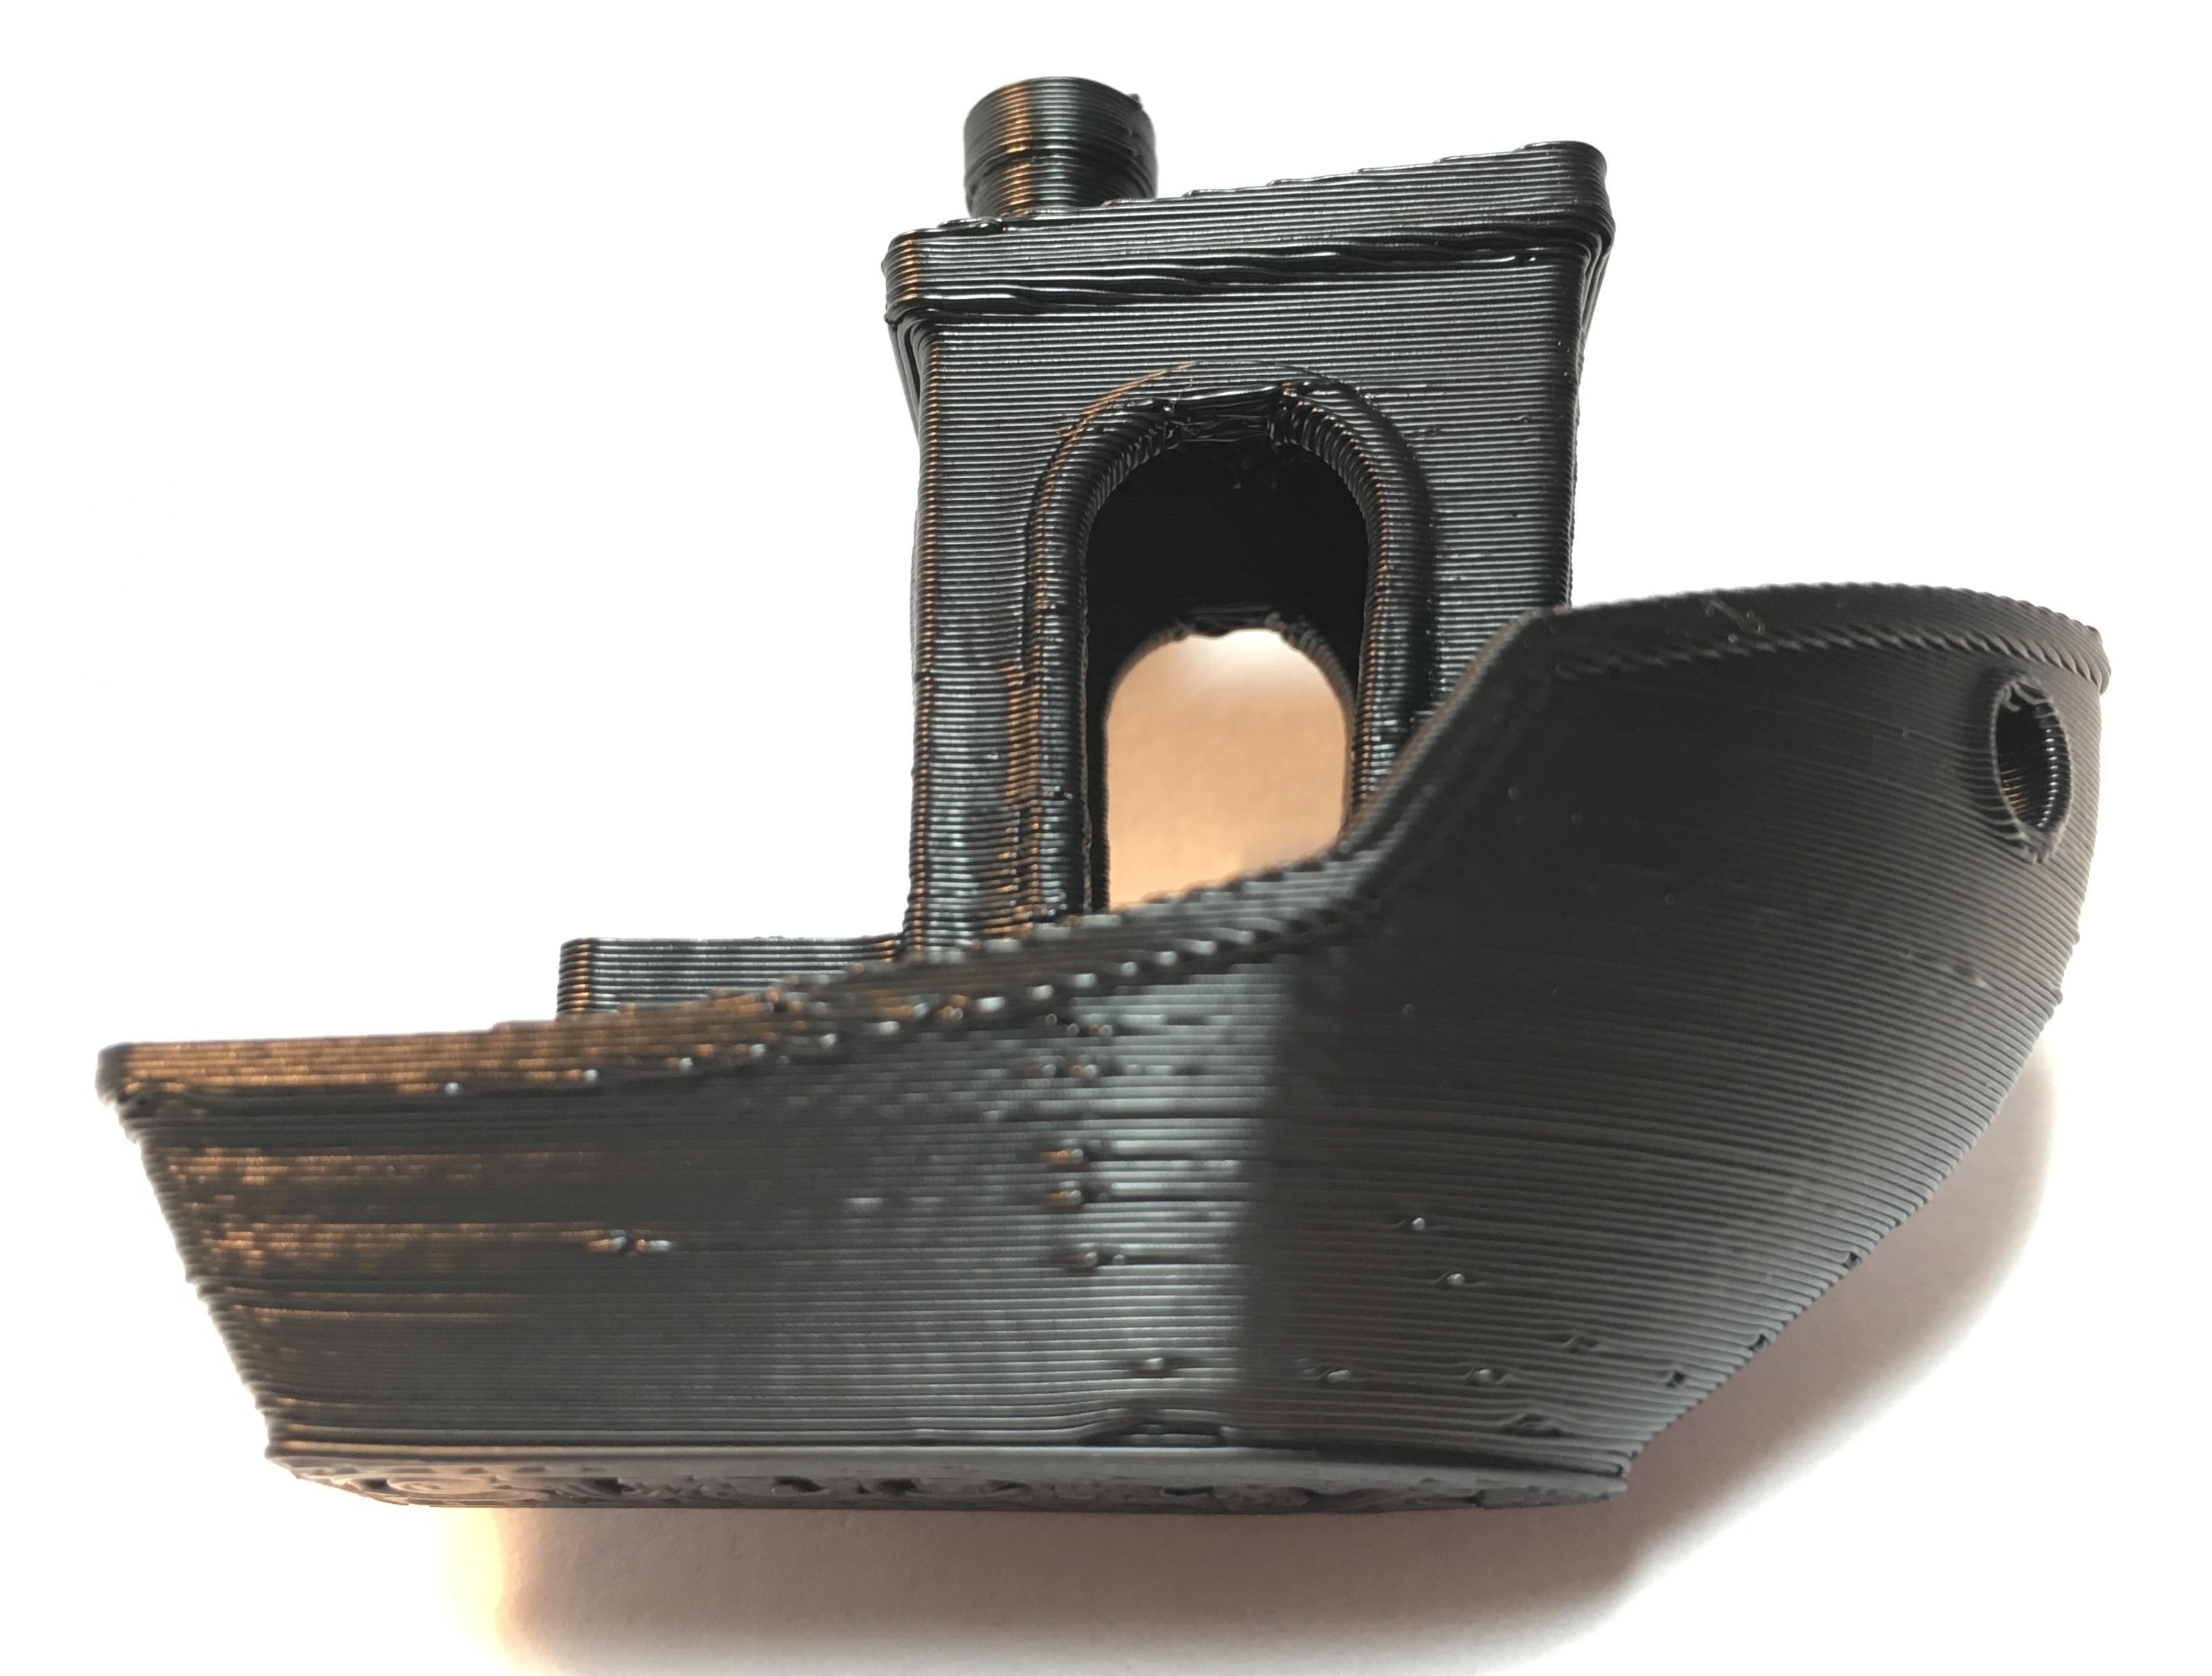
That said, I DID let myself tweak the Z knob just a tiny bit last night, and I printed a Benchy, so in my next post I’ll bombard you with photos of it. Then I’ll go reset my Esteps to factory settings and print another one – unless you prefer I stick with the cube?
[quote=“Geek2Nurse”]Hmmm. It sounds like you can also use Cura directly linked via USB, is that what you’re talking about? Until recently I only had my one laptop, which I take to work with me, so I couldn’t leave it tethered to the printer for long print jobs. So I’ve always printed from the SD card. One of the reasons I thought I needed the mysteriously elusive Pronterface was that it’s the one that was always referenced for sending manual Gcode commands to the printer.[quote]
Yep! When connected via USB you should be able to click the control button and connect to the printer (if it isn’t already) and control it from that dialog box. If it isn’t connected try clicking the Connect button. If it doesn’t connect you may need to change COM ports and try again. Using direct USB makes it very easy to change filament, use the jog controls to move the axes around, etc. And, for small / quick prints you can print directly from that control window as well by clicking print.
What you were needing printer face for you should be able to accomplish using the same control window, command box at the lower right to enter commands.
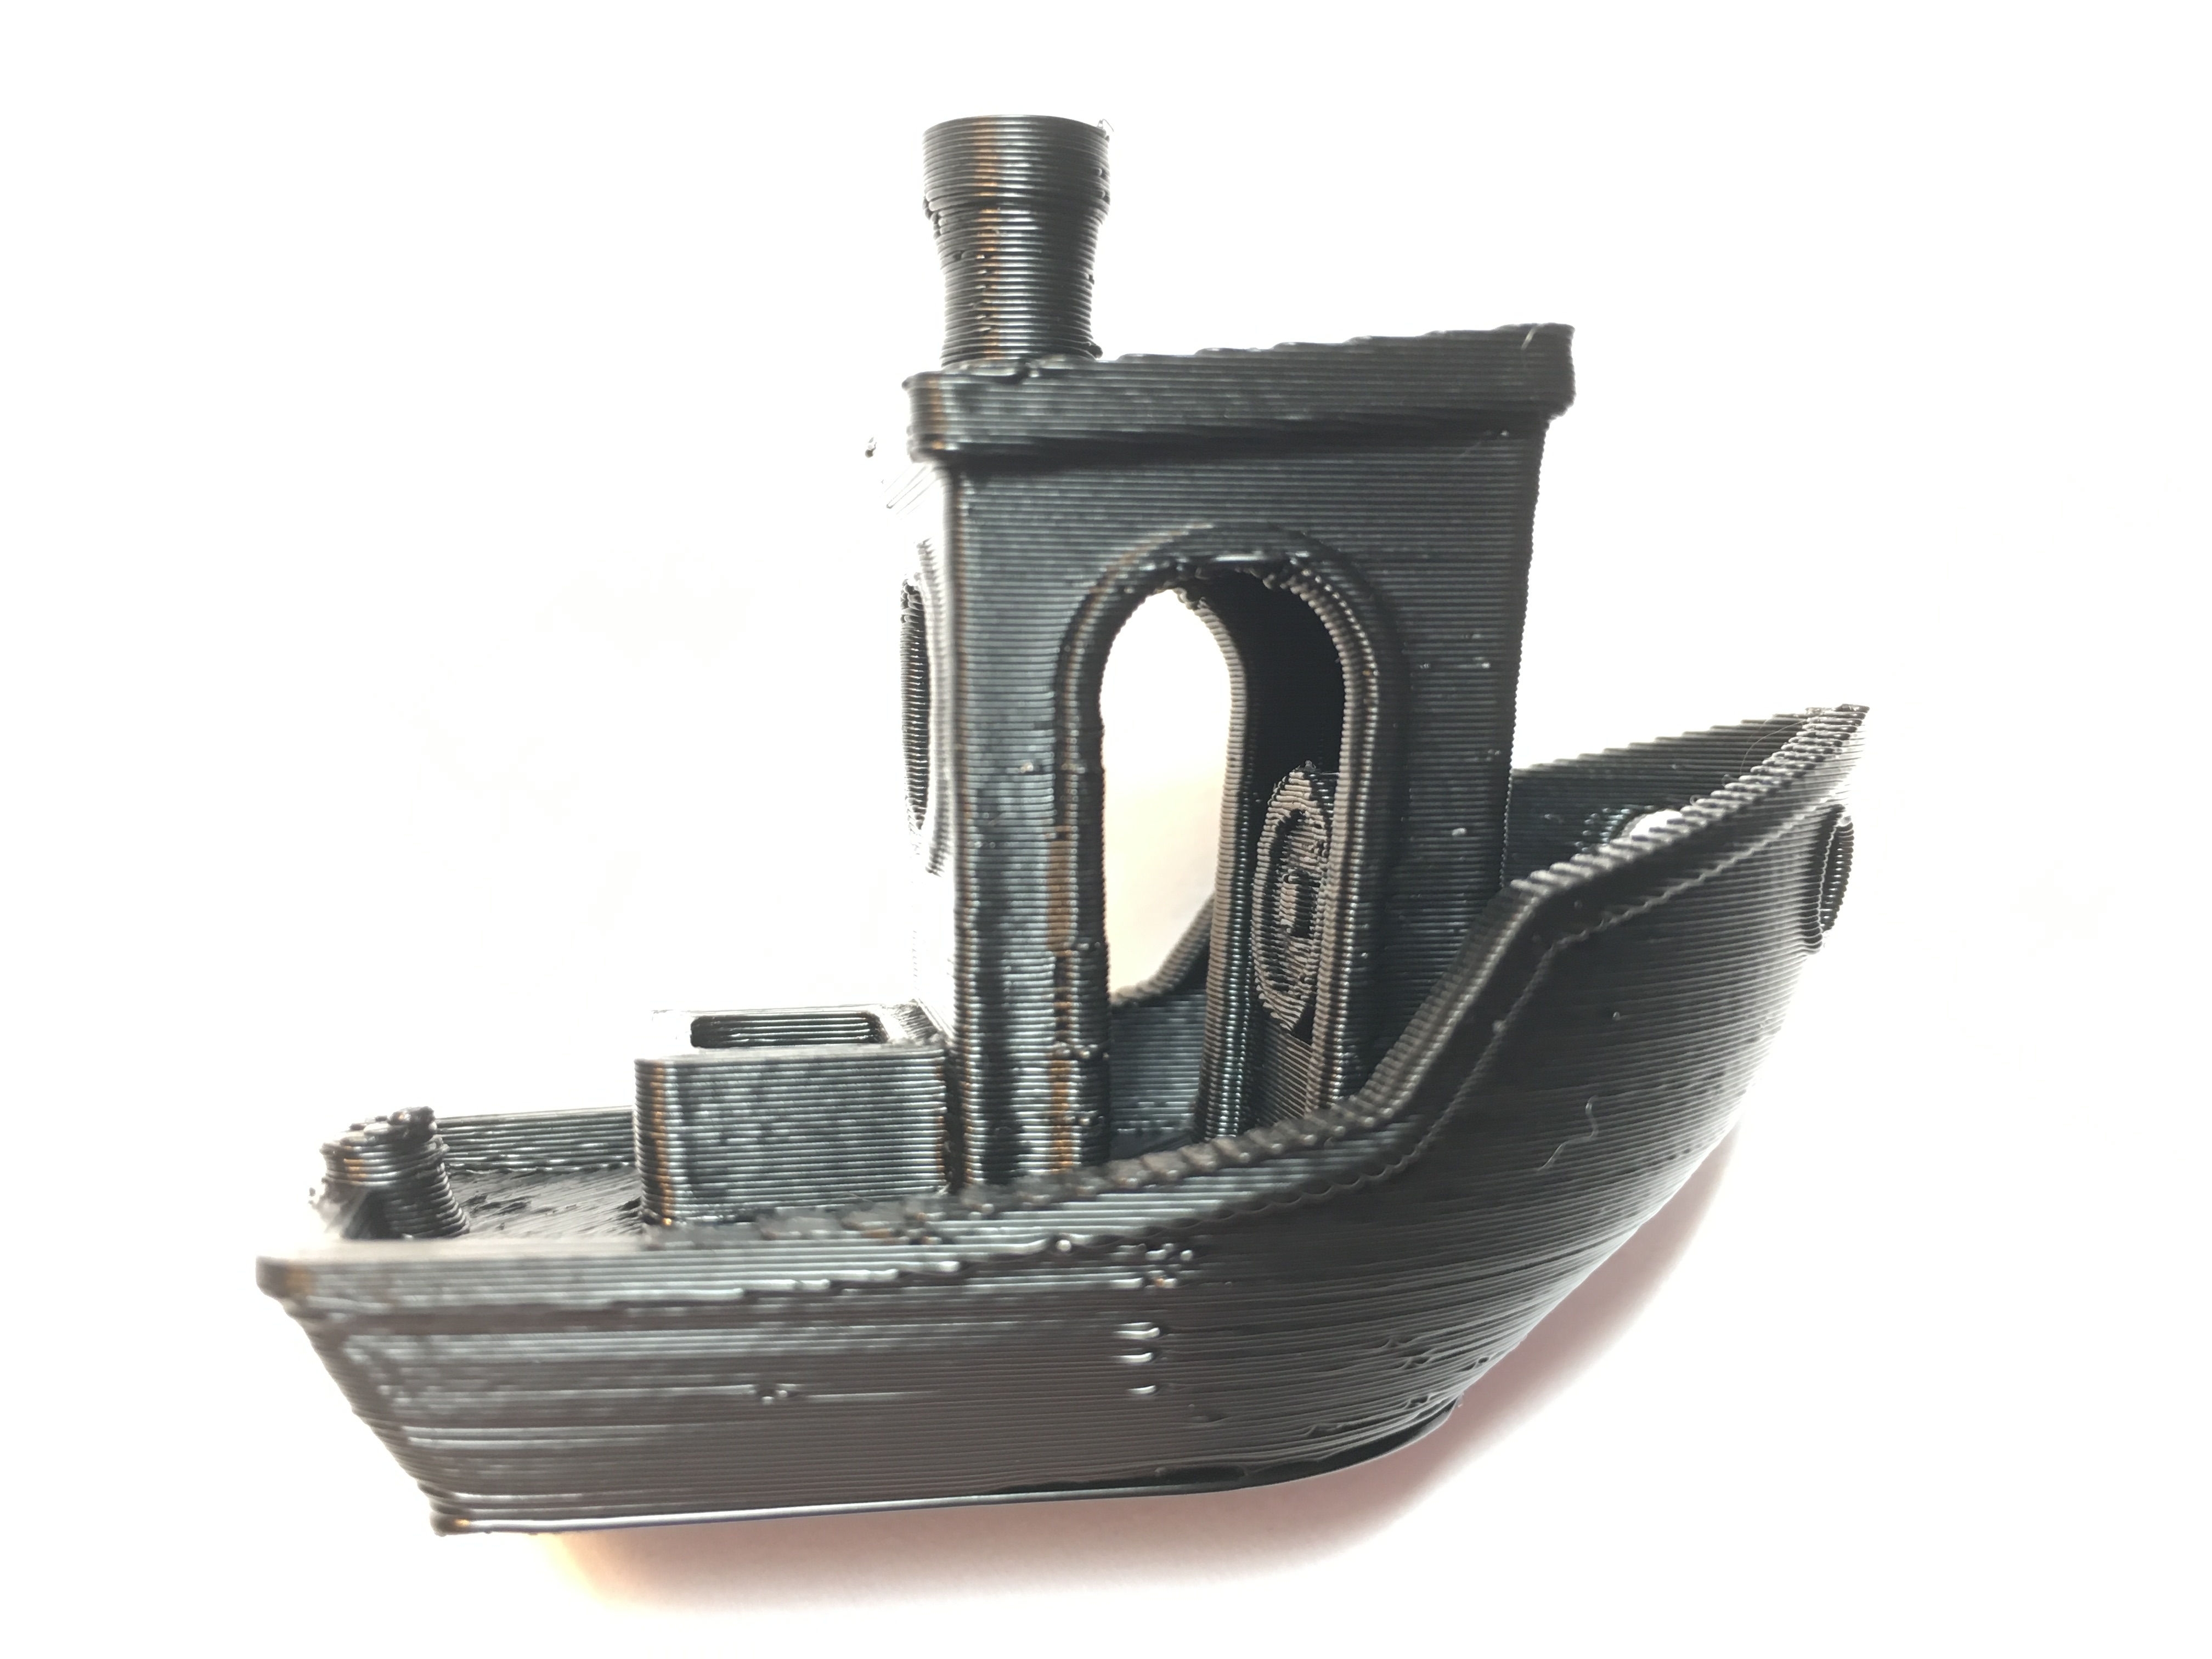
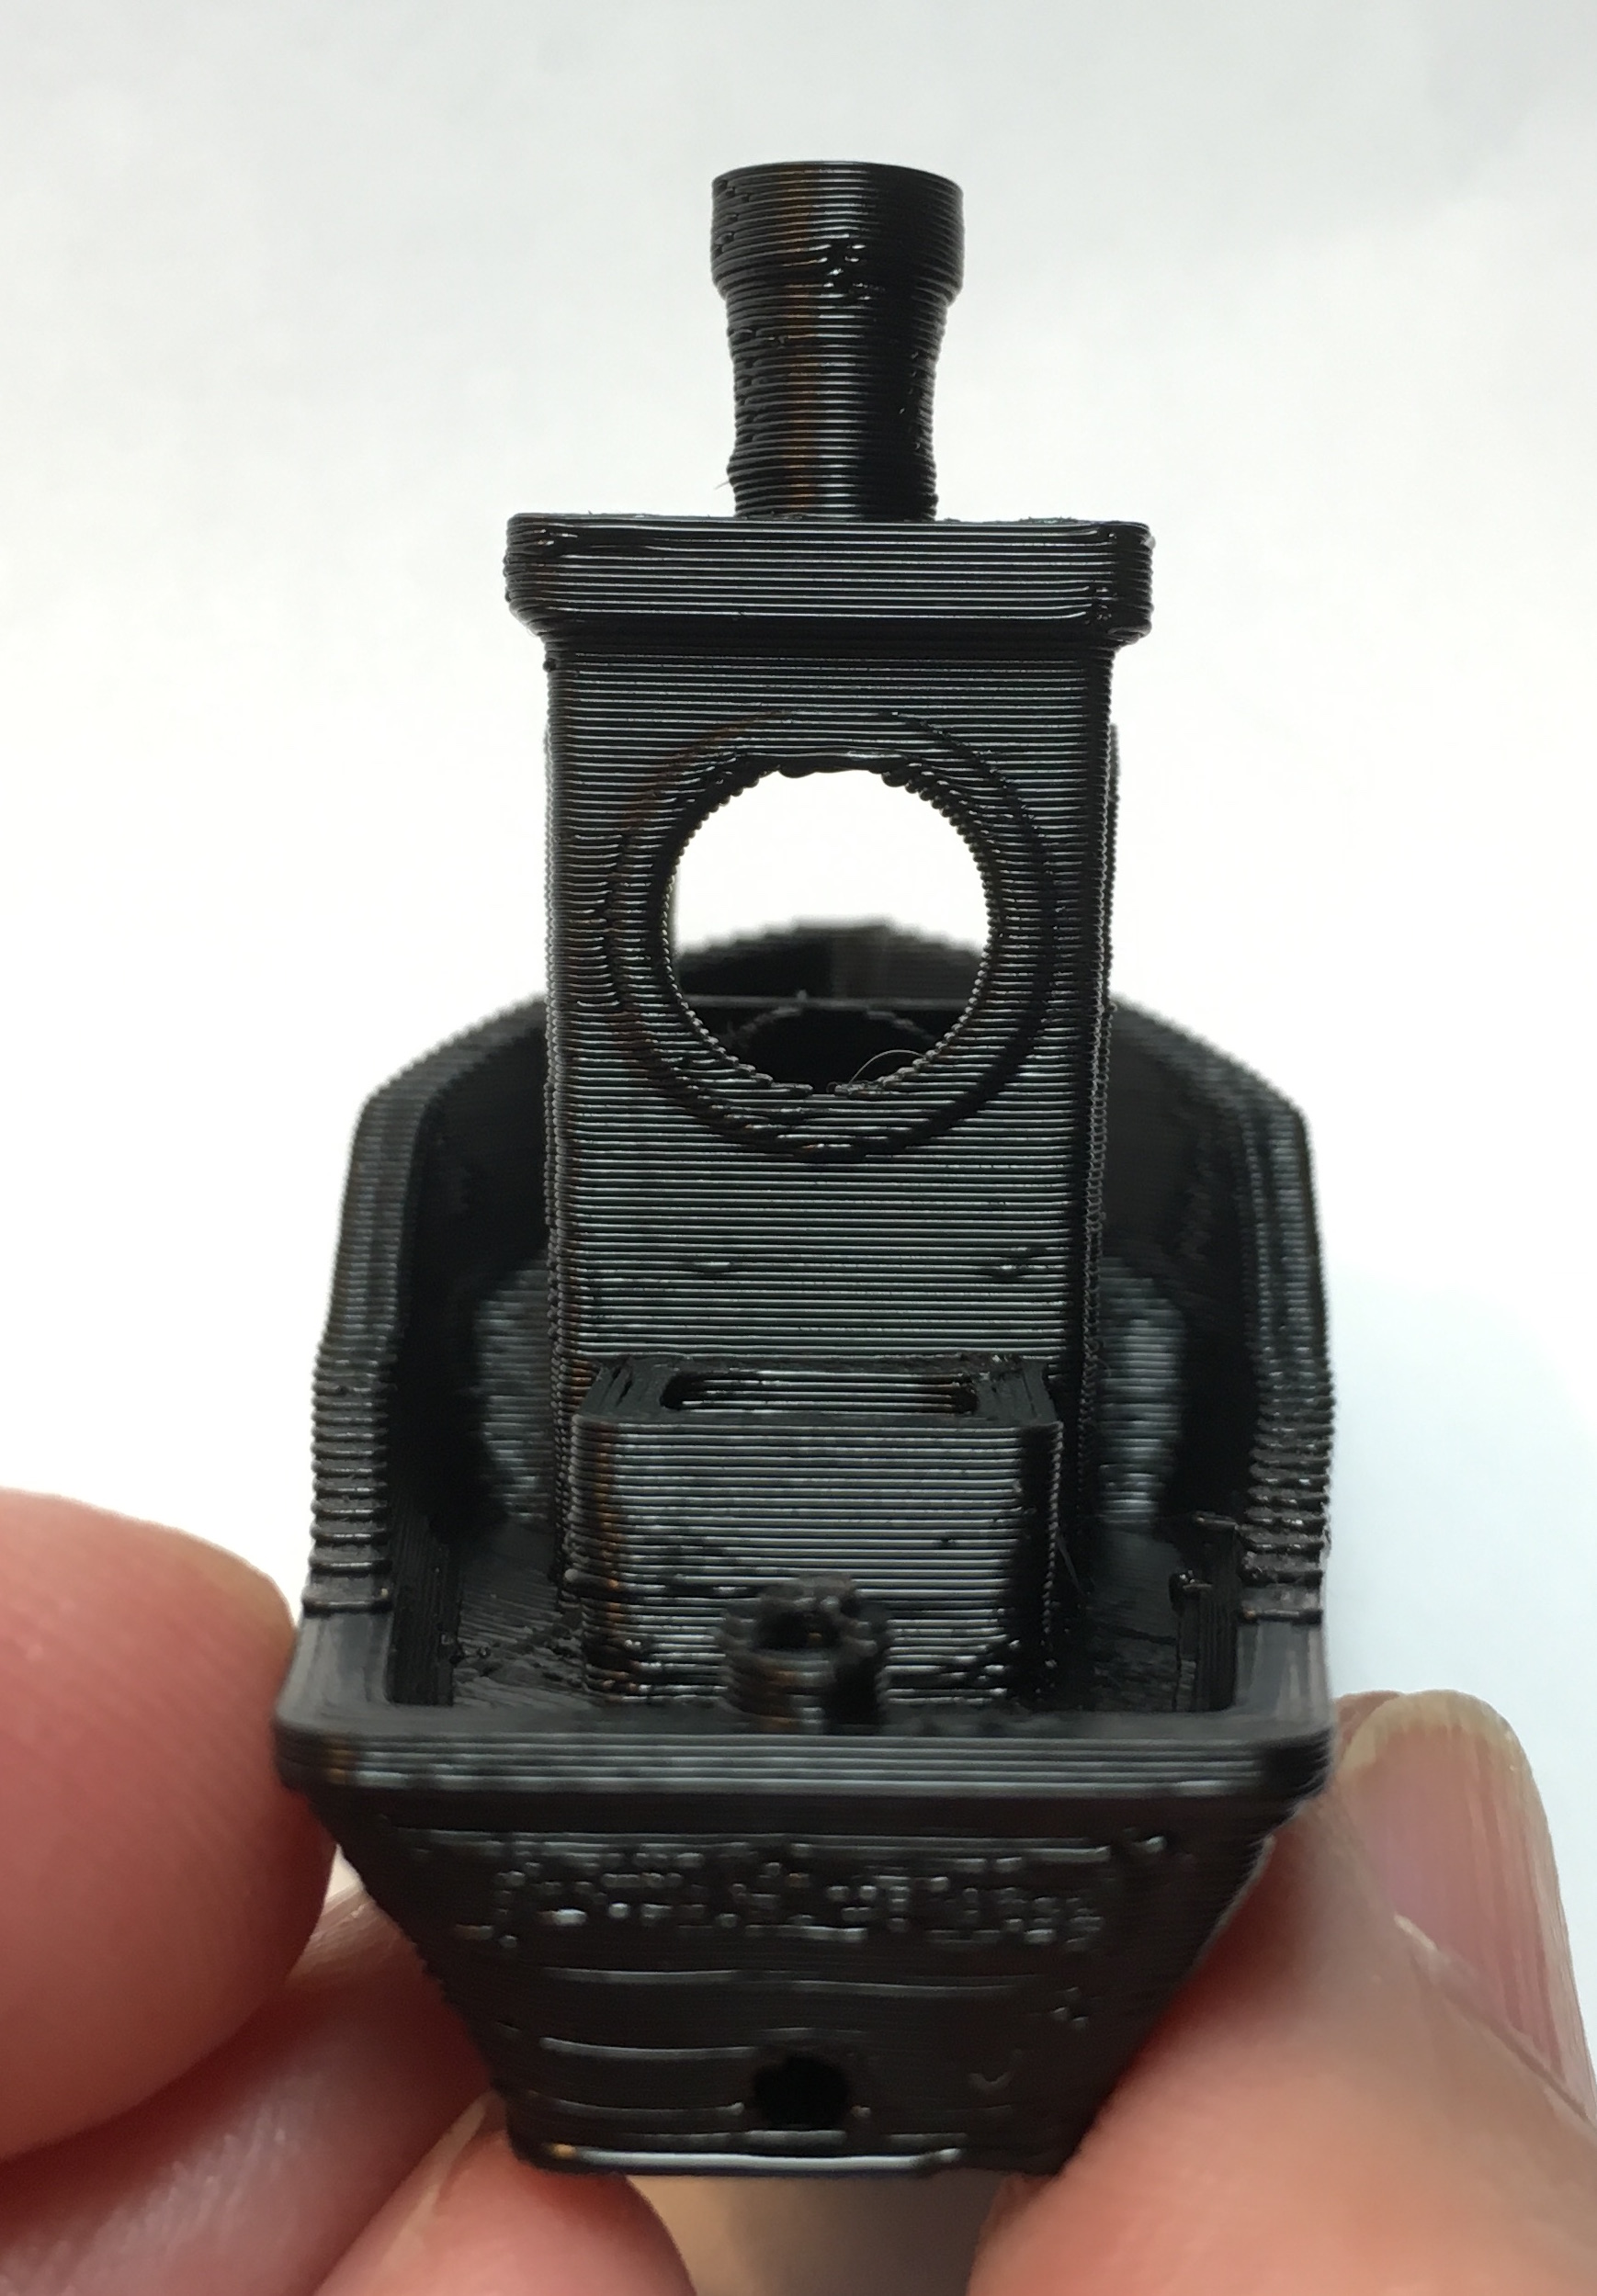
Those 3DBenchy’s are looking better than I was expecting. Was that printer before resetting the esteps? There are still some anomaly to clean up. Did you hear popping noises when it was printing?
What you were needing printer face for you should be able to accomplish using the same control window, command box at the lower right to enter commands.
I’m hoping it will make bed leveling easier than trying to do it using the graphical interface on the printer, next time I need to mess with that! Or maybe I can do that from Cura too, now that I know about its USB connection capabilities. (I will await your guidance on that front, though!)
Those 3DBenchy’s are looking better than I was expecting. Was that printer before resetting the esteps? There are still some anomaly to clean up. Did you hear popping noises when it was printing?
Yes, that was before resetting the esteps.
ABS stuff usually comes out at least halfway decent, which is why I switched back to it for figuring things out. (Except for my Hatchbox silver ABS, which is brittle and frustrating; I read about drying it in the oven but haven’t tried it yet.)
PLA is a little more frustrating, and the other day I was trying to use some bronze and copper PLA that have worked nicely for me before, and getting nothing but smooshed messes no matter what I did. I’ve also got some Ninjaflex I’d like to try, but I’m afraid to mess with it before getting my other frustrations sorted out, lest I short-circuit my brain.
I didn’t hear popping noises, but I started the print before going to bed, so I wasn’t really listening.
That’s a very nice looking benchy. Those small divot are either moisture popping, or possibly start points of peremiters are set to start with the outer perimeter first, not the inner. You also may be able to turn down the starting layer over extrusion for adhesion a bit to get a better start layer. It’s set to 120% to help new printer users get things to stick to the bed better, but it does cause “elephants foot” on parts for the first layer. It’s not needed if you are getting good part adhesion.
Good looking Benchy. The fact that you can read the bottom indicates that the initial nozzle height is good. Might be a little overextrusion… but should be fixed when you set your esteps or adjust the flow %.
It’s starting to feel like all the stuff I was trying to fix using things I was reading was just making everything worse…which is kind of discouraging… sigh But I’m okay with starting over and learning to do it right.
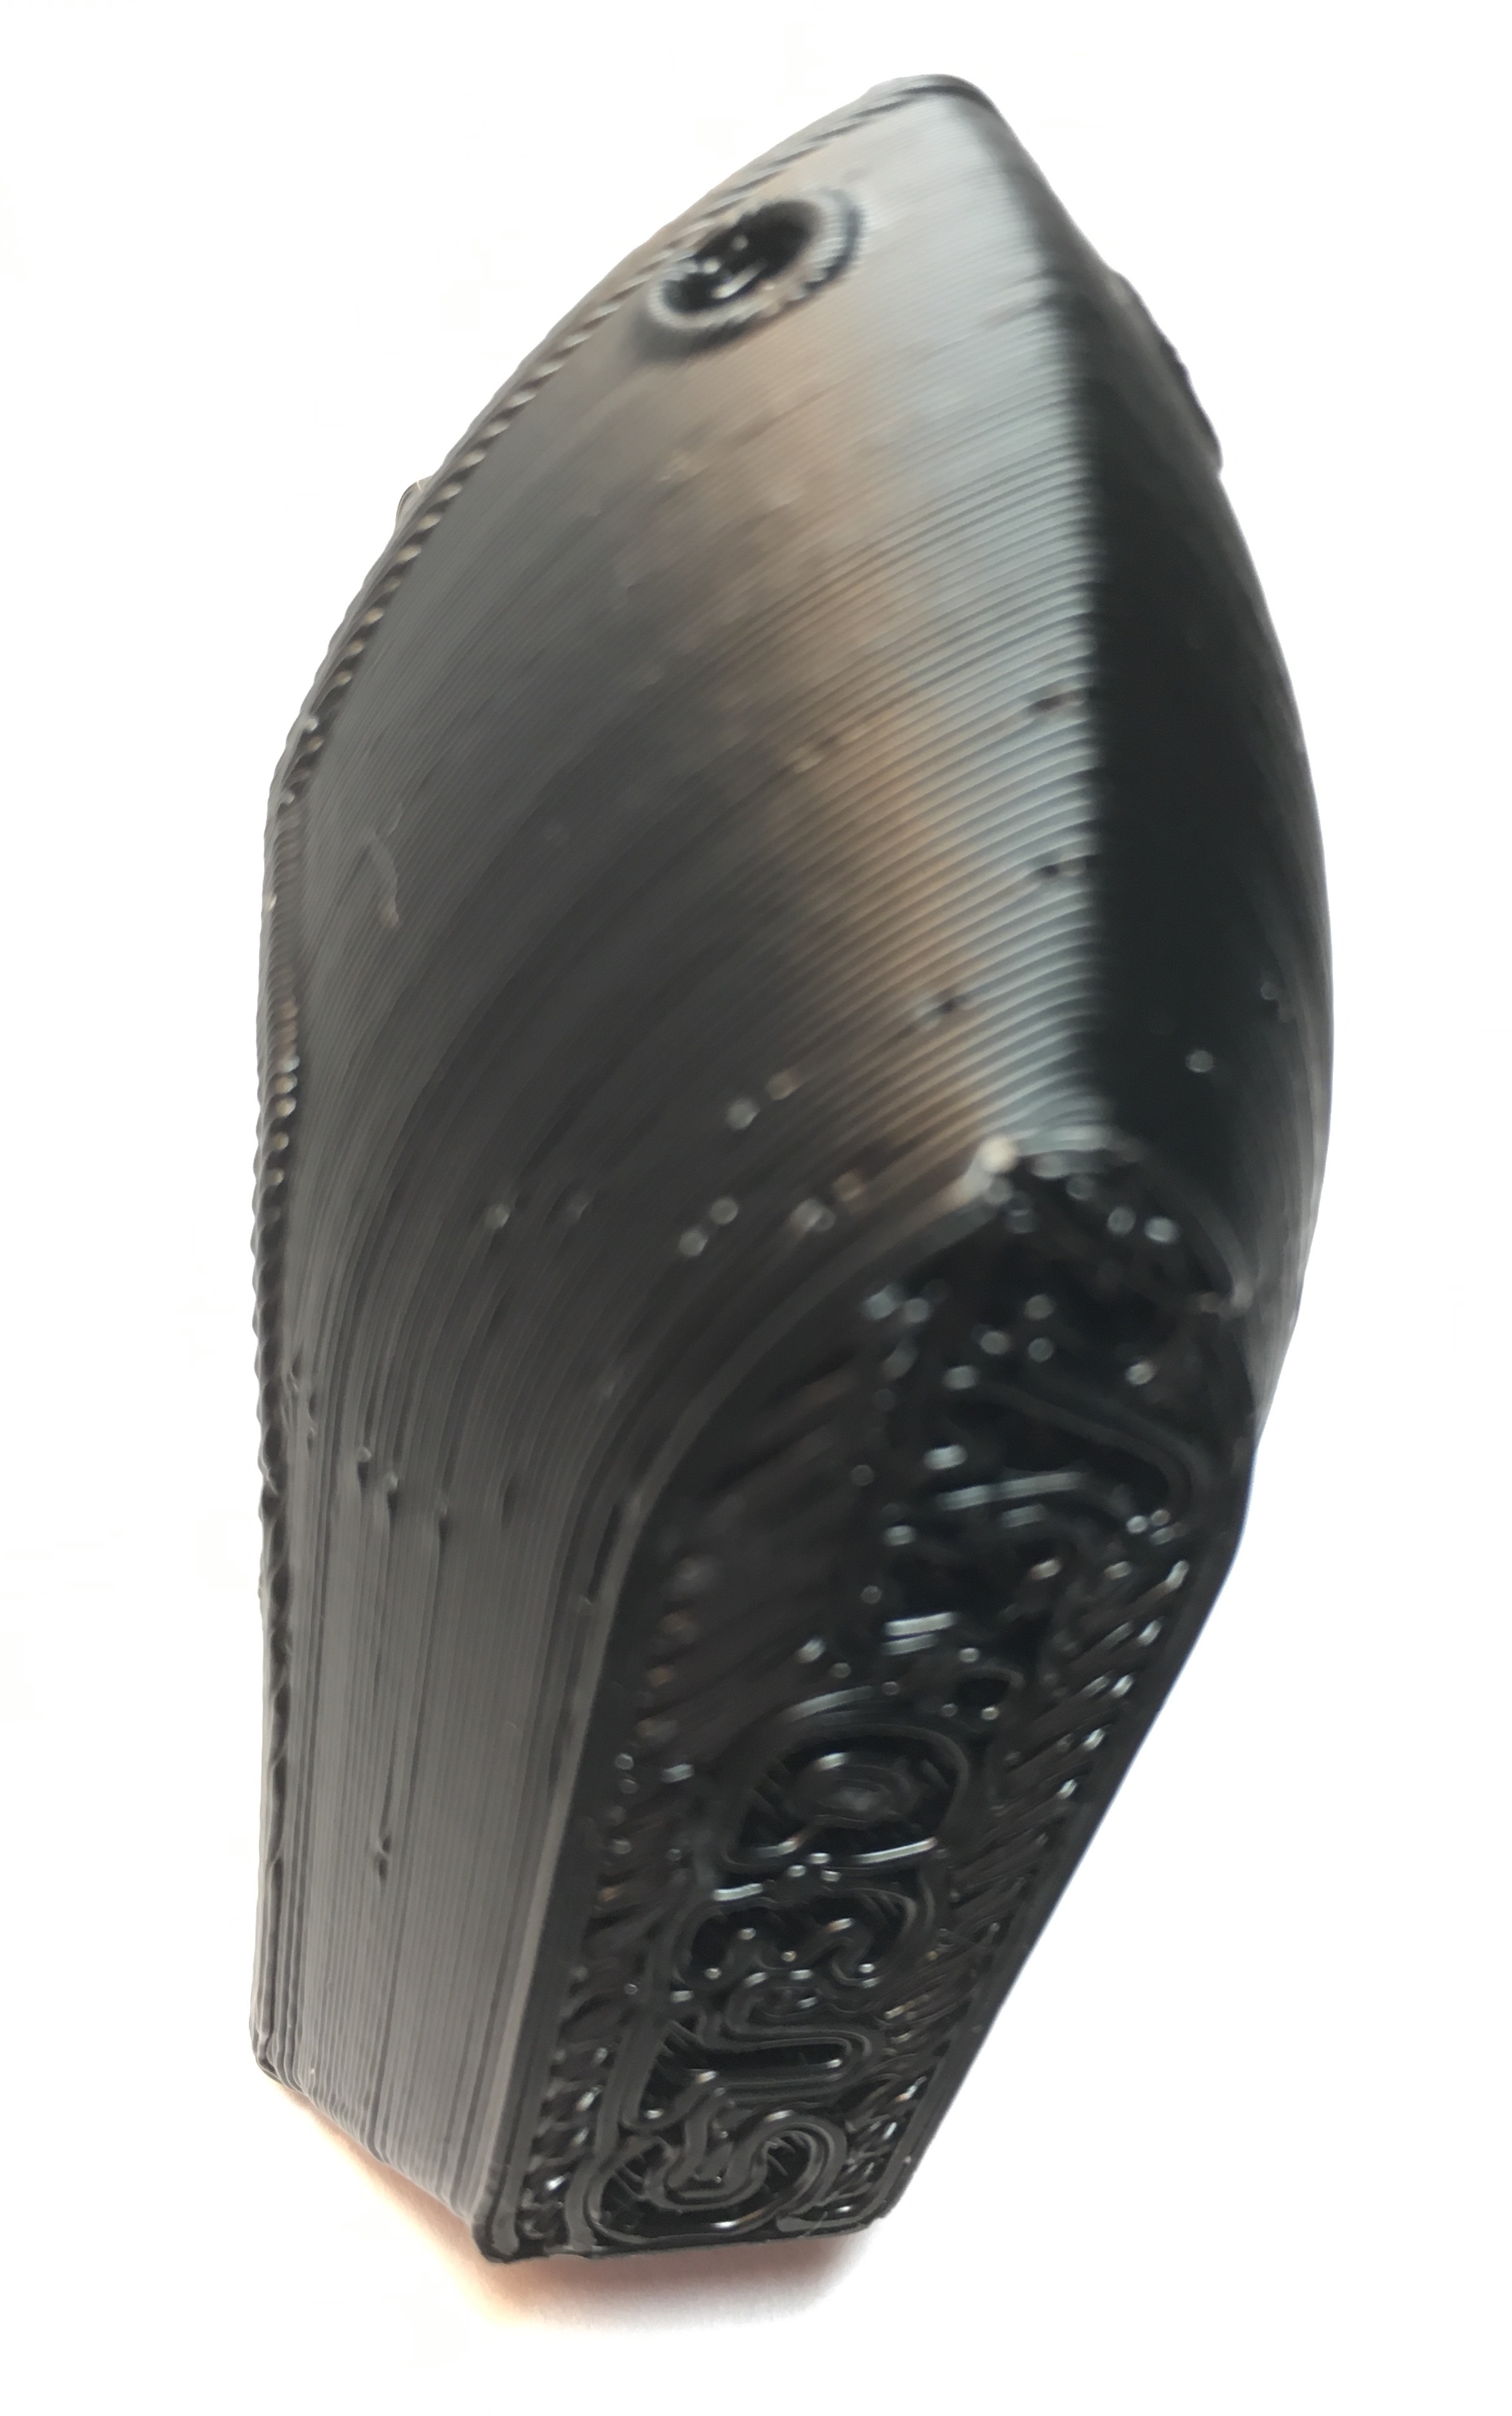
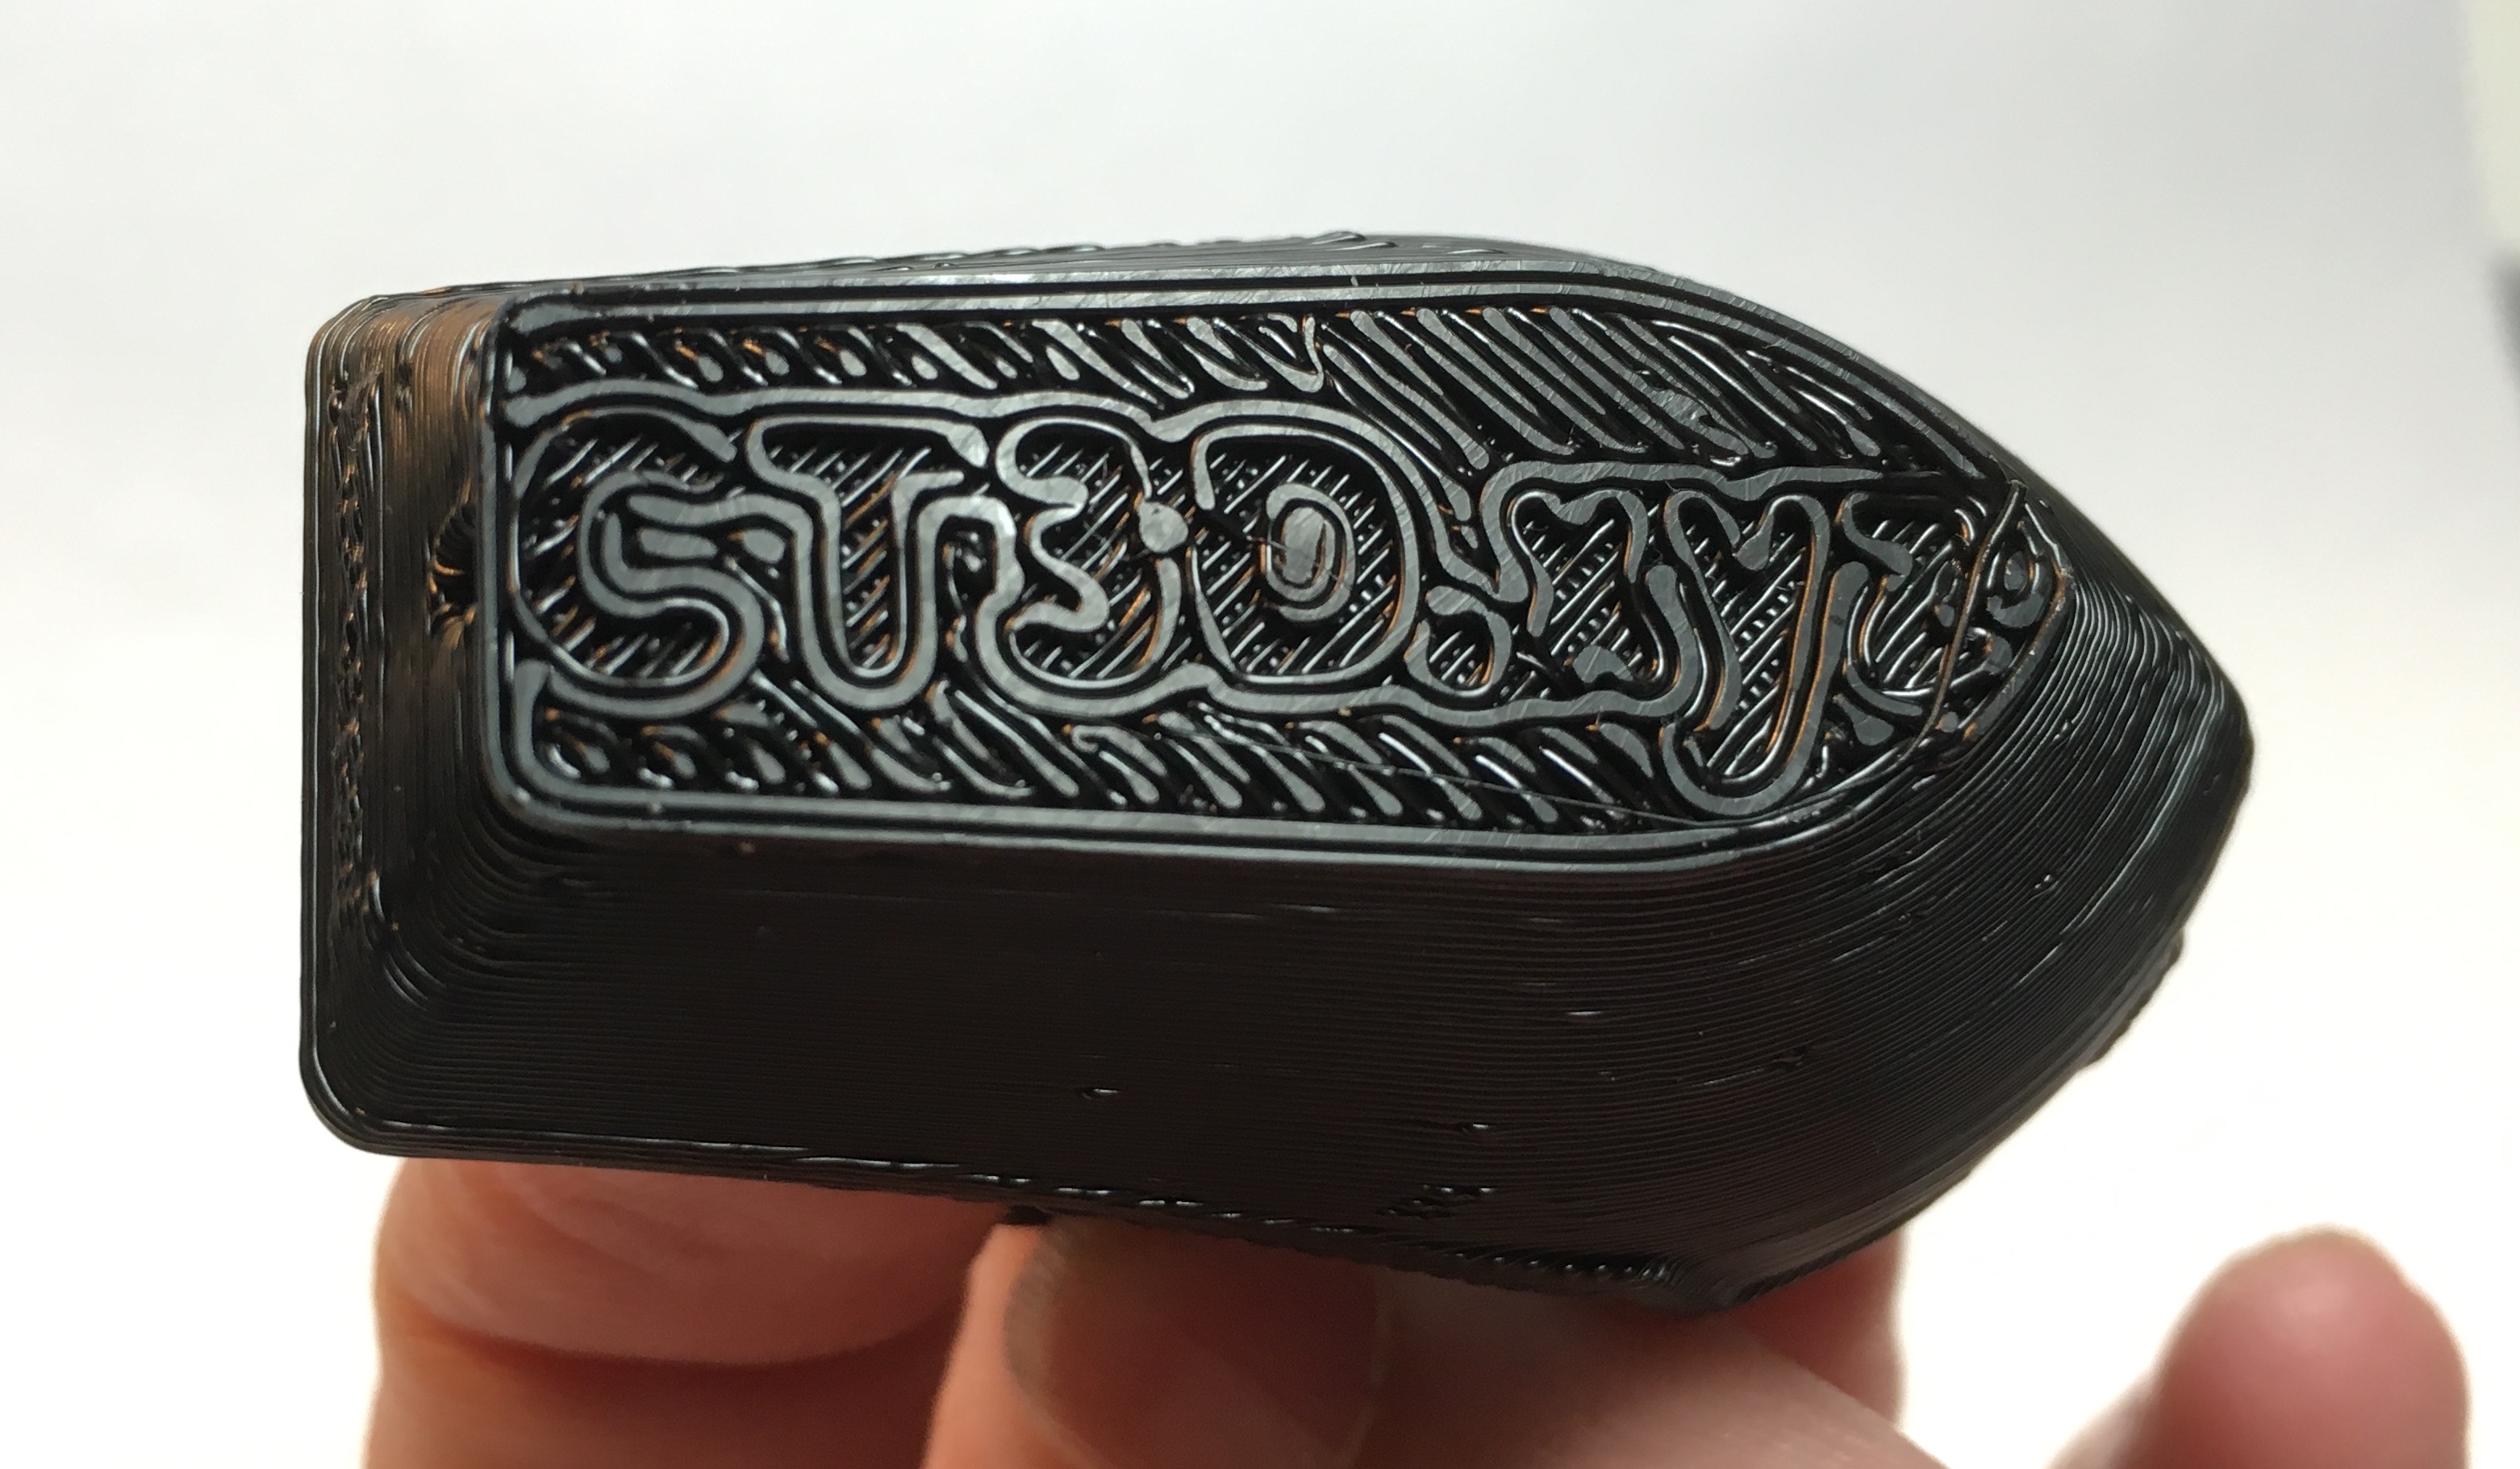
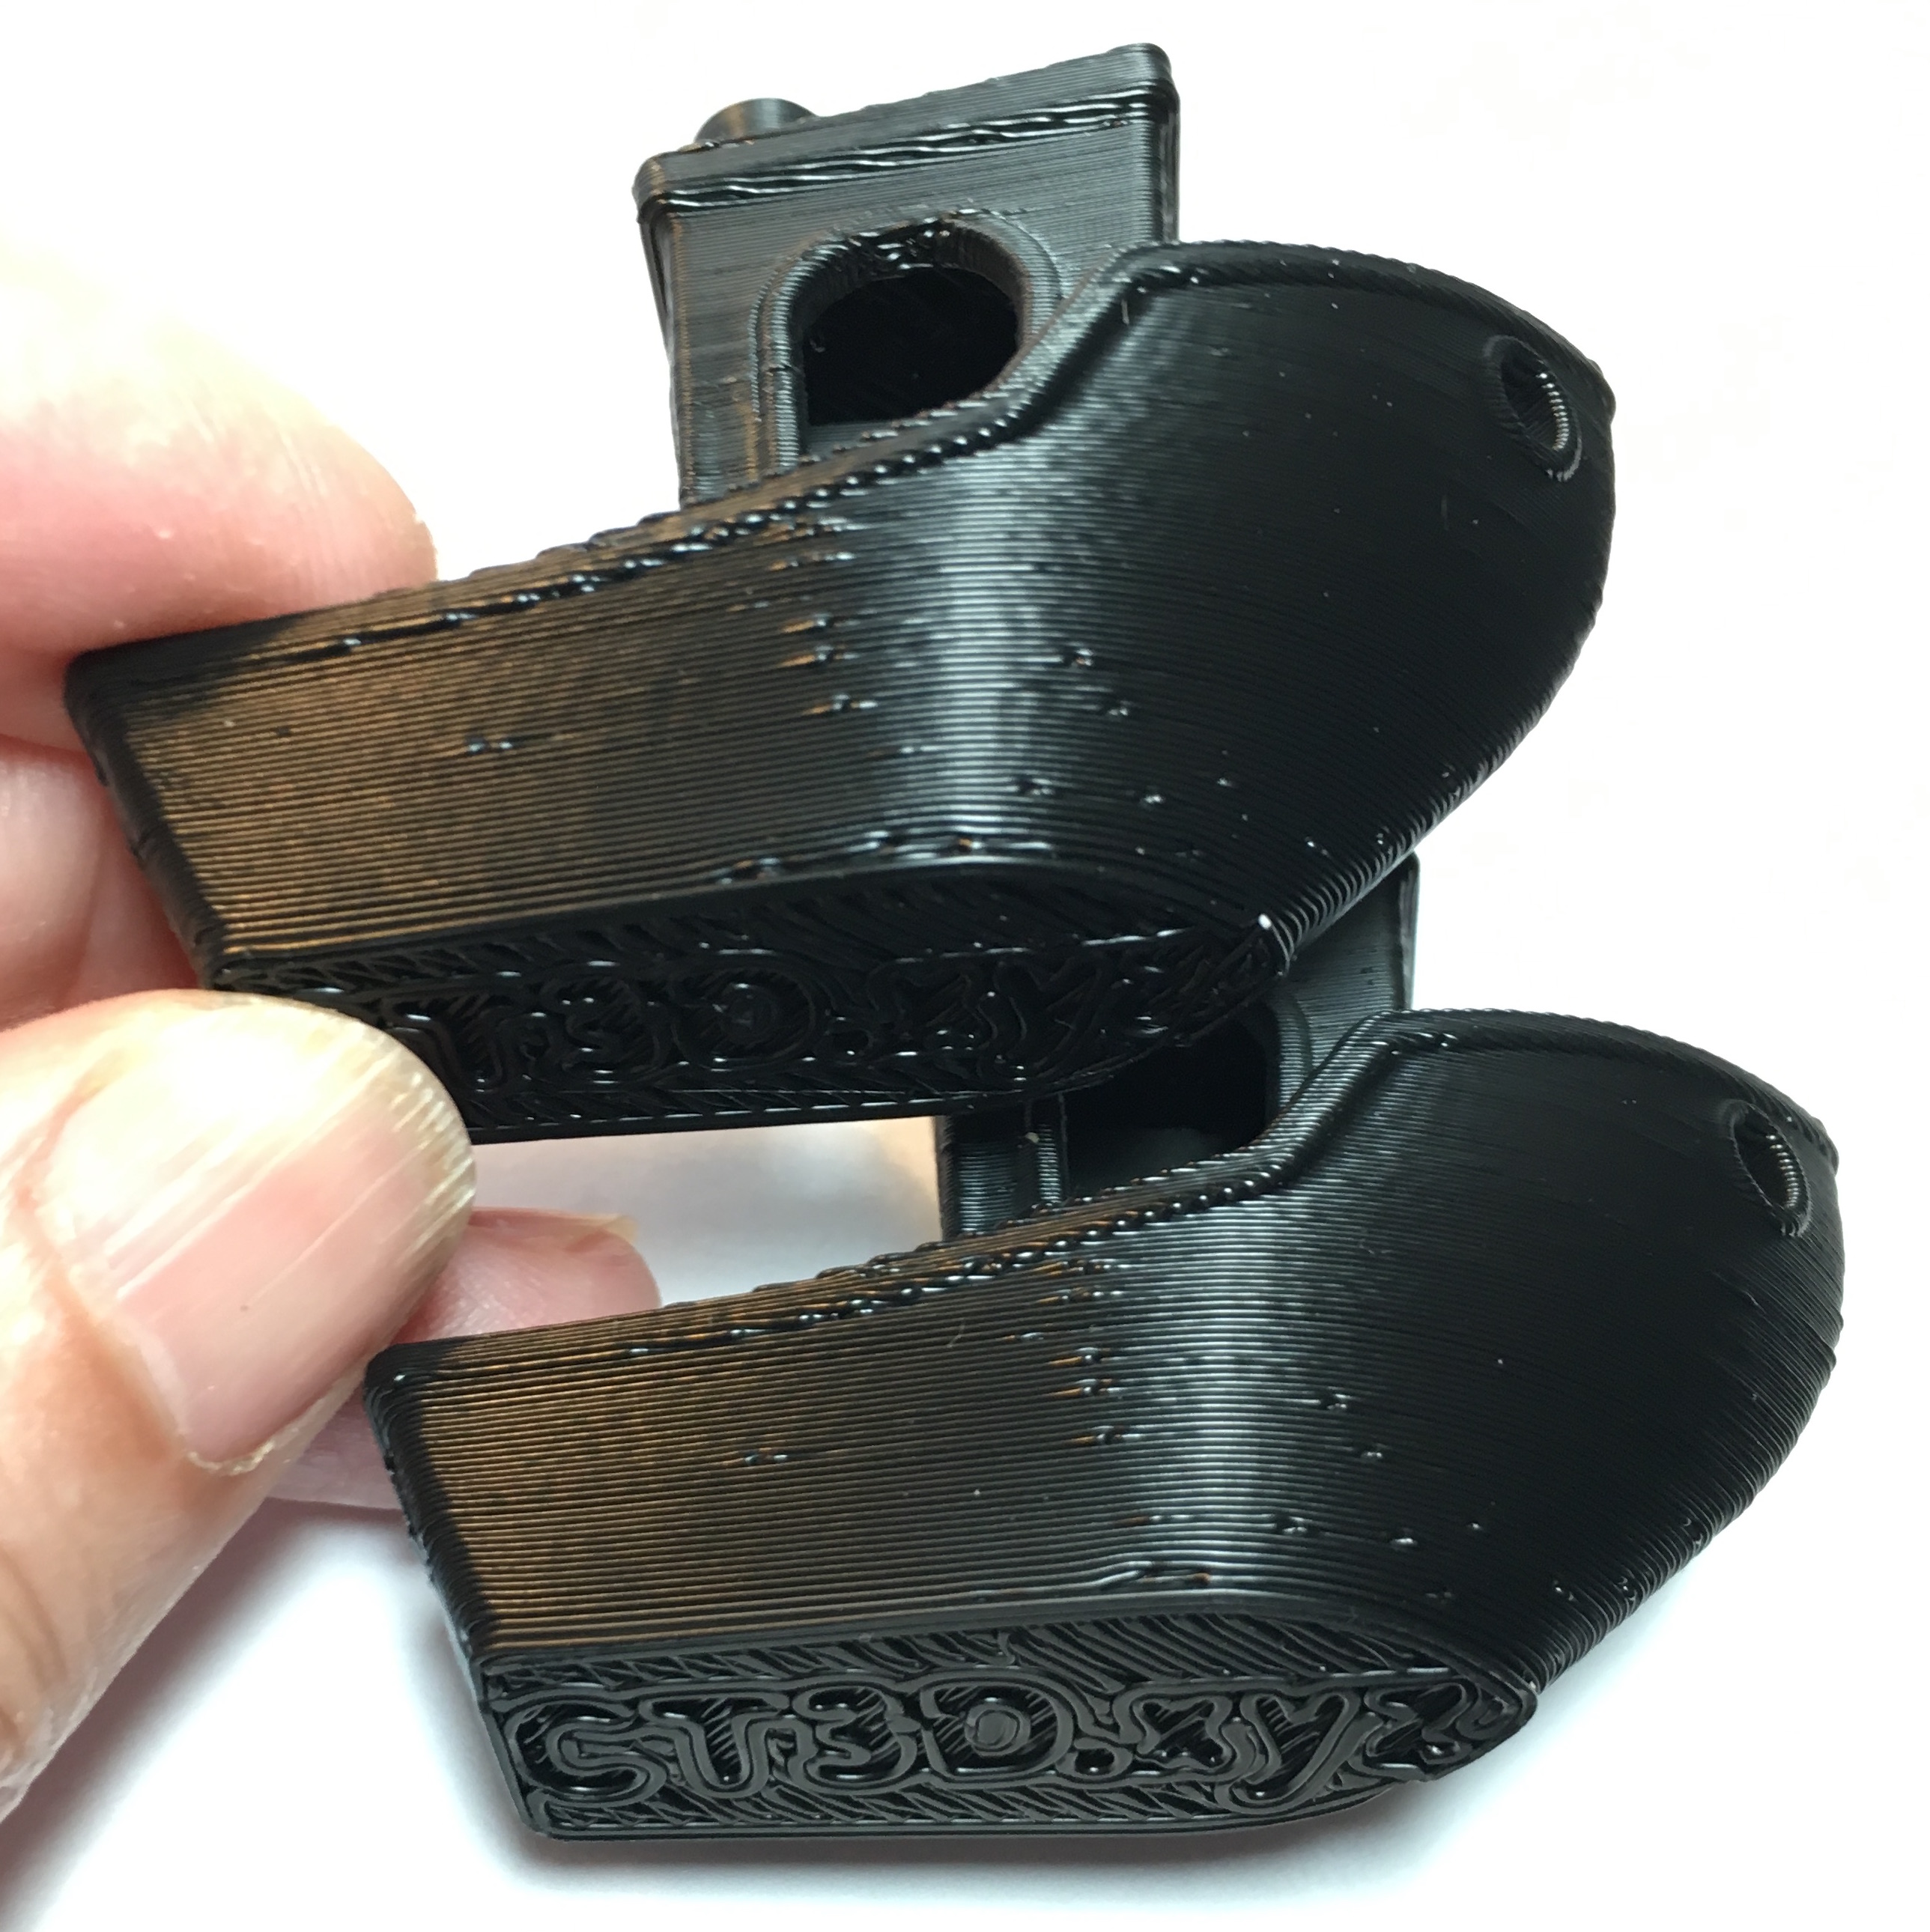
Top is before; bottom is after bed-leveling using a piece of paper to adjust the nozzle height; middle is after raising Z just a smidge higher, because the paper method left it too low.
As best I can determine using my husband’s non-metric analog calipers (because my digital metric ones died), the first layer thickness is pretty close to where it should be. It’s reading about in the middle between the marks for 0.01 and 0.02". 0.425 mm would be 0.017", so I’m calling it good, at least until I get some new calipers.
The bottom of the middle one looks good! Nice job with the leveling and z-offset adjustment. I honestly don’t think you’re giving yourself enough credit in all of this. Half of it is just recognizing what doesn’t look right, what typically causes it, and what to do about it. Sometimes the best way to learn that is trial and error.
That’s also why you see folks loyal to certain brands of filaments. Ones that print well and with dialed in settings you just load up a saved profile and spend more time printing rather than troubleshooting.
The bottom of the middle one looks good! Nice job with the leveling and z-offset adjustment. I honestly don’t think you’re giving yourself enough credit in all of this. Half of it is just recognizing what doesn’t look right, what typically causes it, and what to do about it. Sometimes the best way to learn that is trial and error.
Thanks. Part of my problem is the trials and errors are spaced so far apart right now – real life has been frustratingly busy and all-consuming the past few months (I’ve had my printer about 4 months), and I haven’t had the luxury of uninterrupted time to focus on it. And I don’t really know what looks right, and what doesn’t, or when it doesn’t, how it’s not right. The input on my photos here has helped quite a bit with that already.
The middle one looks pretty much the same as the first two Benchys from the side. I didn’t print the whole thing that time, since I was just looking at the Z-height, so it’s only like 1/4" tall.
I haven’t tried Piercet’s “elephant foot” suggestion yet; wanted to get my first layer looking better first.