Awesome to hear about the long ABS prints turning out ok. For PLA, mind you I done havn’t too much of it, I don’t heat the bed, or I start off at about 50 degree’s then turn it off, or…errr I can’t remember if I put down painters tape and glue though over the PEI…frick, it’s been so long since I’ve worked in PLA … But ya, you def don’t wan’t the box getting too hot with PLA, put the fans on to provide air flow, and keep it on the cooler side.
Yes, the box will contain the heat pretty well in a drafty or cold environment. I have mine in my basement workshop, it’s been getting pretty cold here at night, 14C, so I keep the windows open for ventilation, I notice the box will drop a degree or two but overall doesn’t effect the prints at all. Just did another gas tank print for my second bike, almost a two day print!! it’s amazing how long you can run these things if everything is in tip top shape. At some point I’d like to do an endurance test, see if I can run it reliably for four or five days straight days straight . I’m almost certain the only issue that would happen is nozzle clogging. I think that’s what we should work on next, designing a 3D printed filament cleaner that we can install in-line on the box. Get work’n on it guys!
I don’t think designing the nozzle cleaner is the problem, it’s adding in the g-code to wipe the nozzle. The cube pro does that, where it wipes the nozzle every layer. Adds time to the print, but “can” improve some of the messy-ness that can show up on the print.
No, not a nozzle cleaner, but a small filament cleaner, like a sponge soaked in cleaner oil that the filament passes through before it enters the nozzle. There’s a million of them up on thingiverse, we’d need to design one so that it can fit on the box. Like a plate design that can be screwed in the outside of the box sorta thing.
WOw, check out this new forum look right…pretty fancy
So this thread has been pretty dormant for a while, I’m just curious as to what everyone is up to? How have your builds come along, can you post some pictures of your progress.
SO just a little update for everyone. We sold our initial batch of kits and have decided to not continue selling them as the time/profit margins didn’t really pan out. Ideally we would like to make a metal enclosure to offer as a kit but we are still shopping around for this and we are uncertain about it, a full metal kit would be $$$, probably 1000$+shipping when all is said and done so obviously the market potential would be questionable.
So lucky for you guys, I will be posting the full BOM in the file dump link really soon, it’s just been crazy busy this summer so I need to tackle a few other things first. But anyway, that means you will have full access to where we sourced our parts, pricing, per unit pricing etc. Mind you some of the parts were bought as multiples but it will at least get you going in the right direction. So it doesn’t really help kit owners already but for anyone just reading this now, you’ll be able to build a Hbox at a reduced cost.
Thanks for continuing to support this project and keep checking back here for updates. I’m still waiting to some awesome HBox mods.
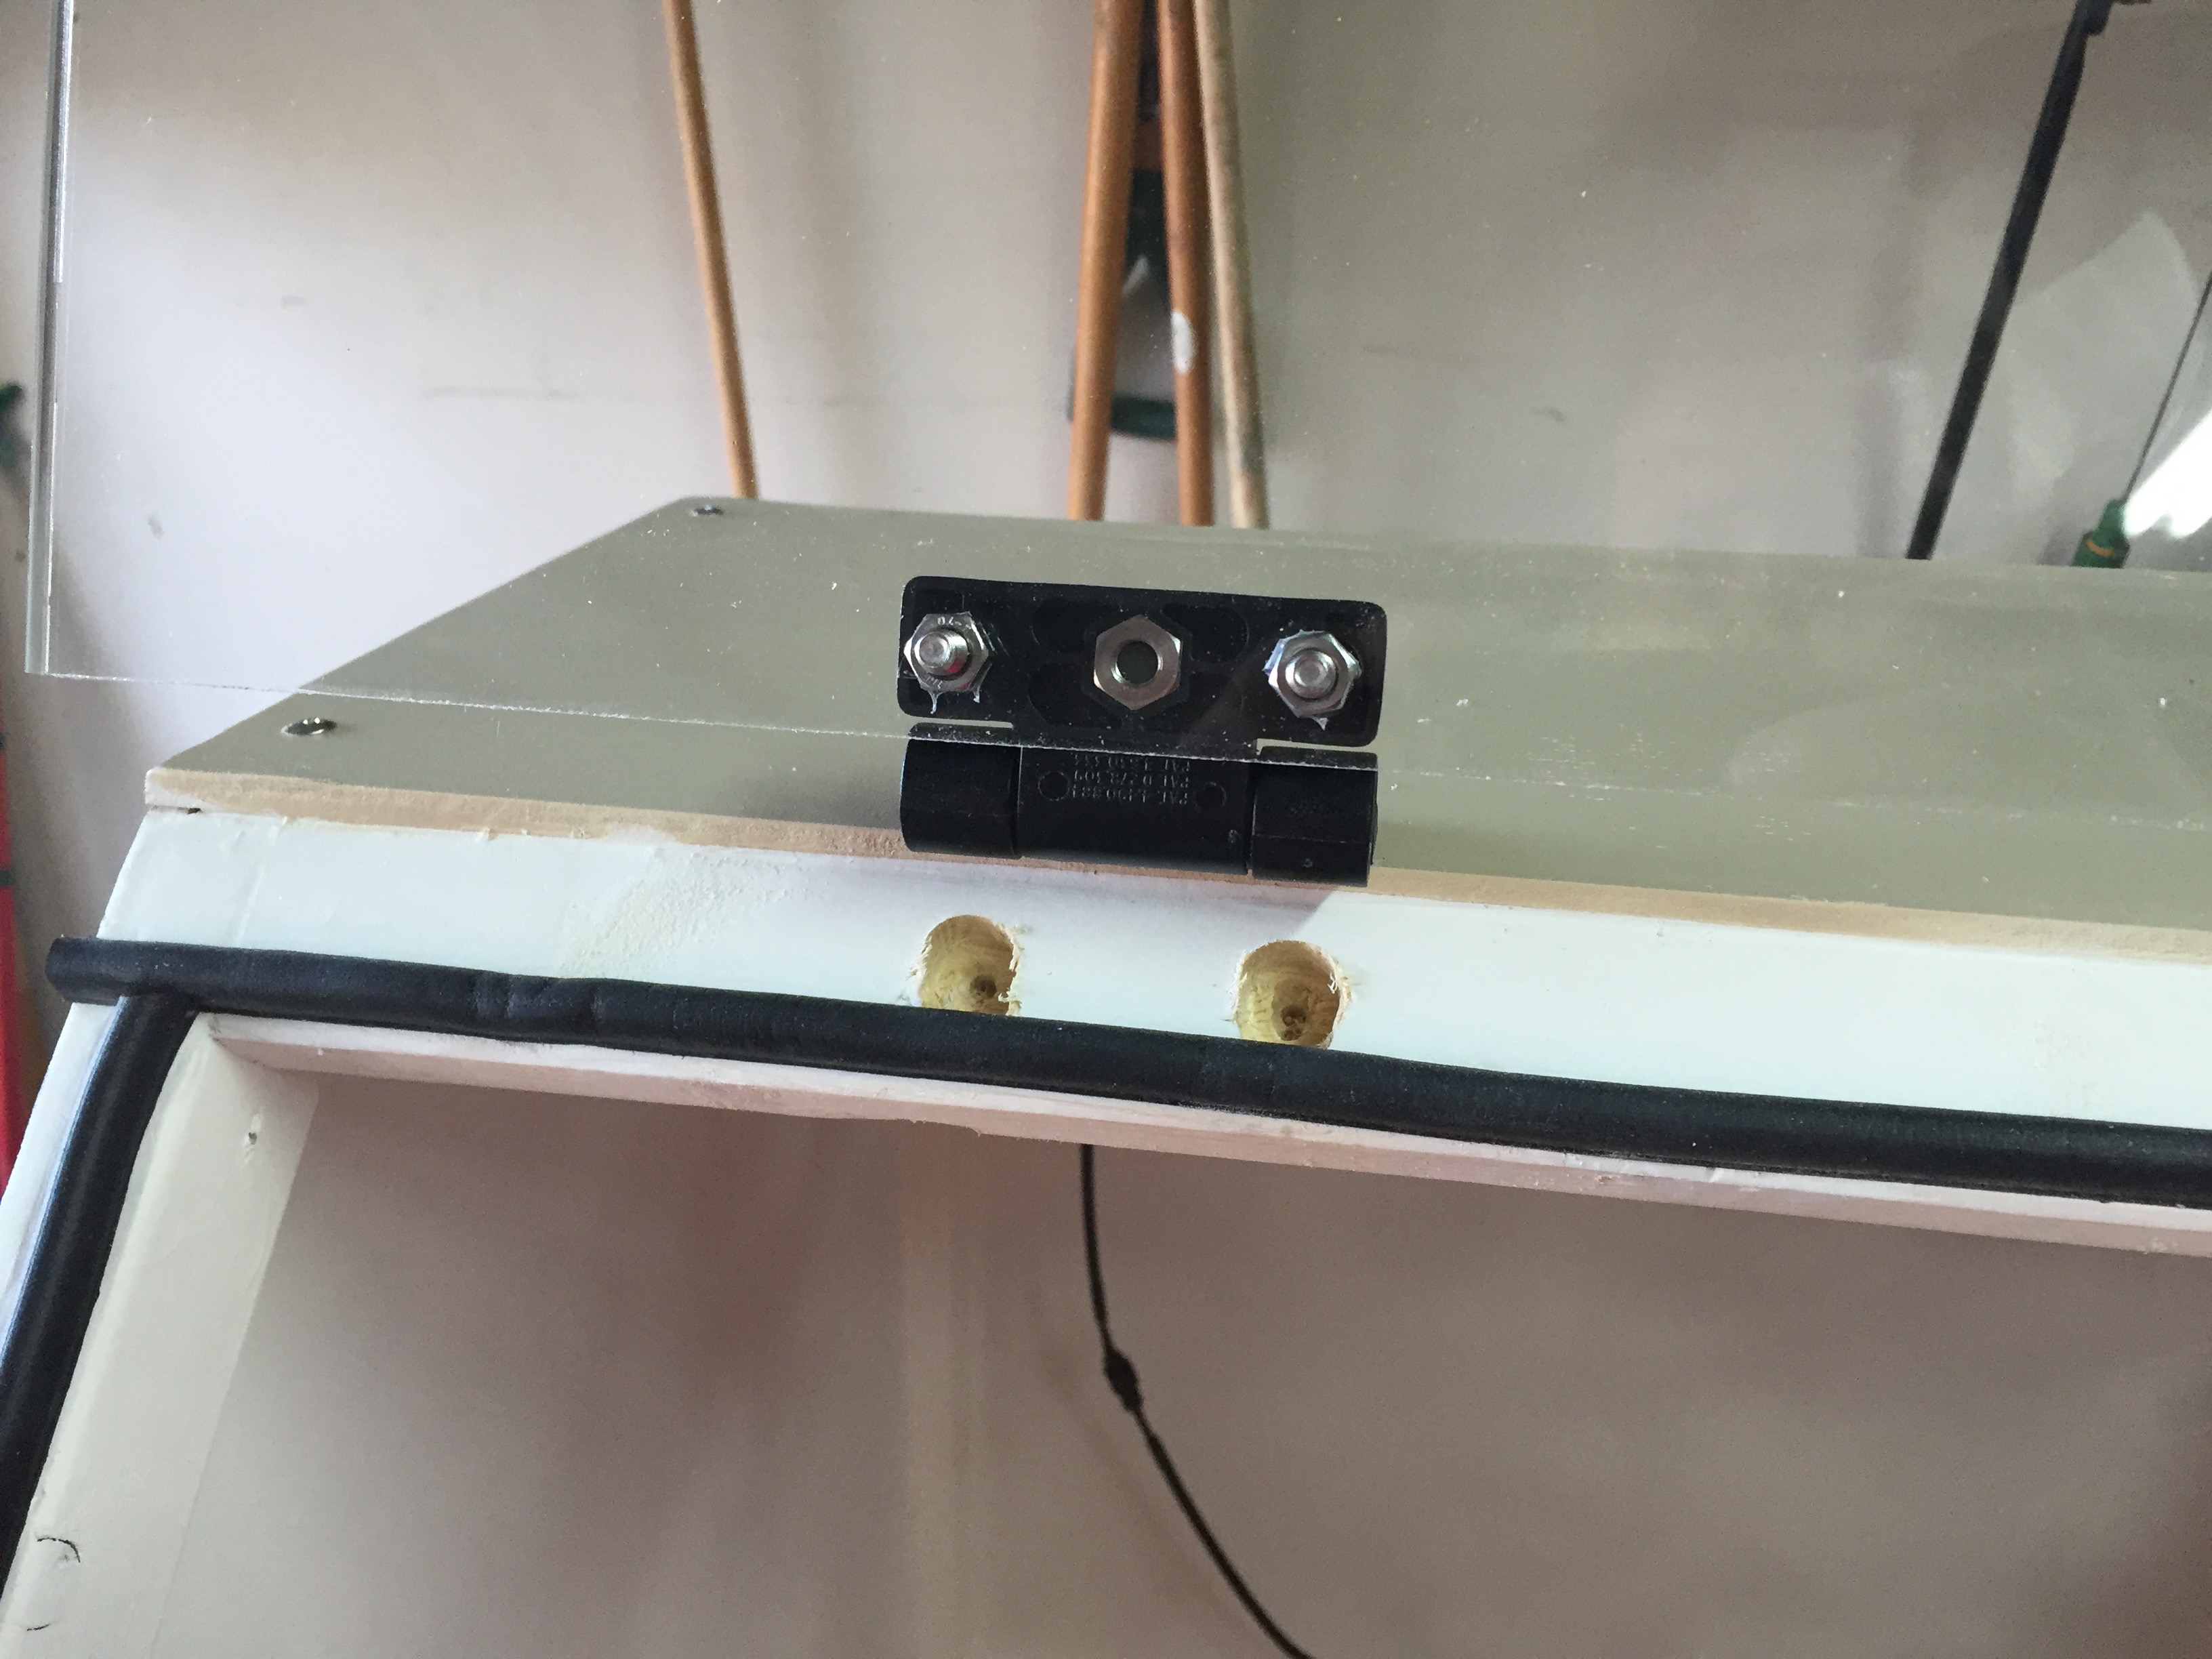
We just got a TAZ 5 two weeks ago and ran some ABS which we had some warping issues with and I looked through you hotbox design. I’m really impressed with the amount of work that went into your designs and documentation. I wanted to offer the one thought I had, if I were to build a similar box, which you may have already considered; is using a piano hinge rather than the bent plexiglass. It won’t be a totally clear cover which is cool looking but it will reduce the overall height and cost of the build.
For your metal version I think there is a chance to reduce a lot of the cost by adding bent tabs or flanges which may add some slight cost to part manufacturing over a flat plate but would greatly ease the build time and part count. Some well designed tabs and flanges with a few printed parts could even get you to a tool-less build.
The metal version is already fleshed out in CAD, there are definitely some changes to the design that were made to make it more manufacture friendly and easier to ship. ie. the bent plexi is made in two parts so it can be flat pack shipped, all the panels are basically flat packable with small tabs that would have pre-tapped holes for machine screws, you could literally assembly the whole thing in like 25minutes. Here’s the problem. The quotes for the manufacturing alone is a few hundred/unit, so tack on shipping from destination to my location, sales tax, and my margins and you’re easily getting close to 1000$+/unit, just to make it worth while. that doesn’t leave much room for distributor margins either. Not to mention there really isn’t THAT much demand for an enclosure in that price range. I bet you 8/10 guys would rather just spend a weekend making one out of wood, even if it takes them longer and it’s a PIA, then pay that much for a “ready to assemble” metal kit version. Sure, that manufacturing cost could be brought down if they were made in large enough quantities but we’re talking like 1000+ units, #1 the final price point would still be probably too high, #2 no way there is that sort of demand for enclosures in the 3D printing community.
Interestingly enough, I still have some warping problems on large ABS prints. It’s odd, in that it will print perfectly without lifting or anything for say 10-12hrs, but there seems to be a point, at about 2 to 2.5 inches, that the corners start to pull, and things go south on certain large parts. Large, thin parts, no problems, large tall parts, problems.
I have been printing large parts with no warp. I haven’t been using any adhesive too, such as hairspray, glue, ABS slurry. All I use is a raft and a bed temperature of 90 on my Taz 4.
I searched but didn’t see an answer to this. The basebrackets_3DPR (repaired).stl file is significantly scaled down when i open it in Cura. Does anyone know the correct scale i should increase it by to achieve the correct size?
Sorry, like I’ve mentioned, it’s been a busy year PLUS with the forum change I couldn’t figure out how to log in! Hilarious. I’m glad the thread has a bit of action again, I want to really encourage people to upload their builds now that I have put everything out there for free including the BOM. Let’s see what mods you have come up with etc.
*knock on wood but I’m actually suprised at how little maintenance my TAZ4 requires, I must have done over 1000 hours of printing on it so far with very minor repairs need along the way. One thing I did notice is that I used a 12" square sheet of 3M 467 adhesive to put the PEI down and after that many hours of printing, the glue started to dry up. I think that model of sheet the thinner one so in the future I recommend getting the thicker adhesive sheet. To fix it, I just doubled up two 467’s and it went down nice and should last longer.
@Catz, you should NOT be experiencing significiant warping so something is up. Do you have a thermometer to check the temperature in the box, ideally it will be in the 35-45 range. Make sure you have no drafts leaking into the enclosure either. On certain parts, after they cool, long stretches will always have a small bit of warp to them, it’s pretty difficult to avoid but it should be very minor, with the enclosure, you should be able to make great, usable prints in ABS.
@Paul, I sent a pm to you. You need to get a program called Netfab and just convert the units from mm to inches or vice versa, this will solve the problem. Don’t scale!
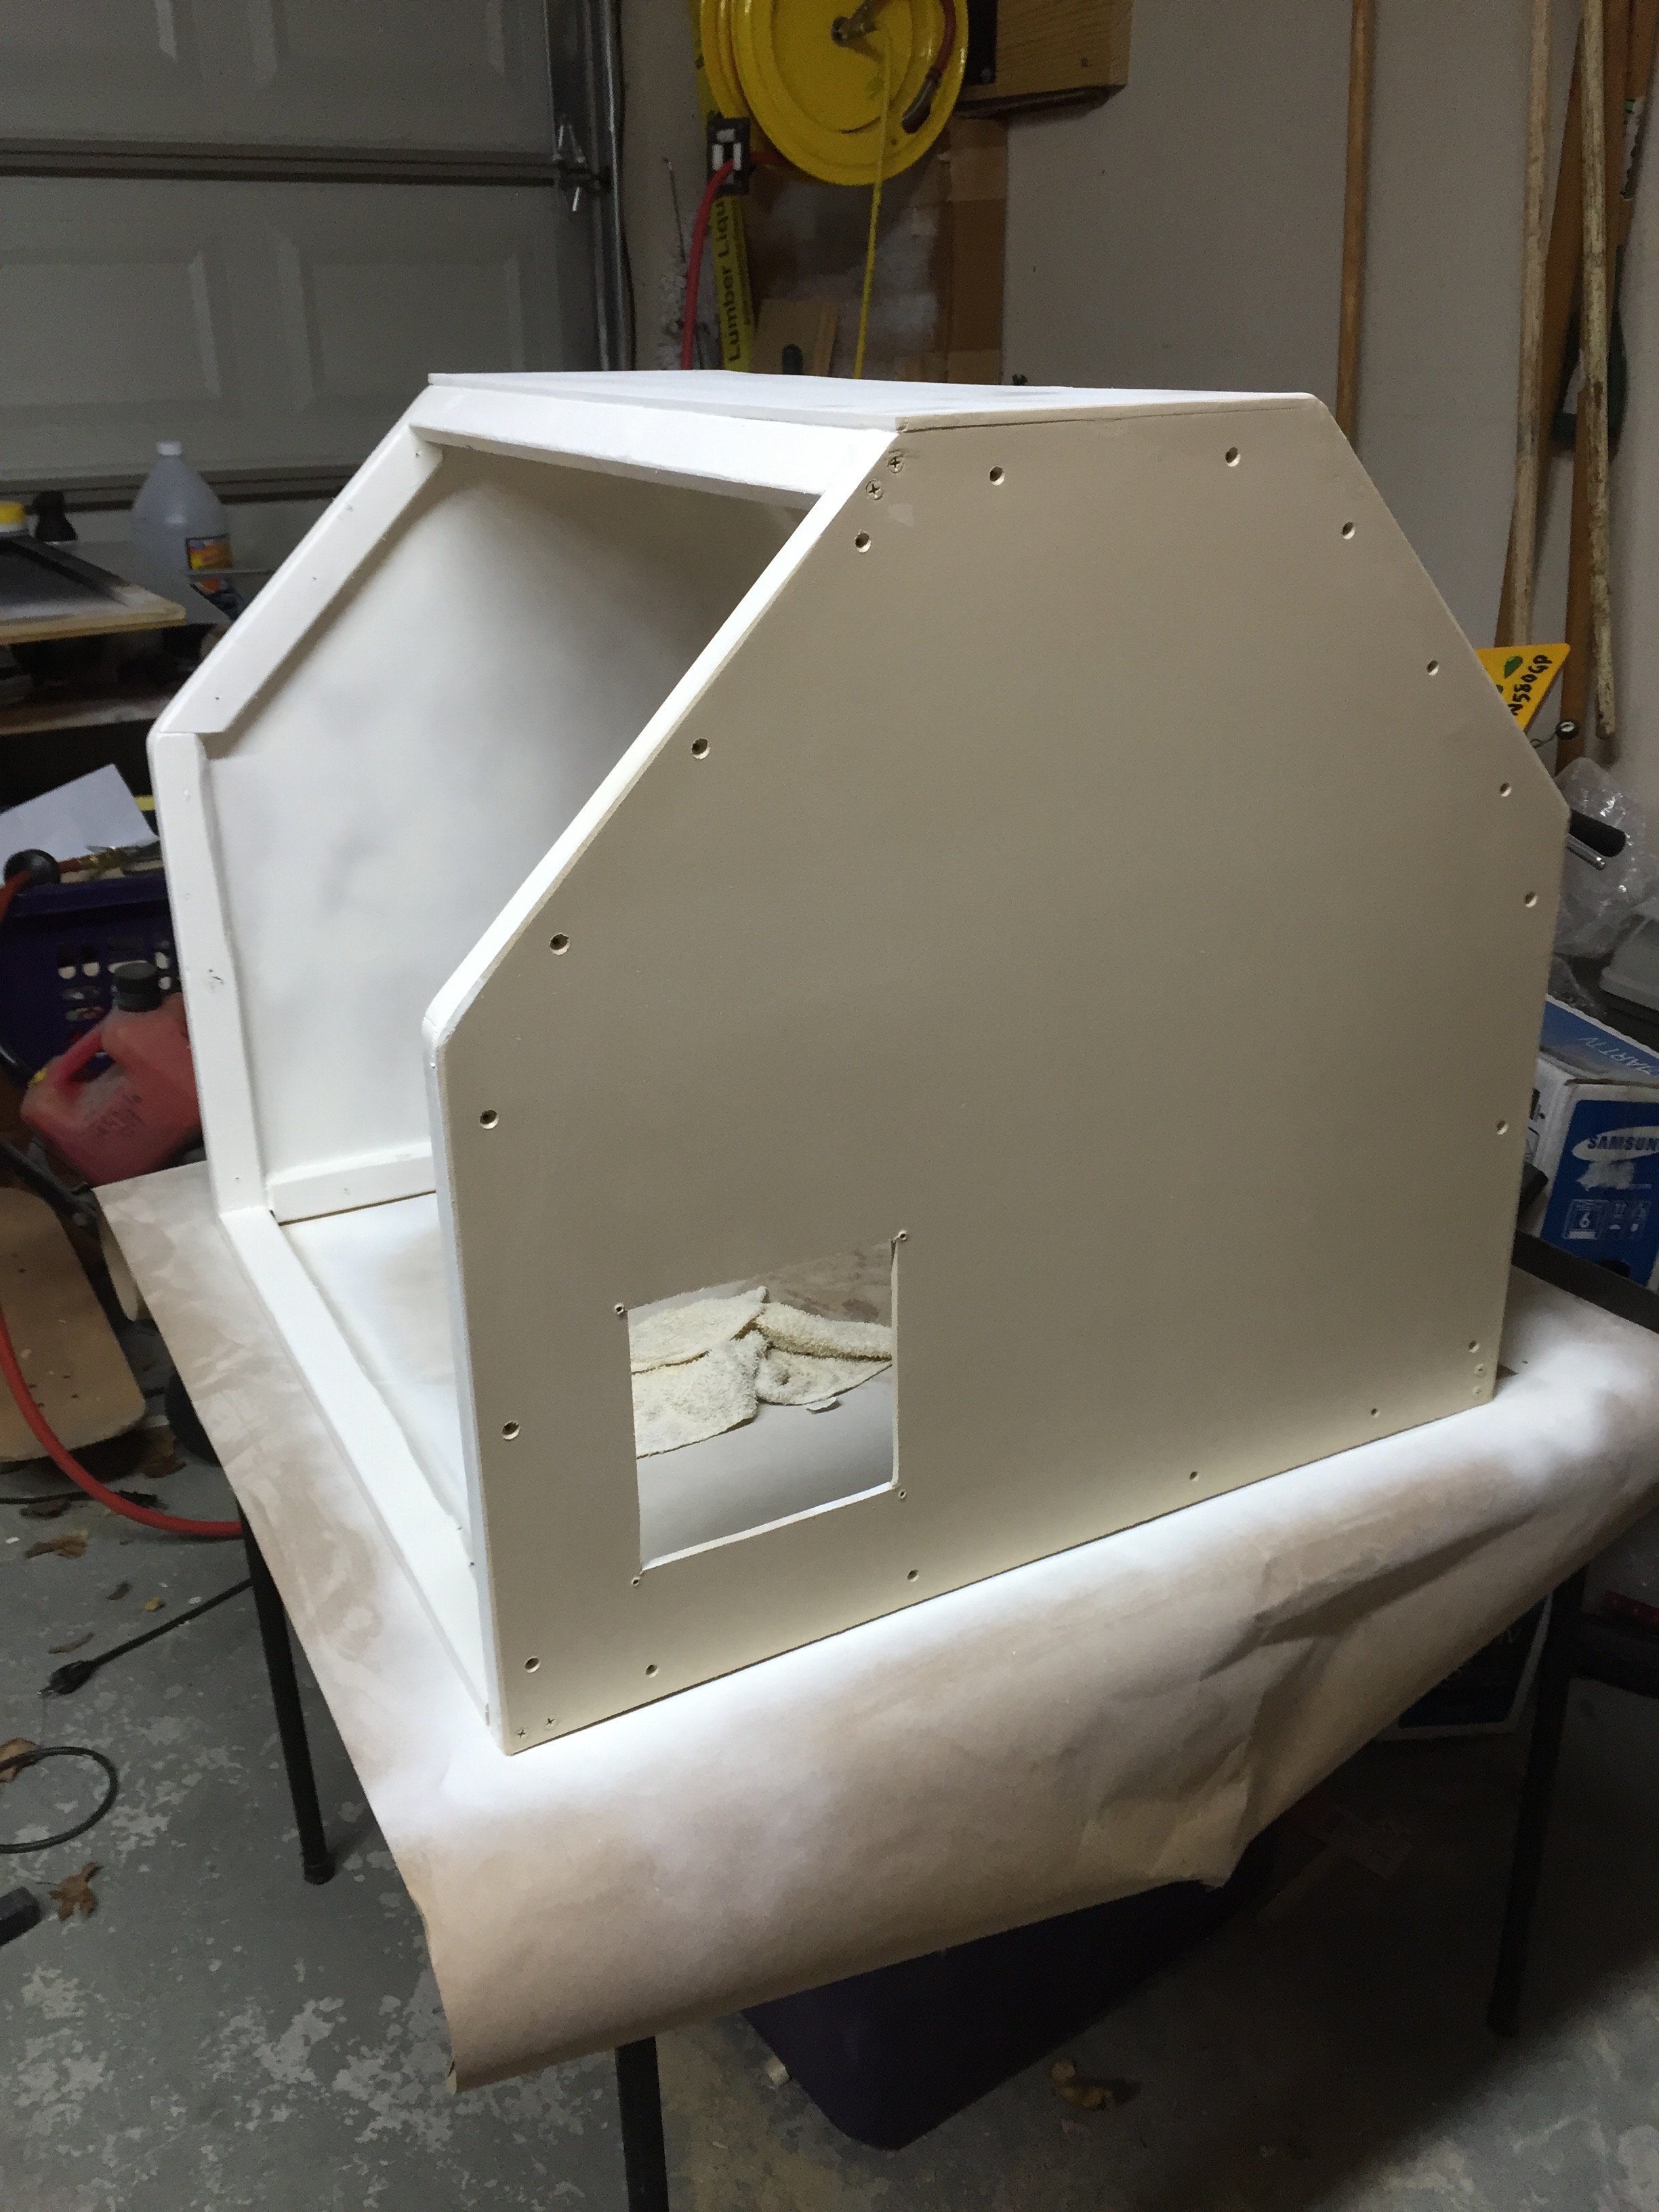
Thanks for the reply Jonathan. I had already built the box by the time i got your message. But it’s all good. Here she is in all her glory. Kind of large for my office but I love it. Thank you so very much for all the effort you put into the design.
I haven’t finished putting the panel in the plexi but i’ll do that in the next few couple of weeks. I also included a pic of the first big item i printed. It was a 12 hour ABS print and it was PERFECT. Perfectly stuck to the floor, perfect layers bottom to top. I could never have done that before.
What is the opinion from people who have build this box about keeping the TAZ control panel inside or outside the box. Is there going to be a heat problem with keeping the control panel inside the box. I feel very lucky I ordered all my parts a while ago, and I will start my build sometime in the next month.
This post has gotten very long, is there anything I need to watch out for before I start the build. I printed out the directions a while ago, someone talked about using 1x3 for supports, a problem with the screws and latches, drilling holes in the plexaglass and cracking it, bending vs using a piano hinge, any other things I should consider before I start my build.
Also I printed all the parts used in this box with PLA, will I have any problems with heat.
Hi Jonathon, just wanted to say how enjoyable it was building your enclosure. I’m sure glad I bought your parts kit, it made the job 100% easier. Here’s a picture of the finished product.
My printer is in my basement workshop and this time of year the temp. is about 52F the enclosure easily maintains it at 72F. I still need to seal some heat leaks but I’m happy so far.
One thing I noticed is that when the fan for the Rambo enclosure comes on it’s sucking in cool room air (a good thing) but the air is exhausting inside the enclosure (not a good thing). I am going to design a new air intake/exhaust that will allow the cool air to exhaust outside the enclosure.
@BigKahuna That’s a great idea. In fact i’ve thought about that too but never thought about trying to isolate both. But this adds to another idea I had that I’d like to add to the overall design of the box… And that is a panel that can be removed to allow full access to the plate over the controller. Yes, it’s possible to remove the top of the box but for me it would be infinitely easier if i just had a door on the side that I could remove for temporary access. So i’m going to design a side panel door with both in and out for air. Will post something after i get it rolling. I think i’ll just print the whole thing. If i can get what’s in my mind out in CAD, this thing should look pretty cool too.
@choban Just drill slow on the holes. Start with smaller bits and graduate up till the hole is the right size. Practice on a scrap piece of plexi if you have some left over. regarding screws for the main outside of the box, I used a counter-sink drill bit combo and was careful to get them all the same which led to a really nice finish look. I bought stainless oval head screws with a tapered base so they could be counter sunk. Made a nice looking finish. If you decide to paint it, i might suggest KILZ in a spray can for the primer on the wood. I actually tried a couple of lower priced spray primers but i kept having to put more coats on because it didn’t seal the mdf that well. KILZ is great at that and the spray can is in a different league than the other brands. Good Luck!
 … But ya, you def don’t wan’t the box getting too hot with PLA, put the fans on to provide air flow, and keep it on the cooler side.
 . I’m almost certain the only issue that would happen is nozzle clogging. I think that’s what we should work on next, designing a 3D printed filament cleaner that we can install in-line on the box. Get work’n on it guys!