Only if actually Logged into Octoprint. Someone without an Octoprint logonID can still access the web interface and “view” current activity (file list, webcam, temperatures, etc.). A logon is required to delete files or control the printer. A logon is also required to upload files via drag-and-drop, but SMB would allow uploading files without a logon.
Thanks, everyone. This is very helpful as we think about the options.
ScottW mentioned getting a relatively large mini SD card. What is considered large enough for this type of setup? Is 32 GB plenty / not enough ? The kids are not doing huge or extremely complex prints, and the file storage is on a Google Drive the classroom uses.
I’m also thinking it’s best to drag and drop the files from the Google Drive to the Pi’s mini SD card to avoid any problems with a slow network during printing (not even sure if the interface would allow printing directly from the Google Drive, but being in a school, the network is usually not the peppiest one you’ve ever seen, so I’m thinking best to get it over onto the PI prior to attempting the print).
The classroom is using Cura now with decent results. Does OctoPrint / Astroprint take the place of Cura? wondering if it’s better to send STL or Gcode files over to the Pi (“better” in this case could mean better print results or a simpler work flow for the teacher/students to follow).
The Gcode for simple prints is often only a few hundred kb to perhaps 5mb. A 32gb card will have room for a LOT of 5mb files.
The file must be uploaded to the rPi first. Octoprint will be accessing the file from the rPi storage during print, so no network issues.
Octoprint does have a working Cura slicer plugin, but it is slow – and using different profiles (i.e., different materials, support requirements, layer heights, etc.) is problematic at best. I would recommend continued use of Cura on the PCs to slice and visualize, then export the final gcode and send that to Octoprint.
To continue this discussion, you might want to start a separate Octoprint thread – as the Q&A could create a lot of content that would be better found in future in its own thread.
Thanks again.
I’ll start a new Octoprint thread when we are closer to up and running with the Pi. Just trying to get a idea how the pieces fit together for now.
This fits the Mini and the TAZ 5 perfectly. I used a 5V 25mm fan. Here a link to one: MC25100V2-000U-A99 Sunon Fans | Fans, Blowers, Thermal Management | DigiKey
You don’t have to change any profiles, there is no speed adjustment necessary.
Another option is Astroprint. I found it extremely easy to set up myself on a RPi and the UI is very nice. They also have an option where they can sell you a kit with astroprint already installed ready to go if you don’t want to do the software install.
CoParaTech - I ordered the 5V fan. Thanks for the link.
Is HIPS OK for printing the duct? All we’ve used at the school is PLA and HIPS. I know I ought to get a roll of something else sooner or later - we need to print up some spare gears and other parts anyway. Any recommendations on material to use that will hold up well, but doesn’t take a rocket scientist to print and get good results? (hopefully I can use the same stuff for the shroud and for the other spare parts).
I think the HIPS would work better than PLA because of the heat from the filament heat sink. I used nGen which is similar to HIPS so it should be fine. Worst case, you might have to print another one, but I don’t think you will.
When doing the 25mm hot end fan & shroud mod, is this do-able with the print head still on the machine, or is it easier to take it off and disconnect everything? Mainly wondering about getting to the wiring for the fan on my Mini
If you are going to change the fan out, I think it’s easier to remove the print head. There’s a connector under the top cover plate on the print head that you can disconnect, then it’s just 3 screws.
So why replace the Linear Bearings? I thought the Polymer ones were superior to the metal ones?
It’s a precision and fitment issue. Lm8uu polymer bearings are designed to be press fit into a strong housing that applies preload compression on the bearing that tightens it up a bit. 3d printed housings don’t apply that preload. The mini works around that by positioning the rods against the outer walls of the bearings. The ball bearing units are theoretically tighter fit on the shaft. But they chew up softer metal shafts, and are loud. There are other lm8uu sized options, including pretty oiled bronze bushings that can replace the polymer lm8uu stock units that are a better choice for a replacement than the ball bearing units. Those often are more expensive though.

So I was thinking of doing an enclosure for the mini for printing ABS. Has anyone done this? I was wondering if I need to make a fresh air inlet for the cooling fan so the board does not overheat? Is this needed?
I changed the filament fan the easy way. I just removed the one screw (don’t lose that) that holds on the mini fan and cut the two wires. Then I shortened the wires on the new fan and soldered them to the existing wires (red to red and black to black). Then I snapped the filament fan shroud in place and secured it with the original mini fan screw. Then I screwed the new fan onto the shroud/mount. That’s all there is to it. No pulling off the print head or anything like that. The wires were short enough to tuck in between the print head body and cooling fan, so no muss, no fuss. ![]()
The electronics do need cool air.
I solved that by just putting the electronics outside the enclosure (photo below). The left side is flush to the frame, with a “cutout” that goes over the electronics box. That way both the inlet and outlet of the electronics box are outside the enclosure, and no ducting is needed.

That’s a great-looking enclosure, Scott. Is it your design? I’ve been looking at some pictures of Mini enclosures. A couple of them I’ve seen have way too small a door - I can’t imagine trying to remove a print that is really stuck on through them. Yours looks plenty big. I am debating about door hinges on the bottom vs hinges on the right side or perhaps using lift-off hinges (mainly due to where it sits in the classroom, but also so kids with shorter arms aren’t leaning up against the open door when they remove prints).
Do you already have a thread on it, or would you be willing to start one with more info/photos?
Hi John,
I will try to take some more pics… The enclosure is my design, but not a work of art. Mostly just hacked together from materials I had on hand, and a couple quickly-designed pieces. 
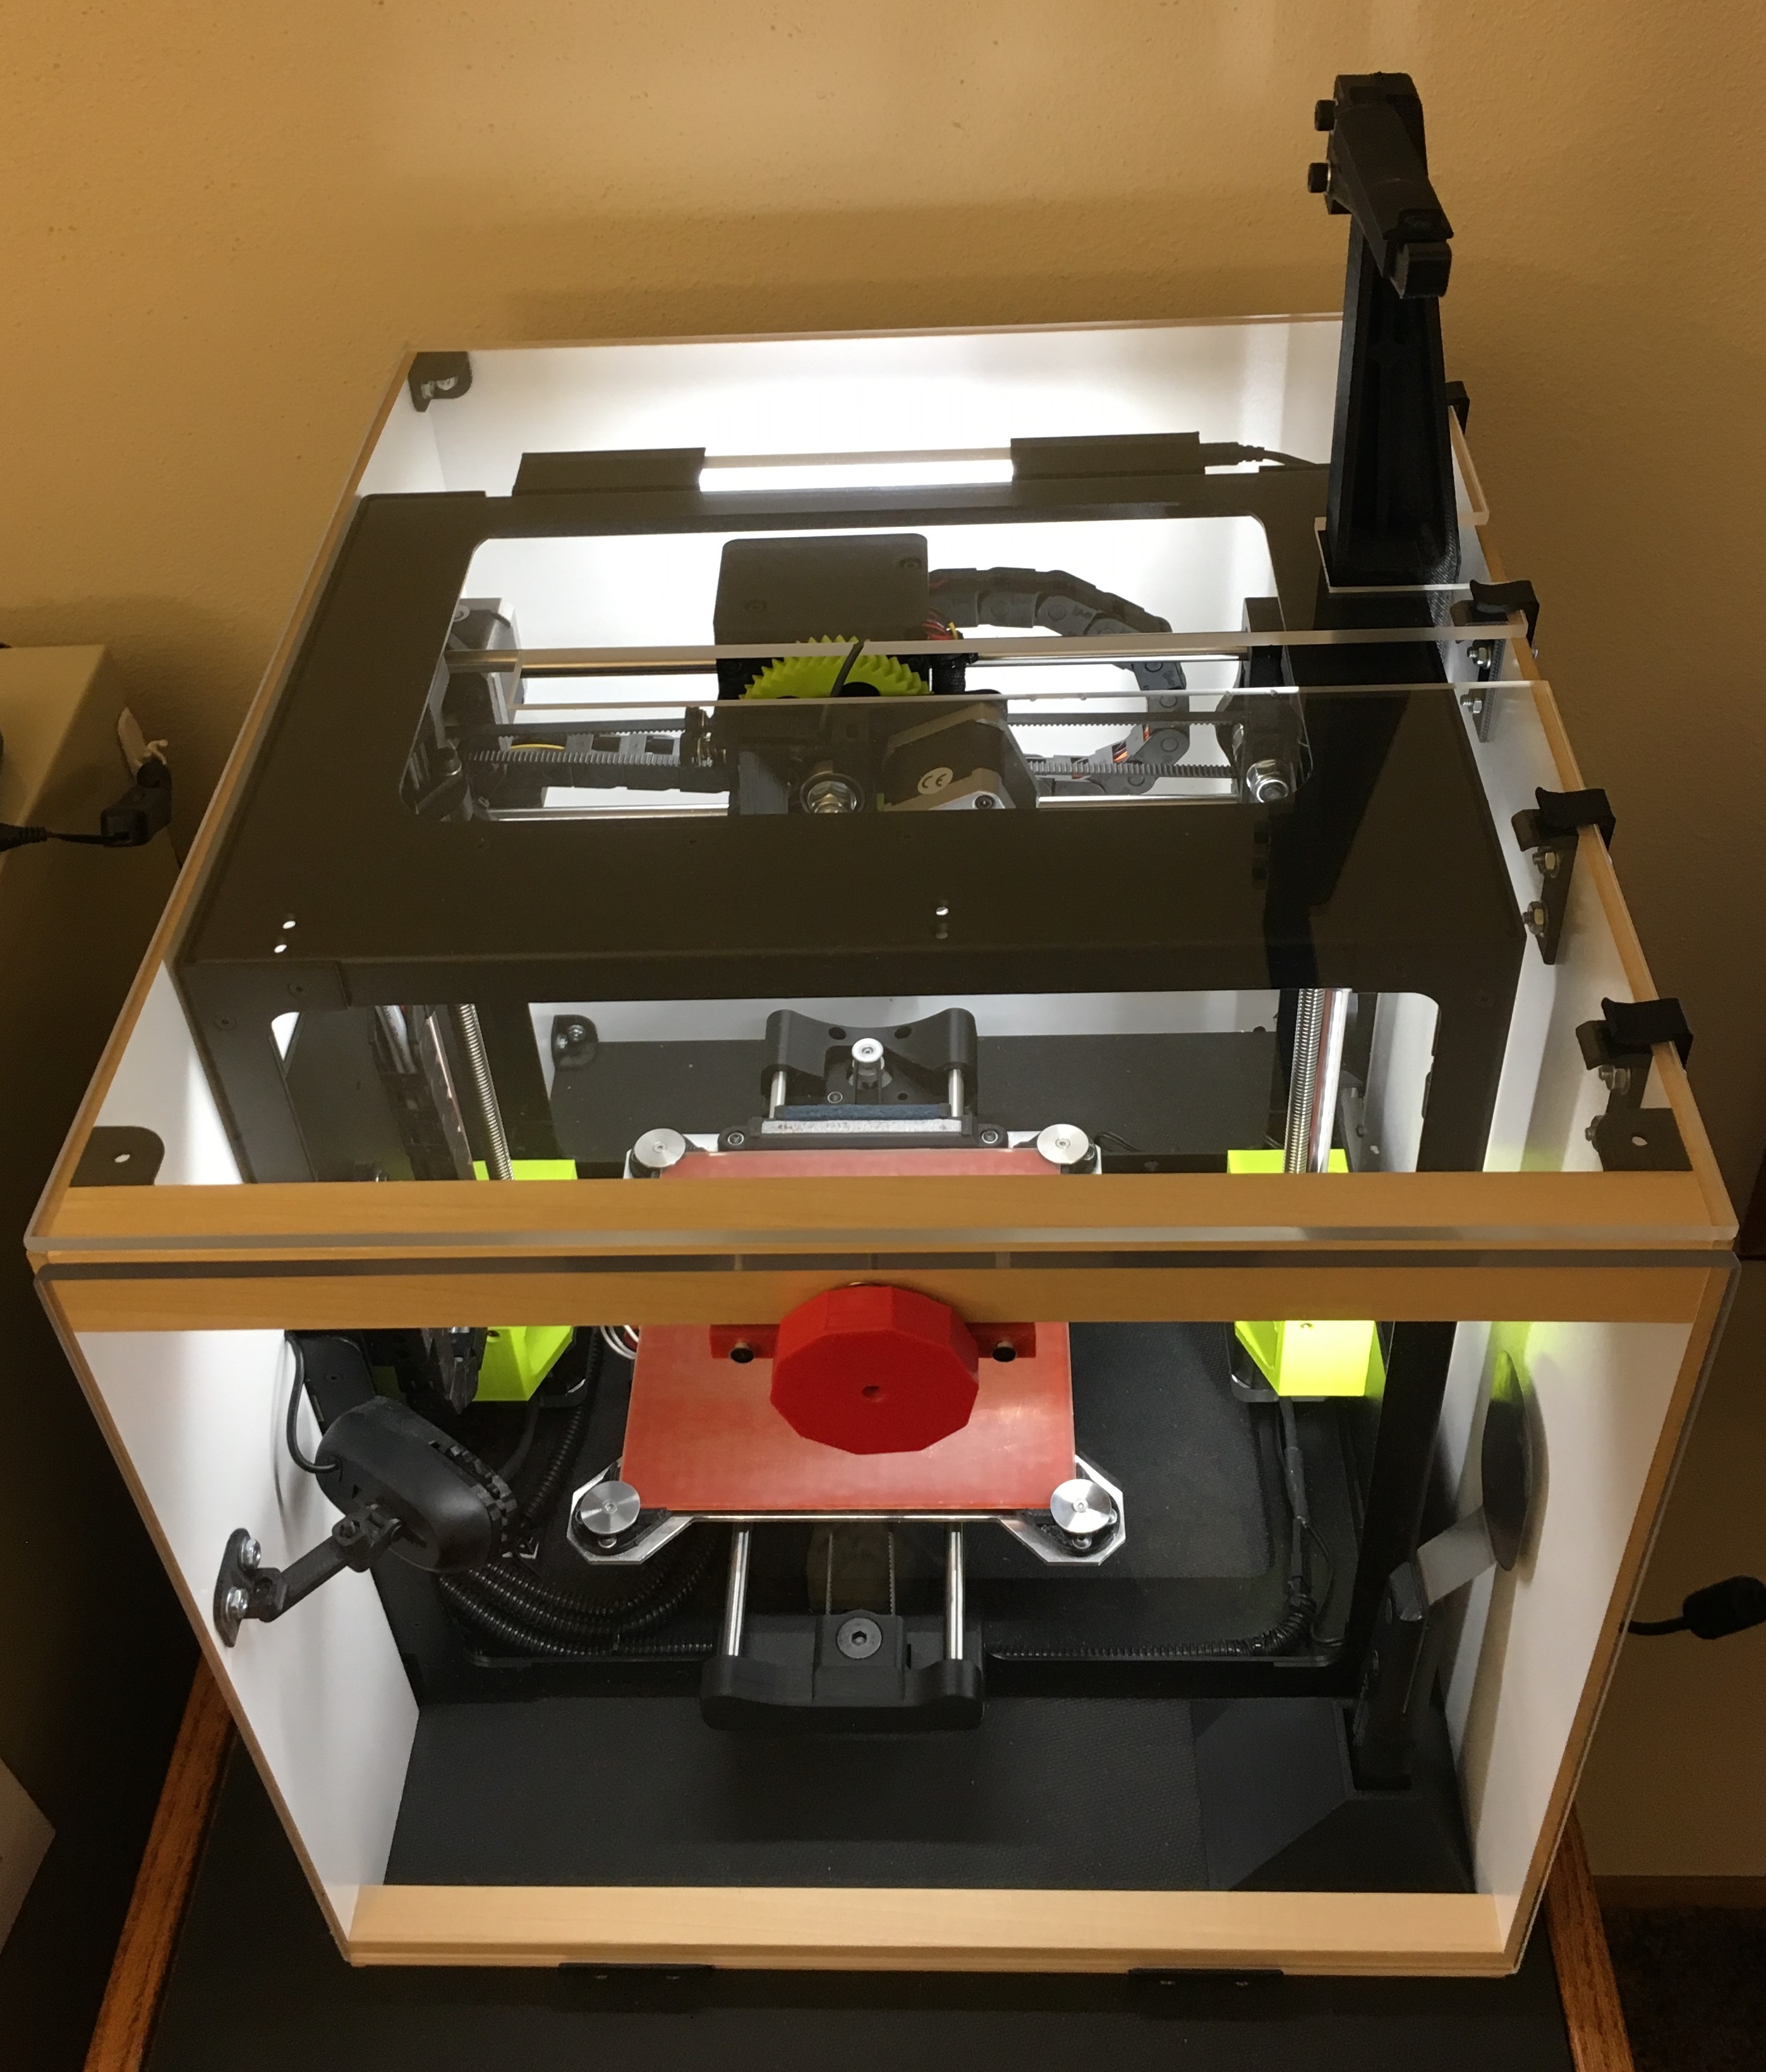
I decided against hinges. Instead, I designed/printed a couple z-brackets that screwed into the bottom-front support bar (maple). The bottom edge of the 1/4" plexiglass front just drops into those. I designed that big red “knob” near the top of the plexiglass to rotate, and it has a rare-earth magnet near the edge – which, when rotated correctly, aligns with a rare-earth magnet in the top-front support bar (also maple). So a quick rotation of the knob (un-aligning the magnets), and the entire front just lifts off and can be set aside.
The sides and back are 1/4" hardboard, with white melamine on one side. I faced the melamine side inward, to help with light distribution. The sides and back are held together with some brackets I found on thingiverse. I also attached a C270 webcam (for Octoprint) to the left side of the enclosure, near the front, using an articulated C270 mount arm from thingiverse.
Like the front, the top is plexiglass. It has a slot for the filament, and a cutout to accommodate the spool arm. It is held only at the right side by some “clips” I designed (in retrospect, only the external clips are needed). The top simply slides into those clips, which provide some friction hold but otherwise the top just stays in place via gravity.
Aside from keeping the electronics cool while retaining heat around the print, my main priority was quick/easy access to the printer. Slide the top out of the clips, remove the front from the Z-brackets, and the entire enclosure lifts right off the printer. It’s literally 30 seconds to completely remove, or completely reinstall.
Even with the oversized “filament slot” in the top, it easily gets up to 40C from the retained bed/extruder heat. In fact, I was concerned about it getting too warm for the steppers in summer months, so I added this Infinity Airplate temperature controlled fan to the enclosure.
Front view, with front/top plexiglass removed:

Top view, plexiglass in place:
View from top left, removed from printer:
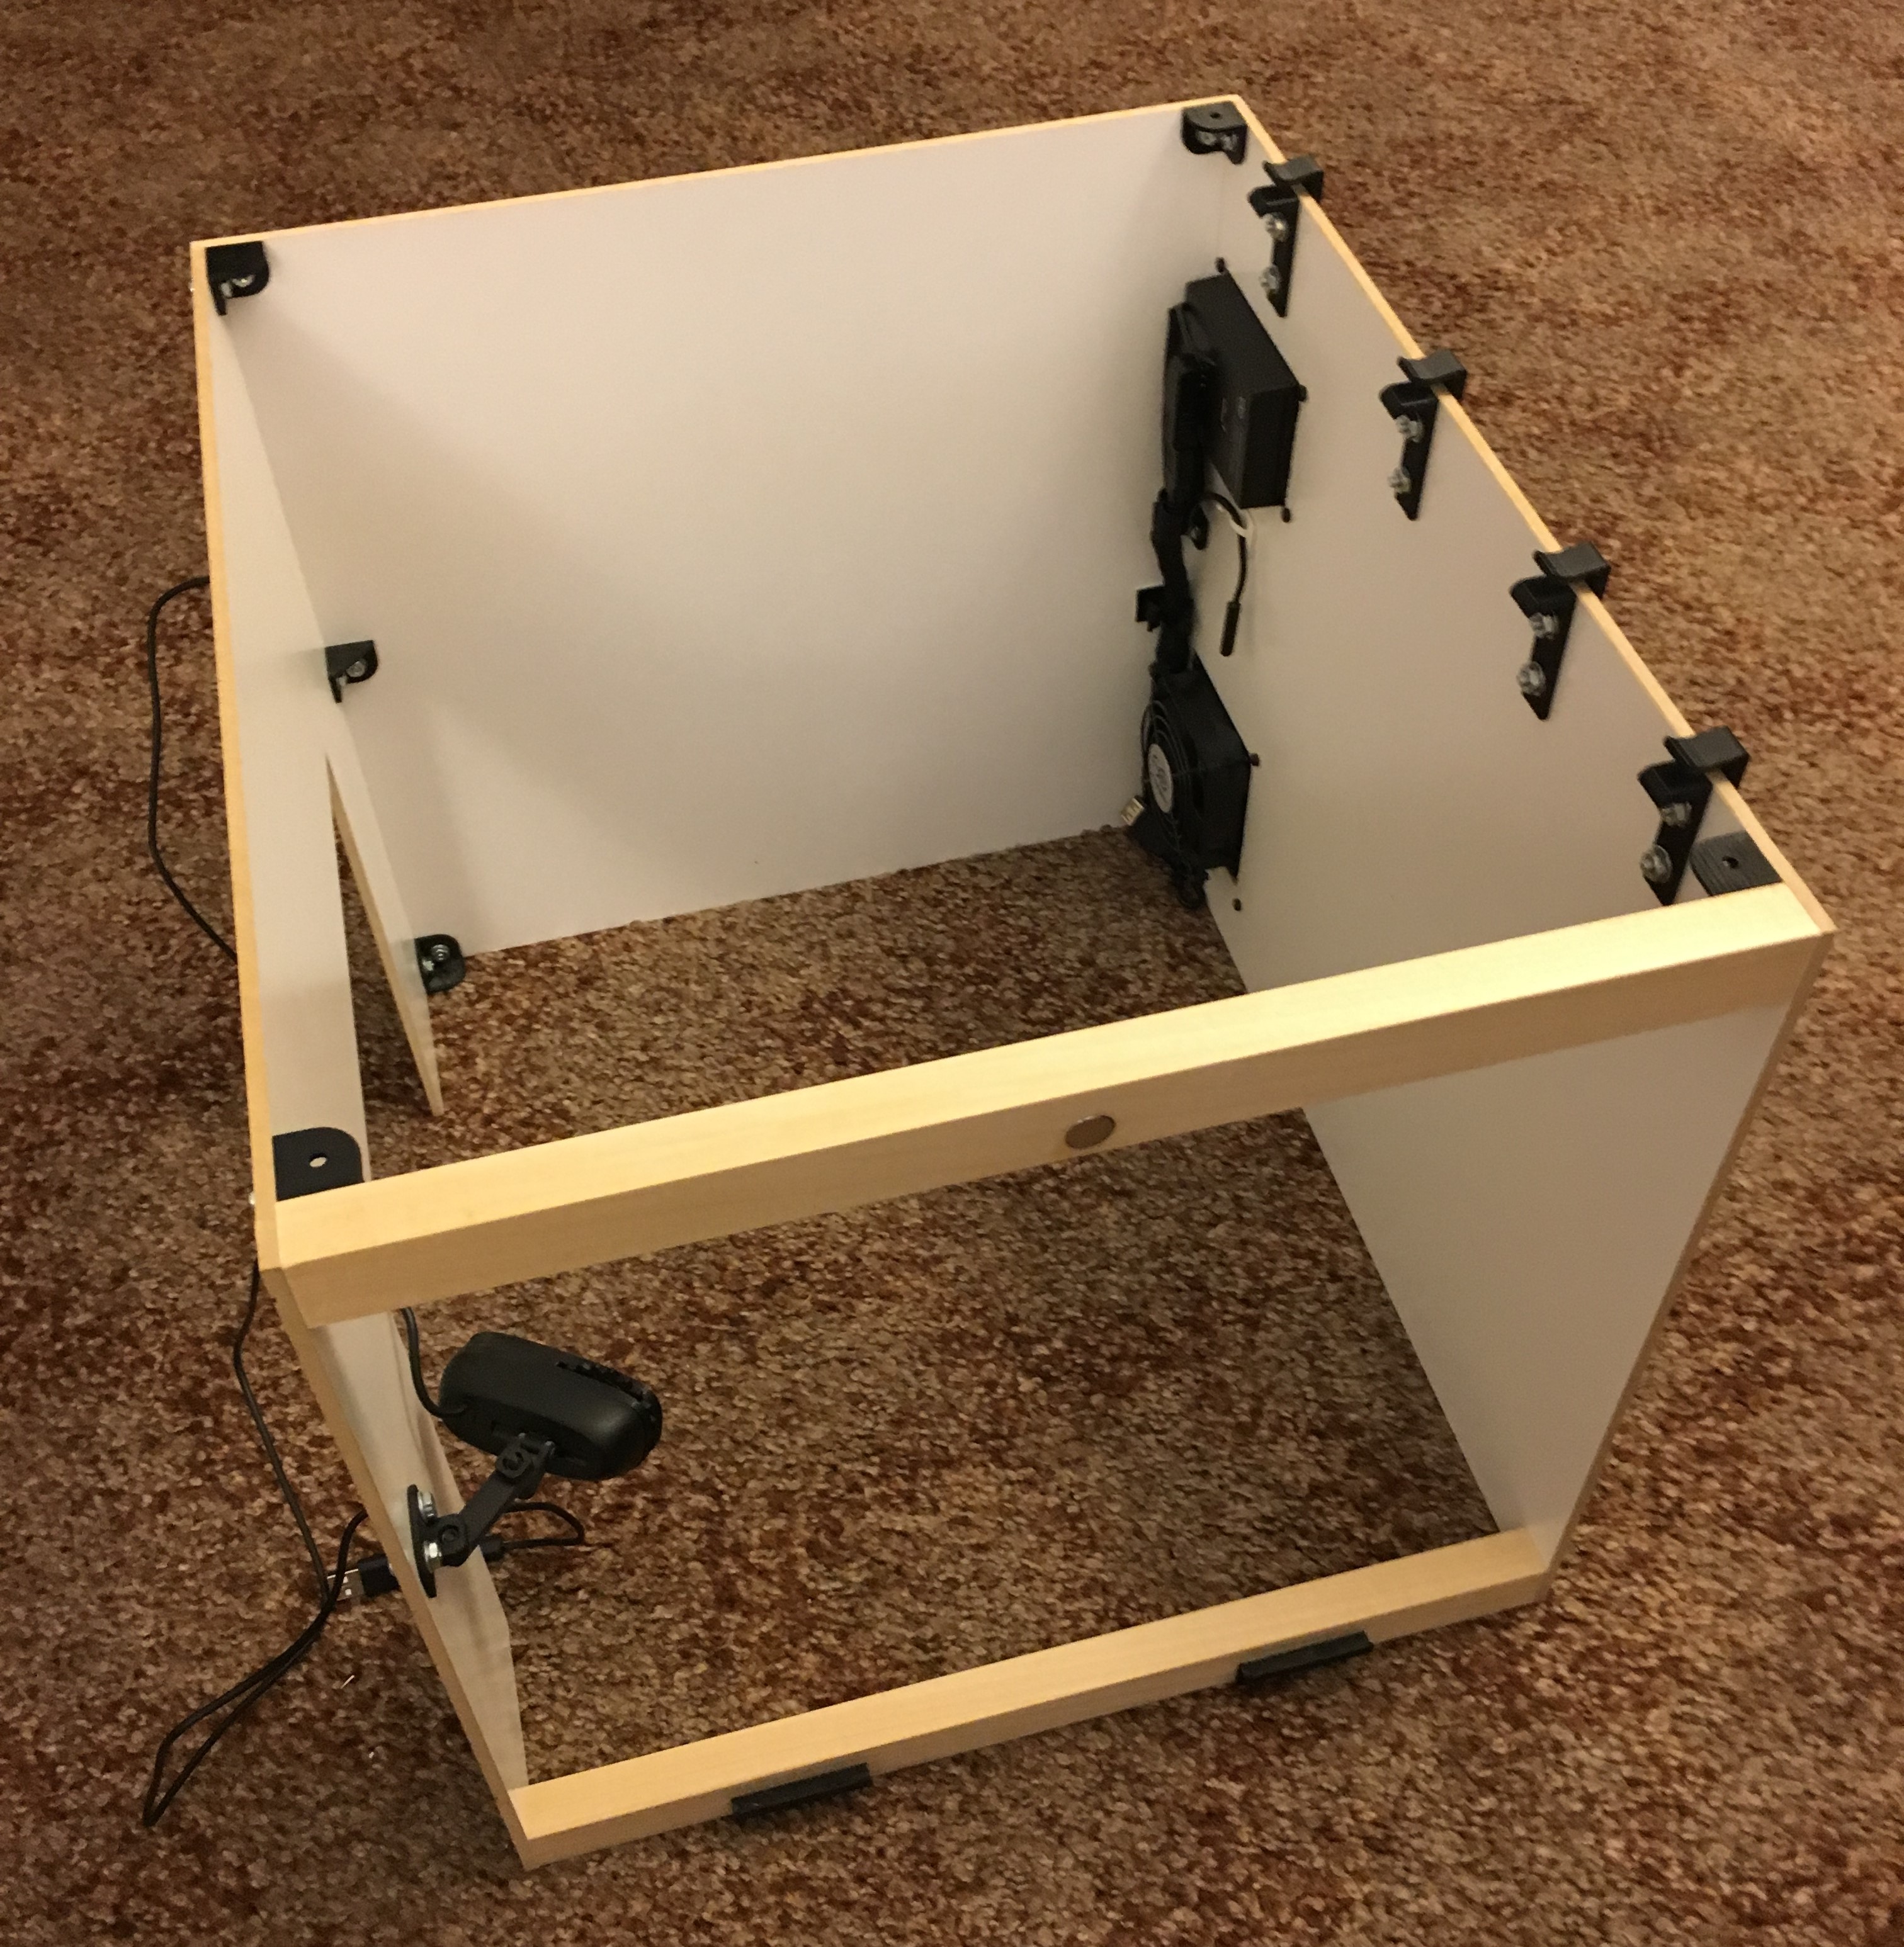
View from top right, removed from printer:

That’s a very nice looking enclosure, ScottW!
The temperature controlled fan is a nice addition too!
Are there two fans there, or is one of the black squares just a grille?
I’ve always been curious about putting a fan in an enclosure. Do the air currents cause problems with some filaments/prints?