Ok, I’ve been spending all of my time the last year with more advanced firmware on my deltas (Smoothieware and RepRapFirmware) and haven’t spent much time with Marlin (I used Repetier in the old days). I don’t understand how the EEPROM settings stuff works on Marlin. On Repetier it was easy.
I edit my firmware, compile and upload. Let’s say I changed the PID values manually in the firmware. EEPROM and Echo are both enabled. When I connect, I see the old PID values. My understanding is/was that I could M502 to load the firmware values (which should be updated) and then M501 to save them to EEPROM. An M503 shows them. This does not work!
Great, as I sit here writing this and looking at the RepRapWiki G-code docs, I see it says under M502 that it must be followed with M501 to store the settings to EEPROM. That’s wrong! M501 READS from EEPROM, M500 WRITES to EEPROM. So, doing an M502 followed by M500 works. I do an M503 and see my updated settings. Got to love open source “documentation”!
Ok, I have the auto bed leveling stuff sorted. That was the issue, G28 deletes the transform matrix that G29 creates. And there is no way to store the matrix in EEPROM. So, inserting G29 into the gcode header did the trick and I am now printing an impossibly thin first layer perfectly! I need to do a little tuning on the probing to get it spot on. FSRs are known to need a little Z offset with printers with a bit of flex in their beds. I have to do this on a couple of my deltas but my Rostock Max has a very rigid bed and it is spot on without an offset.
I am currently in the process of ordering parts to do the rail replacement along with dampeners. I was wondering if you are going to share a write-up on the FSRs as this is something I would love to add to my printer. Also I heard that high temps with FSRs could be a problem, how to do you plan on using a heated bed with that?
Yes I am going to write it up and share the mounts, etc. I just need to get everything working and finalized.
I use a small PLA printed “plunger” that fits into the mount. A silicon disk that acts as both a force spreader and insulator sits between it and the FSR. I’ve run this with 100° beds for 12+ hours with no problems. On the TAZ I adhere the plunger directly to the silicon heater with flexible CA adhesive. I’ve tested this at temperature for many many hours and there are no problems yet. Simple and effective.
Great I am looking forward to this. Being my printer is in an enclosure I have the bed at 90 but so if oyu can have 100 at 12+ hours that should work fine for my case. Thanks for sharing everything, ordering my parts today for the hardened rods and bearing upgrade.
I’m not sure how the FSRs would handle being at 100° like they would be in a heated enclosure. Mine are insulated from the hot bed but the silicone disks so they are not actually warm at all. It’s worth a try though.
Well, after struggling with oddities in Marlin (lack of direct support for multi extruder through 1 nozzle, odd homing behavior, etc) I decided to migrate to Repeater. Perhaps it’s more intuitive to me since I have experience with it. But, it supports the Cyclops natively and has much better auto level support. On Marlin, you got a right triangle with little control over where the points are, with Repetier you can specific precisely where the 3 points are. That’s an advantage for my FSR system. I have FSRs arranged in an equilateral triangle (approx.) and it is ideal to probe directly over the FSRs to get the most reliable/reproducible probe.
The menu support on the GLCD is much better too, there are many, many more features on the LCD so it is much simpler to print using only the display.
I made more progress in 30 minutes - which included configuring and flashing Repeater - than I did in many hours of struggling with Marlin. Homing works perfectly, G29 probing works perfectly, the FSRs are working like a charm and I’m working on tuning the Cyclops for multi color printing.
I am not heating it, the heat from the bed and nozzle keep it pretty warm, I am hoping to get a thermometer in there soon, just need to find a decent cheap one.
Also finally placed my order for the hardened rods upgrade along with dampeners.
I’m getting up to speed on the nuances of Repetier for cartesian printers with mixing extruders and bed leveling! So much for methodically working on 1 thing at a time.
Firstly, bed leveling…
In Repetier the G32 S0 leveling command saves the transformation matrix to EEPROM and enables auto leveling. After running it you do not need to run it again before each print (unless your printer is really rickety!).
To set it up I first heat the bed and nozzle and then home with G28. One thing I don’t get and want to figure out is G28 leaves the nozzle touching the bed (Z=0). With a PEI or other plastic surface, that could leave a small melt divot. I want to raise the head 5-10 mm after homing. Ideally this would be a firmware config but I can’t find it. It is easy enough to insert a G0 Z10 into the gcode header in the slicer but that will not work when issuing G28 from the command line or the LCD display. I have to be quick and raise Z in those cases.
Once I’ve homed (and raised Z off the bed) I run a G32 S0 to probe, calculate the transformation matrix and store it to EEPROM (which you must have enabled in firmware). After that, a simple G28 home in my gcode sets Z=0 and the print starts. It’s interesting to watch the Z axis move up and down ever so slightly to “level” the bed. The first layer goes on nice and even in thickness.
One nice thing about the FSRs and probing is since I have a sensor in the front 2 corners of the bed I can probe those 2 spots and adjust one of the Z screws to get the <-X-> movement parallel to the bed. It takes a few seconds and should only need to be done once. This cuts down the amount of Z movement needed during auto level. Now seeing how easy doing a manual leveling is with the FSRs, I think an adjustable rear (center back edge) FSR holder would allow leveling manually in Y too. Then the auto level would be the “last mile” and tweak out any minor issues due to environmental changes in the machine.
Dual mixing extrusion
The E3D Cyclops is a mixing extruder - it has 2 filament feeds in and 1 nozzle. Repetier has explicit support for it. By default, no matter how you setup your gcode, the firmware advances both extruders together so you get a 50-50 mix of color. Interesting! There is a table in EEPROM that defines 16 virtual extruders. Each virtual extruder is configured to be a mix of the physical extruders and are give tool numbers like T0, T1, etc that slicers understand how to use. By default, all of these are set up to give a 50-50 mix. To create T0 that has 100% from extruder 0 and 0% from extruder 1, you simply use M163 to set the % and M164 to store the weights to a specific virtual extruder. It sounds complicated but it’s actually an elegant solution during the dark days of insufficient slicer support.
I still have work to do to really calibrate the extruders, get perfect first layers (they are perfect from a thickness perspective but they show signs of nozzle drag that can be fixed with polishing as per my guides in my signature), calibrate temperature and all the normal commissioning stuff needed to really fine tune a printer.
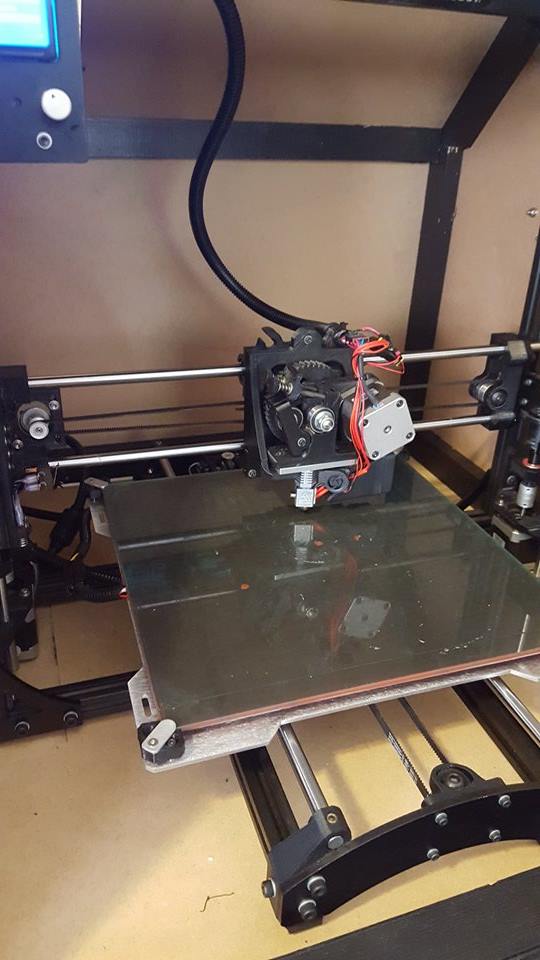
So I installed the hardened steel rods along with the linear ball bearings and dampeners. The machine is SOOOOOOOO quite compared to before. You can see my machine in the image below. Also you will notice the thin bed fingers I made out of aluminum
I was talking to someone I work with about my recent upgrade to linear ball bearings and he asked why didn’t I just use an oil impregnated bronze bushing. He stated that at slower speed they should be more accurate along with making less noise. What is your take on this?
If the ID of the bushing is even slightly greater than the OD of the smooth rod, the clearance will allow some motion. Whereas bearings can be preloaded. Also, metal on metal may wear faster - always consider applying high-quality grease with any linear bearing system (eg. PTFE SuperLube).
Also, the thingiverse page specifically mentions “you may have to ream out diameter with 5/16” drill bit to fit rods". So, getting good results may require carefully machining these to closely match your smooth rods.
In my experience, oils are not thick or persistent enough to prevent wear. SuperLube PTFE grease is great because it is thick enough to persist, yet sufficiently low-friction to use with ball-bearings.
That said, either may work, and I haven’t studied the options scientifically. As particularly extreme examples though, I have managed to get the SuperLube PTFE grease embedded in circular ball bearings used on a tractor mowing mowing deck, as well as LM8UU linear bearings on HacDC’s Prusa Mendel. In both cases, friction went down by an order of magnitude or two.
For the tractor bearings, this was done after catastrophic failure of two bearings, since which, no failures have occurred. The remaining bearings ceased to sound gritty when spun, and could spin freely for tens of seconds. Checking these bearings after several weeks of use, showed they were still slick. Other lubricants would not last. Obviously, this is a high power application, far beyond 3D printing requirements.
For the Prusa Mendel, the LM8UU’s and smooth rods were reaching unacceptable clearances in ~6 months. After applying the grease, this wear ceased to be noticable for another 1.5 years.
Personally, I think just grease is cheap and quick to apply, bearings are expensive and time consuming to replace. Also, I’ve found this grease useful and trustworthy for a wide range of applications, including corrosion prevention.
You can’t anymore, there are no additional kits being sold. Your closest and least expensive alternative will be to buy a used Taz 3 and upgrade it to 5 spec by using parts at http://i-t-w.com/parts/