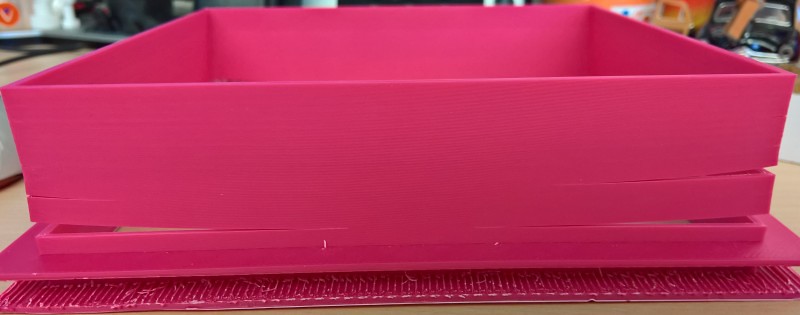
I’m working on my “Overkill Enclosure” (T-channel Aluminum and Plexiglas) and I needed to create a Duct to allow the electronics to breath fresh air. I designed this in Fusion 360 - http://a360.co/2nRzWv6. It’s basically a square tube that will seal off the Fan End of the electronics and penetrate through the plexiglas panel nearest to it - a duct. The wall thickness is 2mm throughout. I had good bed adhesion, but the corners all split once cooled. It’s printed in ABS at 240/110 on my Taz 5. This was only a test print (I had some pink loaded) and dimensionally it’s very good. I need some advice on how to minimize the corner splits.
(Corners are square and vertical - camera warped them)
Will a higher extrusion temp help?
Should I add more material to the corner?
I do have mine enclosed ghetto style (carboard) and it works OK. The splits did not happen until it cooled, after the print finished.
In addition to modifying the design, I can try some HIPS and see if the shrinkage is any better.
I want something that won’t get droopy when warm.
What I do for most of my ABS prints is this.
Bed is set to 110c
AS soon as the print is completed, I cover it with a couple of paper towels.
I leave the covered print on the bed while the bed is cooling to 50c - always for at least 30 minutes.
…
I think this gets the part uniformly hot, so some stress is relieved.
…
Then, I quickly pop the part off of the PEI surface and cover the part again.
…
I leave the covered part on the 50c bed while the nozzle is cooling.
After the nozzle temperature is below 30c I turn off the printer and leave the covered part
on the bed until the bed temperature and part temperature is at room temperature.
…
This is just what I do.
It appears to work for me.
I hope this helps you in some manner.
My taz is completely unenclosed and I get on fine with ABS.
Try filleting the corners so they’re not so sharp and drop the fill %age right down. If that doesn’t help you can try print a one or two layer thick ‘shield’ around the part which will help both to insulate and protect from draft.
It will take slightly longer and use slightly more plastic, but significantly less of either than even an eighth of a single failed print.
I tried to do this in HIPS last night and had some good results.
I put Fillets on the corners that were splitting
I still had some lifting/curling on the flanges that the Plexiglas slides into. I think that 20% support material may have been too much. I was able to heat those areas with a heat gun and straighten them out. It’s not perfect, but it will be serviceable.
Hers is the Pink ABS version next to the Black HIPS version -
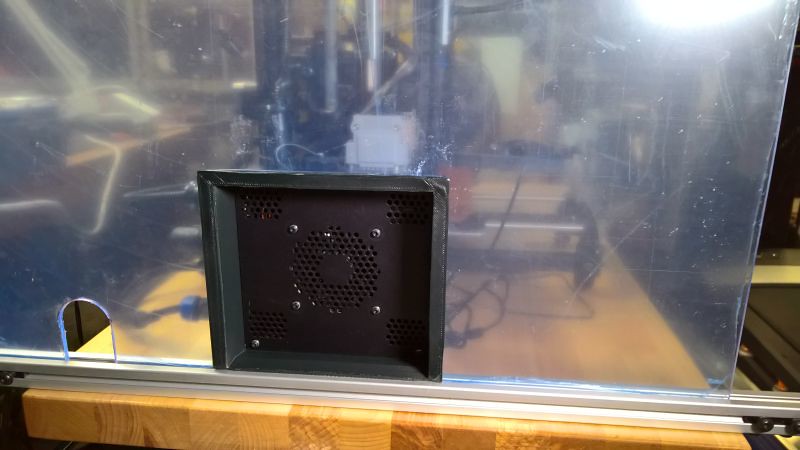
This is how it will fit on the enclosure. The Plexiglas still has the blue plastic protective film on it. I set it on a piece of T channel to test the fit. Spot on! I am going to make a “grommet” to slide in that other hole. This is the outside view -
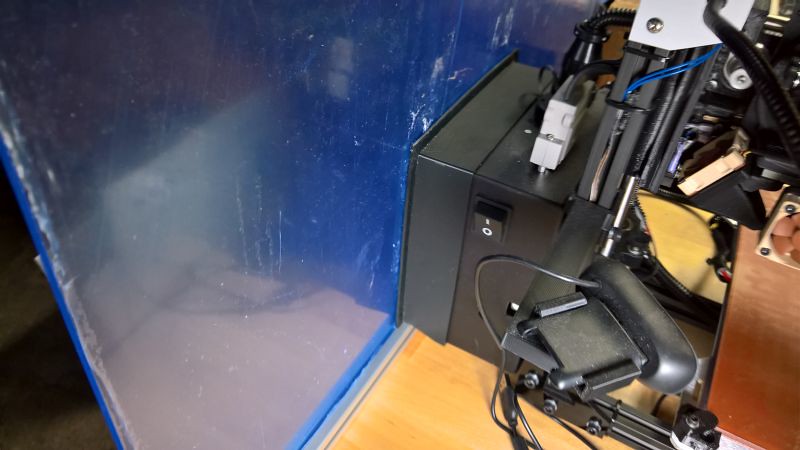
This is the inside view with the duct mated to the Electronics bay -
Thanks for your help and suggestions.
I’m getting very close to being ready to share the finished enclosure.
I’d try what kmanley57 suggested. Raise the extrusion temp by 3 - 5C, little to no cooling from the fan. If you’re worried about warping, try using a 10-perimeter by 2-layer brim if your slicing software allows… should help adhesion.