Hi all, I just received my Workhorse and I’m trying a first print with the included Polylite PLA. I can’t get it to adhere. There are so many suggestions here, but here is what I tried:
Cleaning PEI base with magic eraser
Cleaning PEI base with 70% IPA
Adjusting bed temp to 60C (though it drops to 45 after first layer - don’t know how to keep it higher)
I tried using an Elmer’s glue stick on the cleaned bed - gets a few layers further but then gets dragged. I noticed that the print settings for the material (the supplied PolyLite PLA) show a 60C build plate temp, but as I said before it only goes to 45C according to the LCD, and to my hand (feels like ~40C).
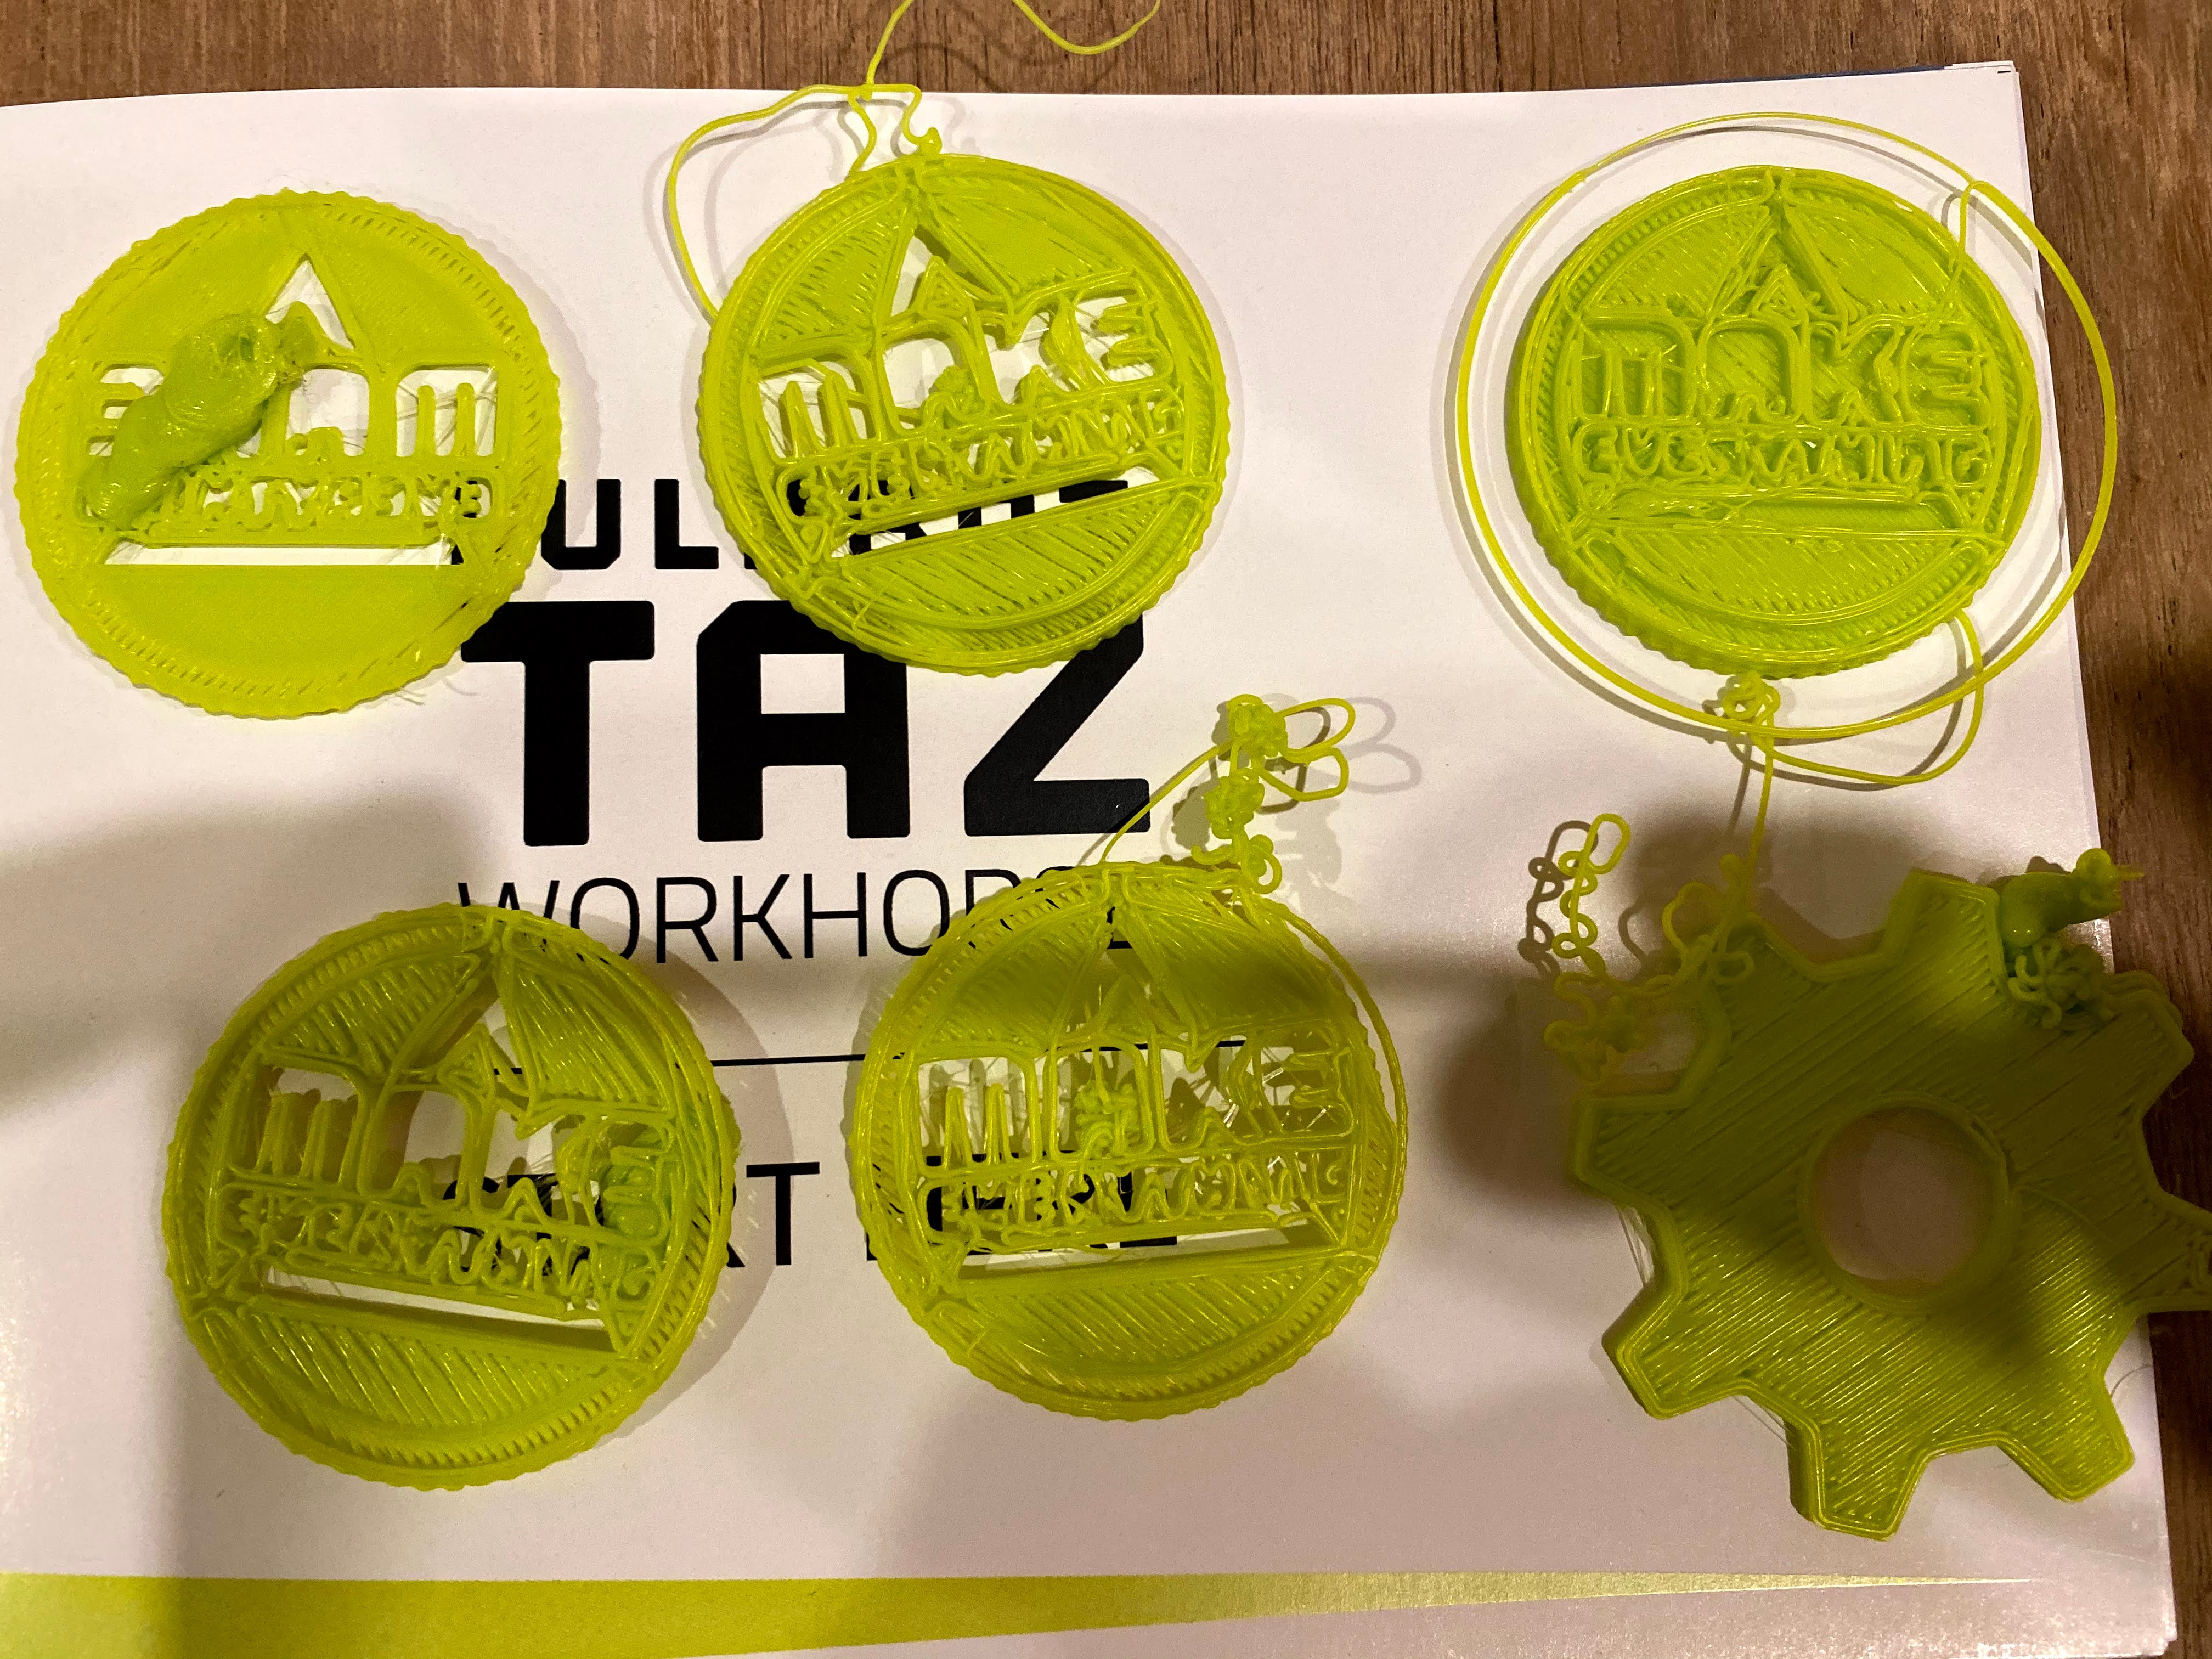
The prints are all really sloppy - there are blobs all over the current layer being printed. I checked that the Z offset is the same as in the QA sheet supplied with the machine (-0.67), as I was worried it might have been reset.
Is there a Z hop defined in the settings you’re using? Might give that a shot. It shouldn’t need to be much, I usually go with 0.2-0.3 mm.
Your bed temp discrepancies sound like a potential issue… I have a Taz 6, and it won’t even start printing until the bed is at least up to 5 degrees below the initial bed temperature (pretty sure that’s a firmware setting). Are you sure 60 degrees isn’t just the initial bed temperature setting, and 45 is the actual print temperature?
Thanks for the tips - I realised now that I was not actually setting the bed temp to 60 for the entire print, so I am now. It’s adhering better. I also set the Z hop to 0.3mm as recommended.
However, just watching it print, the nozzle is being dragged over the top layer of the print and the head is just vibrating up and down on it (this is not the Z hop - I can see and hear when that happens).
It’s as if the bed is raised in the middle by a fraction of a mm. I will try printing at the edge next to see if it’s better there.
I’ll contact support about this as it looks like I have a warped bed.
Same issue at the corner. I still can’t get a print to work and I’ve tried reducing the flow rate to 90% too. The nozzle is just too low and plows straight through the printed piece.
This was the problem. The offset as supplied from the factory was -0.67 (verified in machine and written on the QA sheet that came with the printer), but I had to adjust it to -1.20. The first layer was just glooping all over, but with this being my first 3D printer, I had no idea what to expect.
Looking at the example print supplied with my printer (and printed on my printer), the first layer seems correctly compressed. Looks like something shifted during shipping.
That sounds really strange that the Z-offset would be so high.
The machine probes the four metal washers and they act as the Z-axis 0-position. But the washers are 1.5mm thick. So the printer needs the negative offset to lower the nozzle below the height of the washers (down to the PEI or glass bed). But you wouldn’t want to go the full 1.5mm because that would put the nozzle ON the build plate and you really want to be just above it. I find 1.2 tends to be pretty good. For PLA, you want a gentle amount of “squish” to help with bed adhesion … not so much that it’s a mess, but not so little that the filament is barely touching the bed (which wouldn’t have much adhesion).
If you ever use PETG, it works better if gently laid on the bed rather than squished onto the bed (and it also needs a release agent… like PVA glue-stick (e.g. Elmer’s)). So for that stuff, I raise the offset slightly and go with -1.1.
When printing, I tend to enable the “Skirt” in Cura so that it lays filament around the part it is about to print. Inspect the skirt … make sure you are getting just a very gentle amount of squish and that the skirt is even all the way around (e.g. you don’t want one side barely touching but the other side heavily flattening/squishing as that would mean you didn’t achieve an accurate bed-level).
Thanks for the info - I had also heard the same about PETG in one of the videos I watched. For now I am just using PLA. I “live” adjusted the Z offset by examining the skirt and test piece I was printing and arrived at exactly -1.20mm.
Now for the other oddity - the included test piece (octopus) and the first piece I printed (the recommended gear wheel) have a perfect first layer. At the time I did not pay attention to the skirt that was printed. Using the same included green PLA, the next five pieces I attempted all failed due to the first layer not being put down correctly, so something must have changed between my first and second prints. I guess this will be a mystery.
The washers all appear to be correctly tightened down. I do remember now that my machine made a hell of a crashing sound when first turning on. It hit the top z limit switch without stopping in time (I checked the wires and they are fine). Though it did print correctly the first time after that.
The Z-limit switches are at the top of the gantry tower … one on the left and one on the right. Not sure why it would fail to detect the limit. I have not specifically tested the Z switches, but the X switch on mine had an issue and that’s when I discovered the switch is wired to the “normally closed” position. This means a broken wire makes the printer think it has already hit the switch (hitting the switch “opens” the connection). For that reason, my printer refused to “home” in the X axis because it thought it was already at the limit (I had to repair the wire).
But those switches detect the Z “max”. The Z “min” is detected via conductivity of the extruder nozzle with the washers. A common reason for a poor bed level is that the nozzle is dirty.
Even if the nozzle appears clean (visually) it only takes a very thin coating of material to create enough resistance that it fools the printer. I have a tiny brass wire brush (roughly the size of a toothbrush) and once the filament reaches “softening” temperature (for PLA that’s 180°C) I give the nozzle a bit of a scrub with the brush. Since developing that habit… it’s very rare that I have issues with correctly detecting the bed washers anymore (it used to be something that happened fairly often).
The nozzle is not aligned correctly with the cleaning pad on the base and I’m unsure how to correct that. Once I recognised that was happening, I was able to start cleaning the nozzle myself.
Be very careful with a “conductive” brush when cleaning a powered on printer. The thermistor and heater wires often have exposed conductors just before entering the heater block, and shorting those together could be catastrophic. I purchased some high-temperature silicone (Permatex Red) and applied it to the side of the heater block to protect those wires.
I have had the same issues with prints not sticking to the bed resulting in a huge mess when I come in the next day, one mess resulting in the bed belt snapping. We have two TAZ Pro’s and both have issues with filament not sticking to the bed. I’ve adjusted Z-offset, used glue, different bed temperatures, making sure the bed is very clean, etc…any other ideas?
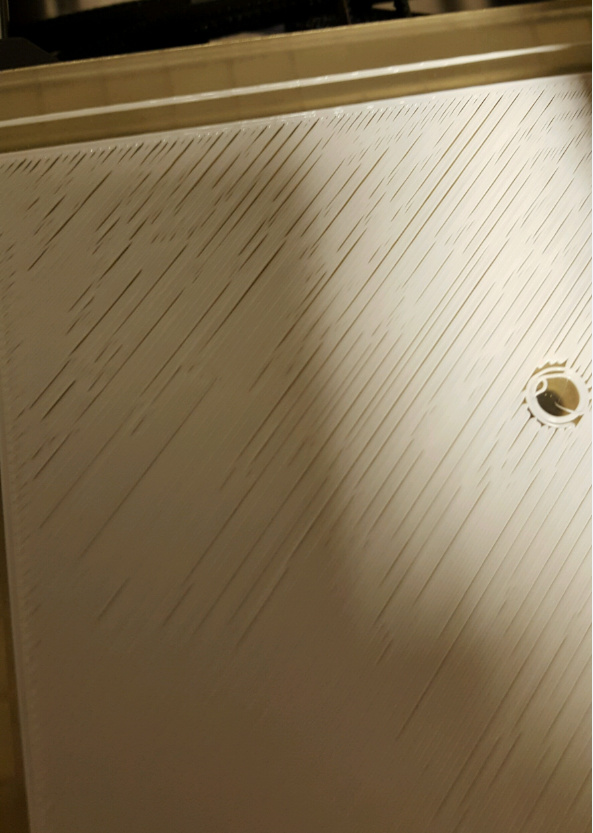
It’s difficult to tell from the photo but the gaps between the filament that has been laid down could be due to your Z offset still being too high, or the flow rate could be too low. Did you “live adjust” your Z offset while it was printing?
I allow it to start printing, stop it while checking the gap then adjust the z-offset. I’ve even had it where it was clearly too close to the bed creating too much squish. Everything else is default for PolyLite PLA for the most part except for trying different bed temps. Small prints have no problems but the large ones like the picture shows are just not doable at the moment.
I’ve literally only got a few days of experience with 3D printing, but to me that looks like you’re not putting down enough PLA to fill the gaps if your Z offset has been adjusted correctly. My top tips for better adhesion are:
Lightly wipe the print bed with a dry magic eraser (it’s slightly abrasive)
Then wipe the bed with some isopropyl alcohol
Wipe nozzle with the supplied emery pad to ensure that bed levelling works
Wipe the four silver washers on the bed corners with IPA
Increase bed temp to 60C
Have you measured the rate at which your PLA is feeding through? I’ve unfortunately not found a guide for my printer, but the gist is that you mark off 100mm on your PLA and tell the print head to feed 100mm, then adjust in software for the amount over/under.
Thanks for the reply, the gaps you’re seeing are not actual gaps, they’re sections of PLA that didn’t stick to the bed, everywhere else where it appears smooth and uniform is where the PLA adhered to the bed just fine. I had two TAZ 6 printers before the Pro’s for over 2 years and very rarely would I see any non-adhesion of the filament to the bed. The beds between the 6’s and Pro’s definitely look different and that’s why I’m wondering if the Pro beds need some fine tuning?!
I have no problem with the leveling and have tried different bed temps including 60C and lower and higher to no avail.
I’ll give the dry eraser a try. Also I’m experimenting with other filaments (Taulman, nGen) to see how they’re impacted.
The bed has a “glass” side (glossy) and a “PEI” side (dull matte finish).
You can print PLA onto clean PEI without the need of anything (bed needs to be clean).
You do want the first layer to have a little bit of a “squish” to it. You can either adjust the z-offset … or alternatively you call tell Cura to set the flow-rate above 100% for the first layer (e.g. you could try 105 or 110%, etc… I’d print a test block to make sure I’m happy and save the profile once you have it dialed in.)
You can use adhesive to help out … but with clean PEI it’s often not needed.
Commonly that’s PVA glue stick (e.g. the “Elmer’s Glue” stick … and get the purple stuff. It’s MUCH easier to see it when you apply to make sure you cover everything and it’s also MUCH easier to see when you clean it off with water. It dries clear … but is purple when wet.)
Some people use hair-spray. I don’t like that because you get over-spray.
I use something called MagiGoo … it only sticks “about the same” as Elmer’s Glue stick (PVA) but once the build plate cools off after the print completes the parts pop off the plate so easily that it’s as if they were never glued down. A single bottle lasts a LONG time. (seems expensive for such a tiny bottle… but it does last for hundreds of prints.)