Hi all,
As most already know the TAZ 5 has just been released. I bought a TAZ4 at the end of January and support fulfilled the 30 day guarantee buy sending me a fresh new Hexagon hot end. I went through the install process and now that it’s up and running I figured I write a post about the upgrade.
looks like Lulzbot shaved a tiny bit of weight off the whole print head assembly–there’s about the same amount of filament in each print head.
I thought the instructions were done really well. The only thing that I would add is that for me it was easier to remove the connector bulkhead from the electronics housing so I could see the pins easier.
Also note that the Linux software is the same for Mac OSX.
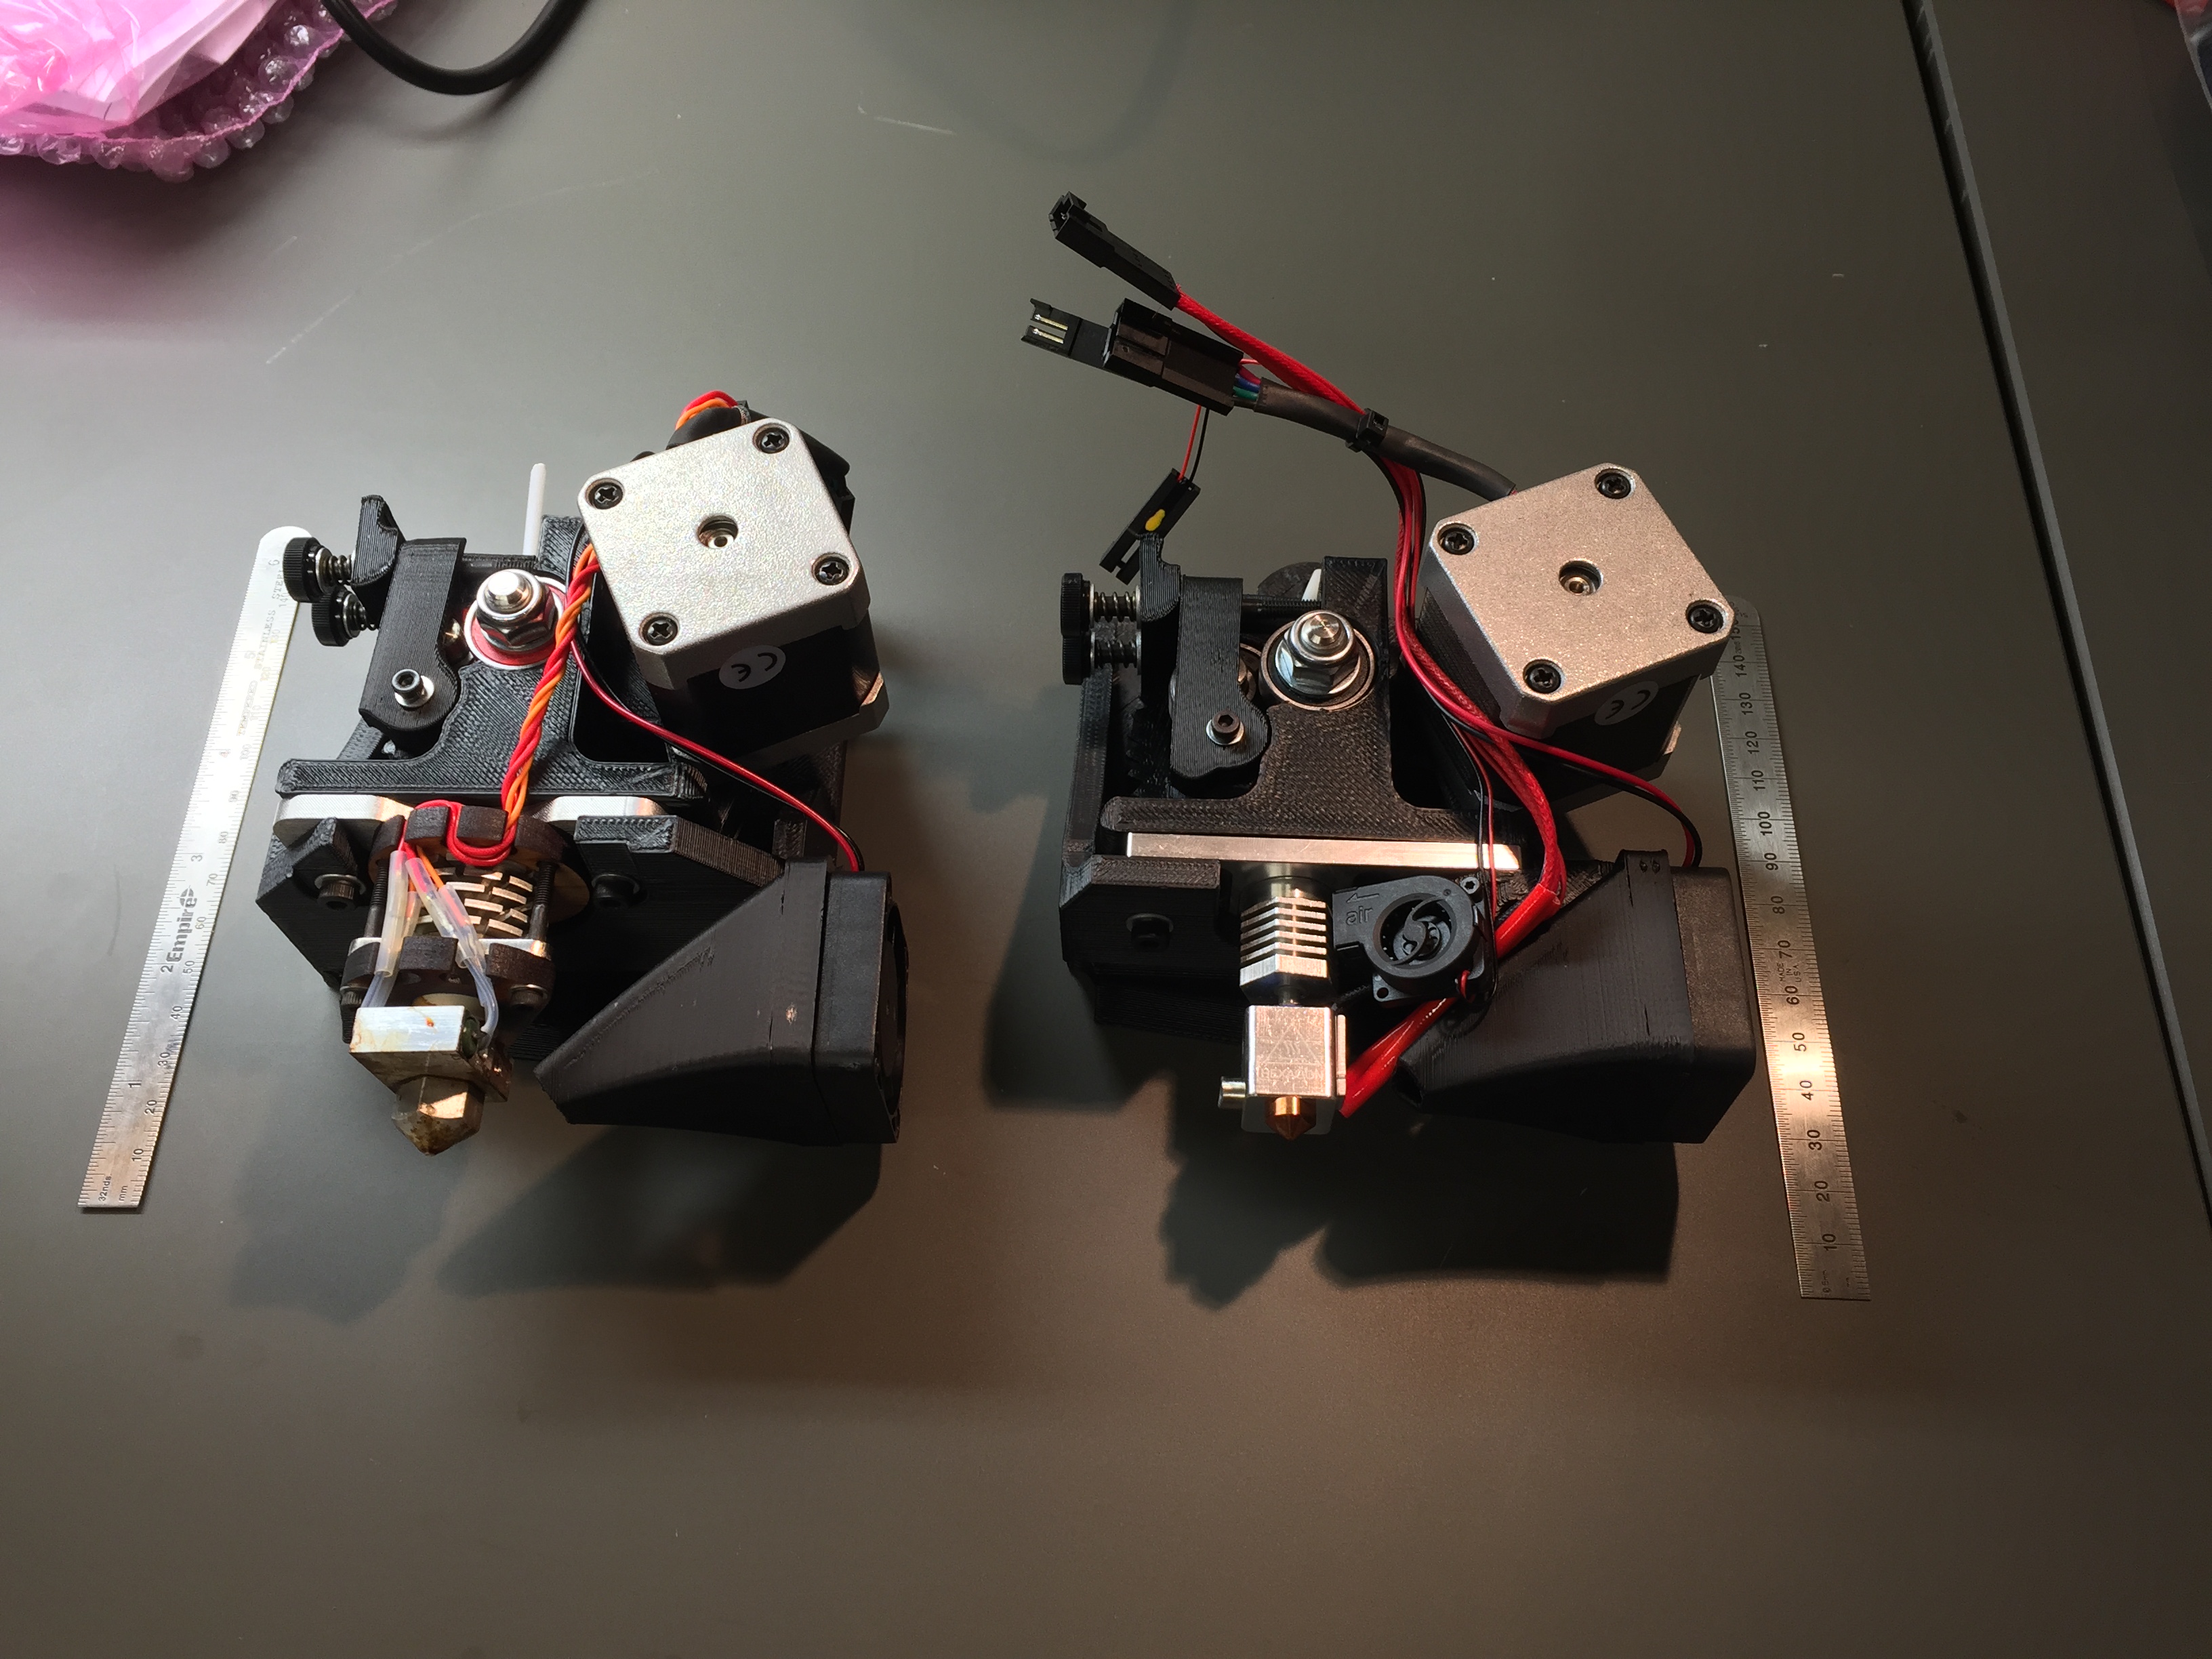
The the extruder mounting plate (as I think its called) is quite a bit different from the one designed for the budaschnozzle. The hotend it’s self is much shorter so the Wade’s mounting plate portion is closer to the toolhead mount. There is no ability to mount an extra filament cooling fan on the opposite side of the tool head as it has been made significantly less symmetrical. The compression arm looks like it has been redesigned as well, adding some extra plastic in areas that have been known to be weak in the past. Here are some side by sides so you can see some of the minor differences between the budaschnozzle 2.0 and the Fangtooth.
Nicely done. I was not aware of the weight difference.
I had a little issue on the bulkead plug as well, I ended up sticking a needle tool down through the empty hole then pushing the pin onto the needle and pushing it up (made the needle tool a guide) and this made it very easy. The instructions should have had a drawing of the bulkhead connector with identification of the proper pin numbers to make it a bit easier.
My main reasoning for the upgrade was to print stronger ABS parts (preventing Delamination) and I printed some thin test parts at 260c in ABS and broke them (on purpose) and I must say I believe the strength was double what I use to get at 240c.
When I use to break parts for testing you could see white where the bond was strong and the ABS color where there was little to no bond. On the test part printed at 260c the break was solid white.
I ended up sticking a needle tool down through the empty hole then pushing the pin onto the needle and pushing it up (made the needle tool a guide) and this made it very easy.
Way better than what I did! I also routed the hotend fan wires behind the power cables inside the box–I think I forgot to mention that part.
Glad it’s working out better for you. The hexagon nozzle is a really nice upgrade, can’t wait to hear about a dually setup.