I’m printing small keystems for an old keyboard which I designed. They are rather small - 20 mm high and about 7 mm in diameter. Since I need a lot, I tried to print 50 on my print bed. This inevitably smeared PLA everywhere.
I dialed the number back, succeeding in getting consistent quality at 10 pieces. I bumped it up to 20 and all pieces printed, but the quality degraded - specifically the layers shifted up the pieces, creating a rougher look and increasing the outside diameter enough to render them useless.
I’m guessing this is a common phenomenon with 3D printers. Any way I can combat it? Or am I stuck to printing only really small batches at a time?
Do you have any pictures to share? Also, what’s your printer and tool head model?
The part about layers shifting up is interesting. Does it not do that when only printing 10 pieces?
In my experience, printing more copies might introduce issues with cooling or Z-seams, but usually that’s about it.
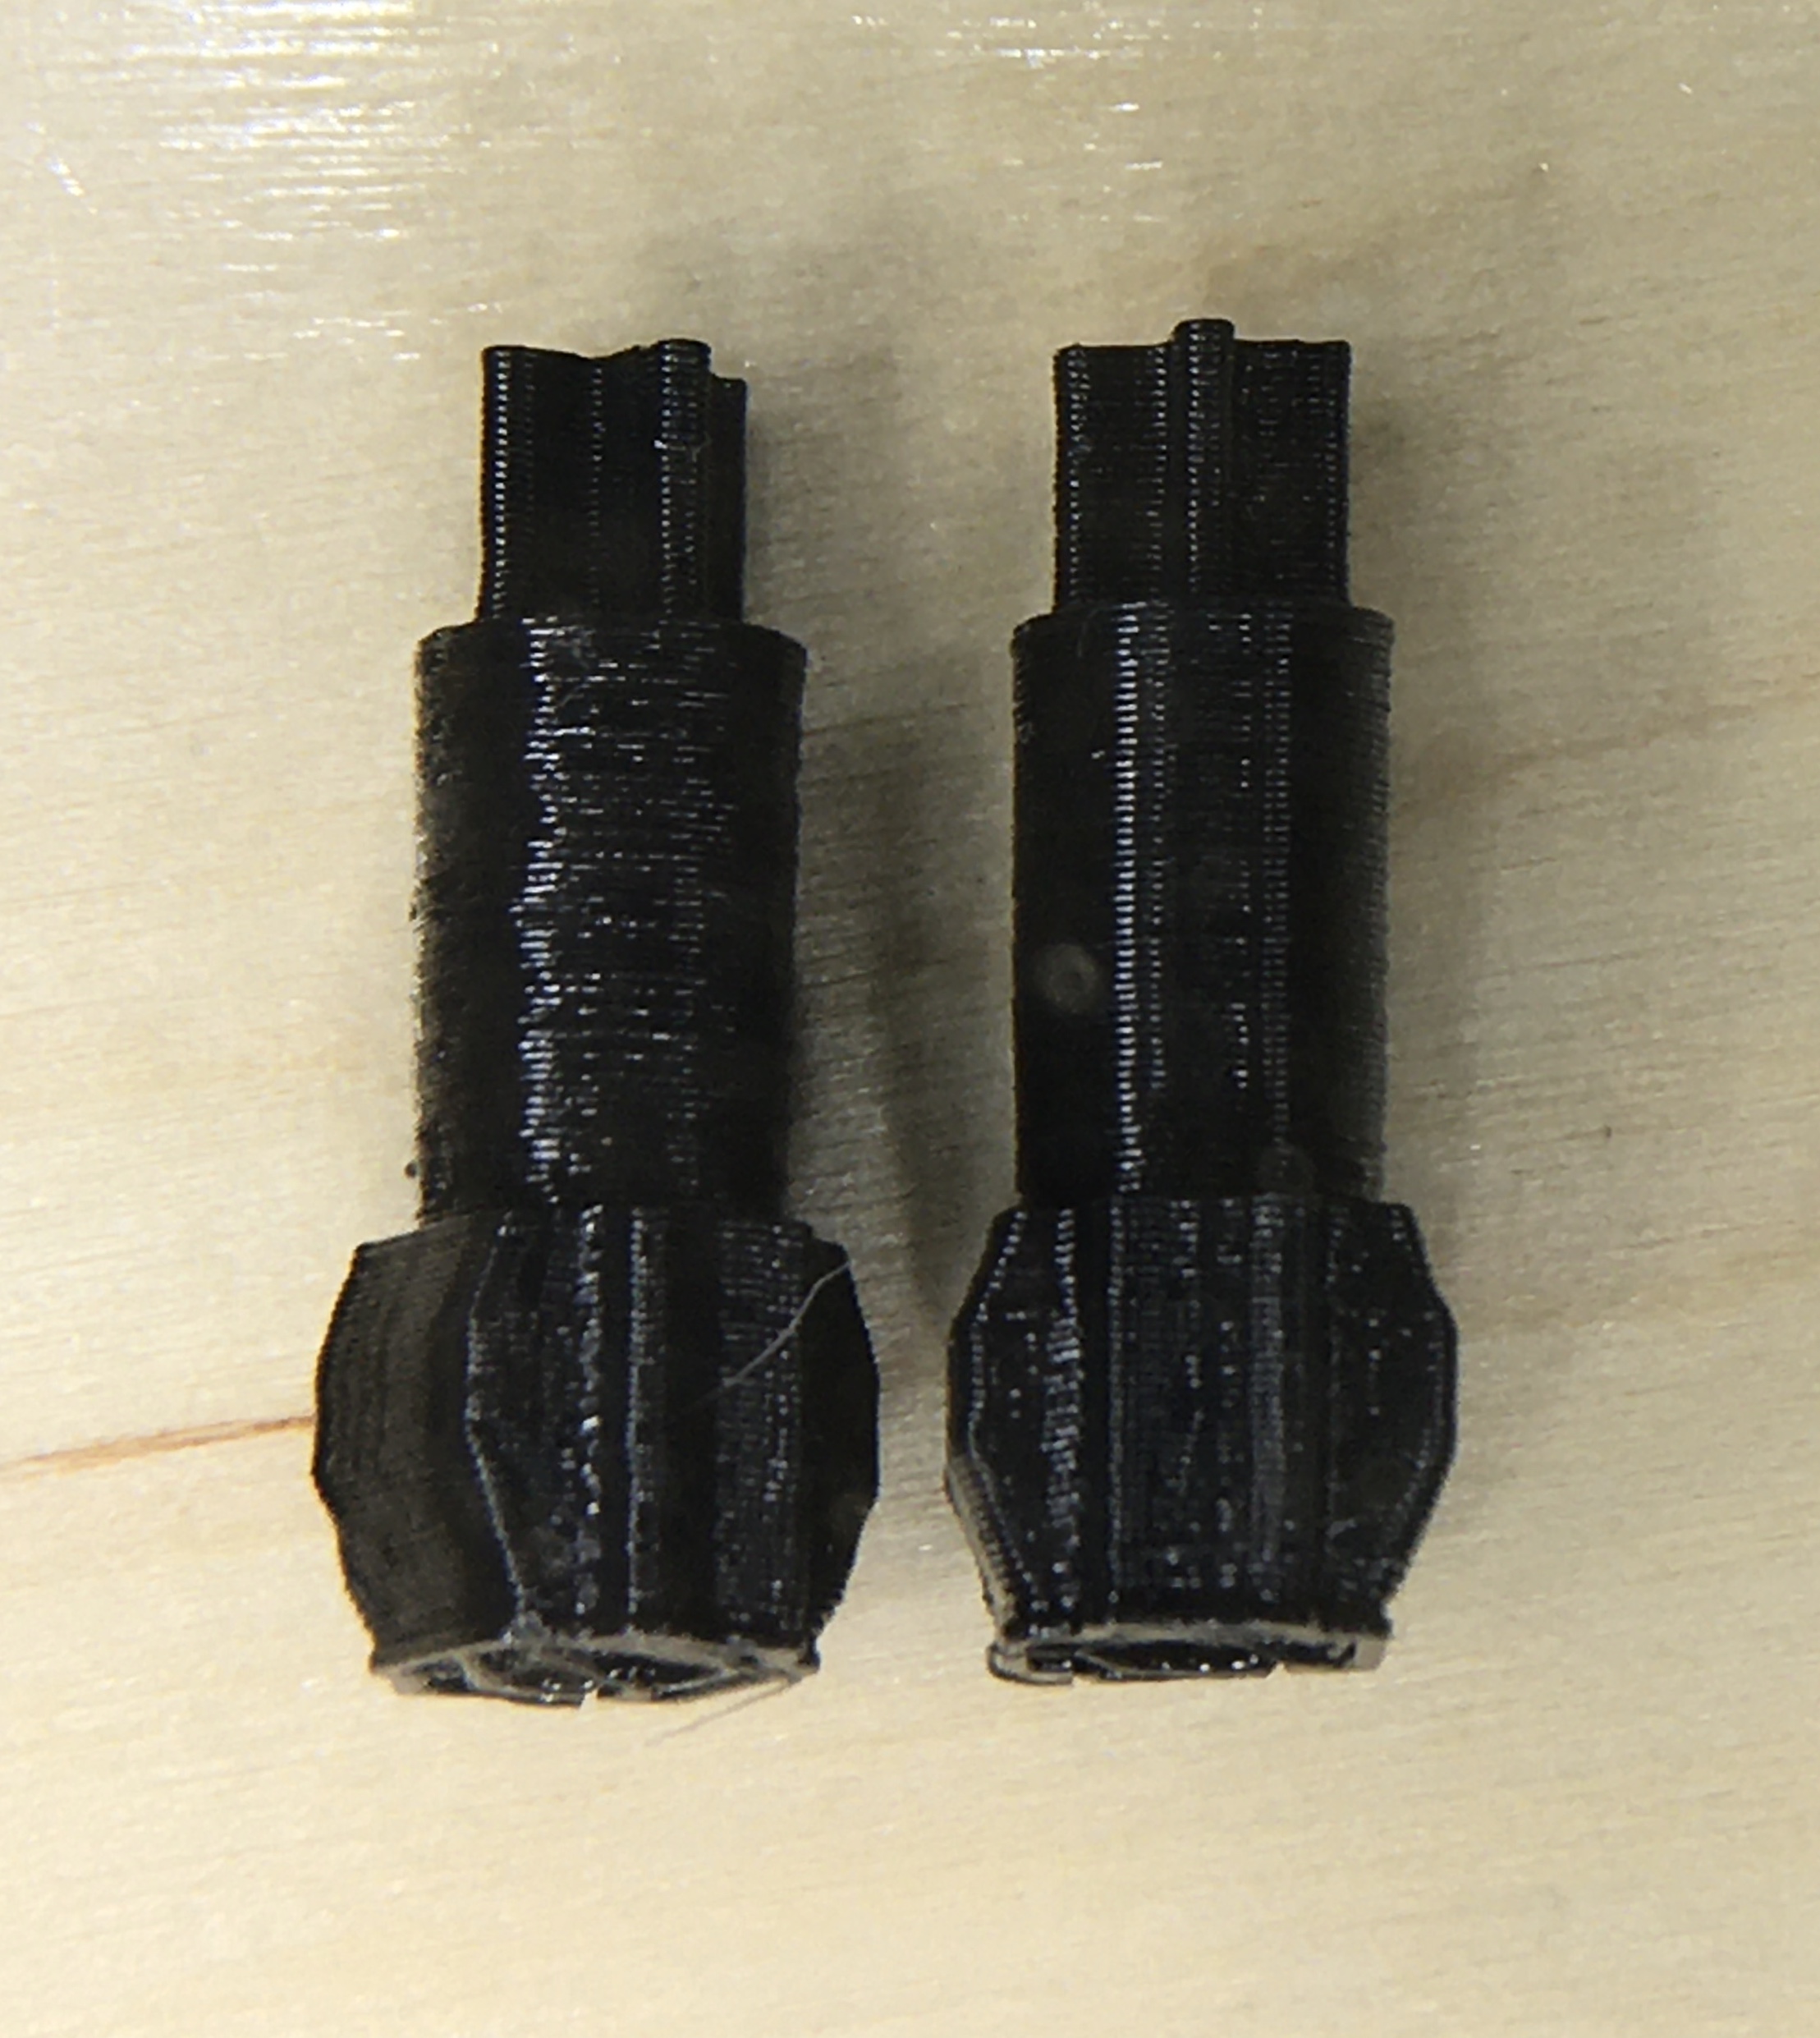
in the attached image, the piece on the right is from a 10-piece batch. The piece on the left is from a 20-piece batch. The poorer quality is clearly demonstrated by the layers having shifted slightly back and forth, which not only looks worse, but throws the barrel diameter out of spec by making it too large on average.
I’m using a Mini 2 with the standard 0.5 mm head.
Thanks for the details! My guess is it’s something involving belt tension or speed/acceleration/jerk. A couple different things to try:
- Check belt tension
a. Assuming you don’t have fancy tools, this is from the website (super old article):
b. If you do have a fancy tension meter, use step 6 of these instructions to ensure the X-Axis is 23-40 Netwons, and the Y-Axis is 23-27 Newtons.
c. If you notice this shifting is only along one axis, this is a tell-tale sign something could be up with the belt.
- Adjust jerk (and maybe acceleration and travel speed):
a. Look for ‘Enable Jerk Control’ in Cura LE under the Speed category of the Custom Print Setup. When you enable this, all the default values should be at 20. Try reducing all of these a bit, maybe to 15. Similarly, you can try playing with the ‘Enable Acceleration Control’ option above this.
b. One easy number to change is the Travel Speed. Perhaps reduce this to 150 mm/s.
My overall hypothesis is there’s excessive backlash, so with each change in direction the tool head doesn’t move to exactly where it should be. This small error might not be an issue when you have 10 pieces, but this could stack up and become more of an issue when printing more pieces. Backlash is inherent in any system like this, but the above steps might help reduce it.
1 Like
So the non-meter tension solution basically say, “if the belt seems loose or too squishy… tighten it.” Which suggests there’s really no good way to do it without a meter. I only started using the printer a month ago, and I guess the belt seems tight.
As for the second point, I’m playing with that. Dropped the “jerk” settings in half. Doesn’t seem to make a difference. Need to still play with the head acceleration values - maybe cutting those in half will help.
The thing that confuses me is why it matters how many pieces I print. Unless the gcode that Cura generates is forcing the printhead to travel farther (skipping nearby pieces) with larger numbers. If it’s not traveling any farther between pieces to print 20 at once, vs 10 at once, it shouldn’t have an effect on the quality…
The more pieces you print, the more time there is between layers on each part. This can have an effect on the quality of the parts.
I have found that the default travel speed and acceleration settings are too high for large print batches. My mini2 can really shudder under the default settings and parts sometimes detach from the build plate mid or late print.
I adjusted those settings way down using print acceleration of around 300 and travel acceleration around 500 and enabled jerk control using 20 mm/s settings. This will increase your print times.
You could also try slowing your print speeds and lowering your print temps a little bit.
If by smearing PLA everywhere you mean a part broke free and was dragged through your other parts then also try printing on a raft to keep that from happening.
1 Like
Printing small parts presents a unique challenge for FDM printers. I have found these videos to be very informative. They are about printing 28mm tabletop miniatures, but are very pertinent to your application of printing small, detailed parts:
1 Like