SOLVED: Taz 6 auto leveling is >0.5mm off (NOW PERFECT TO 0.01mm!)

You’re actively fighting the leveling system when you try introducing shims, manual leveling, and such.

First things first. Is your printer actually on a flat surface? Can you slide a piece of paper under any of the feet? If so, this is introducing twist in the frame that is going to screw up any sort of leveling. A rhombus isn’t a good foundation for a printer. If any place gets shimmed, it’s under the feet. It’s better if you can just buy a large paver stone that is quite flat first. Put that on your shelf. Shim under the stone if it’s wobbly, then put your printer on top of that. It’ll help deaden sound from the printer too.

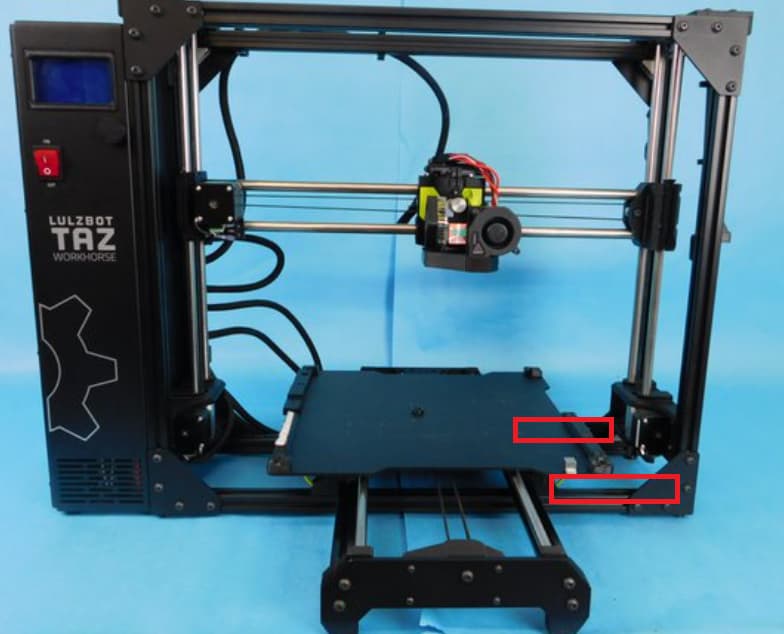
Next, measure from corner to corner of the frame - top-right to bottom-left and then top-left to bottom-right. This measurement should be the same. If it isn’t, you need to loosen up the frame on the right side, and while on a very flat surface, get those measurements to be the same.

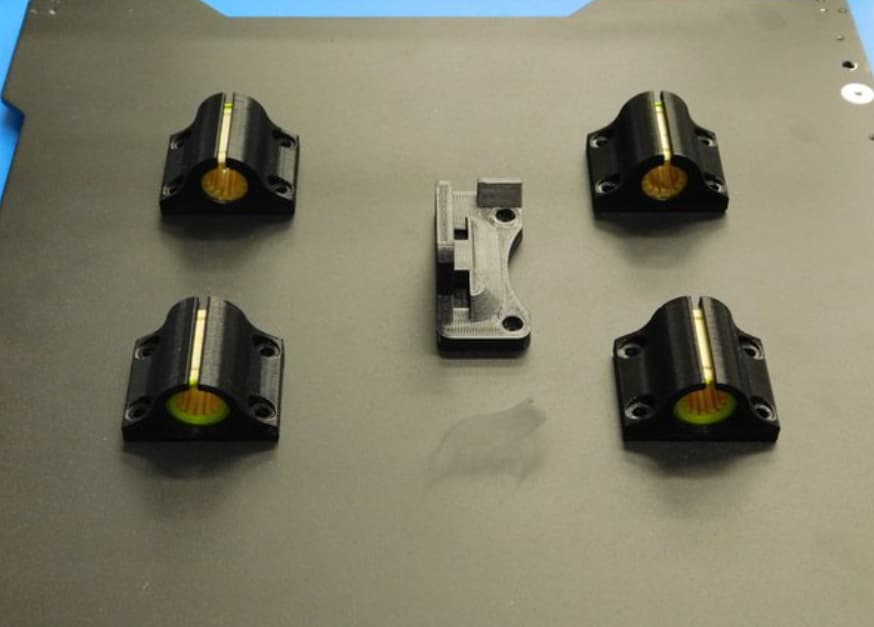
For the Y axis squareness for tramming, I just printed some spacers to go between the right frame side and the Y axis mounts. They just stay in there since they keep little plastic bits out of the frame.
Trammer.stl (56.1 KB)

With all that done, you should at least be in a good ballpark for squareness. Now ensure your gantry is parallel to the bed. Raise the Z axis until you can put an object with a solid base and top between the X-axis rod and bed. It should barely slide under the left side. Check on the right side of the bed with the same object. If it fits exactly like the left, then your gantry is parallel to the bed, and you’re done. If it is not the same, disable the motors in the motion menu, and then manually twist the threaded rod to raise/lower until your object slides into place. Then move it to the other side, and adjust that rod. You will have to go back and forth several times to get it right, since adjusting one side down affects the other slightly.

With the gantry parallel to the bed, that leaves the washer-to-bed to check. The washers are precision machined, and almost always are within spec, but you can measure them if you have a good set of calipers, just to be sure. The spacers beneath the washers are not precision machined. If they are too tall, they can prevent the washers from snugging down the bed. If they are too short, the washers can slant upward on the bed side. Both of these conditions result in the probe offset being too large. Observe my terrible MSPaint diagram:

Also note that if your TPU pads have compressed over time, you get the same result as spacers that are too tall. Shimming in this case reduces the gap between the print surface and the washer back to where it should be. No real issues with this here, but the real solution is to replace the worn parts.

And you can’t talk about Taz bed leveling without mentioning the terrible idea of using something that is frequently covered in plastic to measure an electrical connection. The nozzle can never be too clean, but is frequently too dirty. Any plastic interfering with the connection will delay sensing the washer, simulating that the corner of the bed is lower than the others, effectively reducing the Z offset for that corner.

There is no magic going on in the machine code that turns a properly assembled machine into one that probes improperly. It measures that washer, subtracts the Z offset, and assumes the bed is there. Adding shims is a crude way to try and correct for another deficiency that shouldn’t be there.

Thanks for the detailed reply @Wrathernaut.

–Is it sitting level? Yes. It’s on a Lista workbench with a 2" butcherblock top. Paper won’t slide under any feet.
–Measuring frame twist–Hard to do with the various brackets and my enclosure, but the vertical distance between the horizontal 80/20 rail is consistent within 0.75mm (1/32" via tape measure). And bottom rail under the bed is perpendicular to the verticals within 0.25mm over 100 mm.
–Washers measure 1.45-1.49mm; Standoffs measure 10.03-10.05mm (micrometer check…), TPU corners measure 9.56, 9.55, 9.57, 9.90. The taller TPU happens to be on one of the low side corners, go figure. I torque the corner washers to 3 in-lb.
–I’m not following the Y tramming/squareness, sorry. I opened the STL but am missing the application.
–Gantry is out of parallel vs. the bed by 1.75mm (checked via 1-2-3 block under the gantry, measure gap with feeler gauges.) The Workhorse Z is belt driven, not threaded rods, so I can’t adjust threaded rods a la Taz 6
–Measuring nozzle height vs. the bed, w/ no shims, there is a 2.5mm variation between corners, most of it in the X direction, corresponding to the gantry parallelism.

With the machine off, I held one Z belt, and turned the other, lowering the high side of the gantry. Re-do of M420 S0 / G28 / G29 V4 yielded this:

< [19:37:46] 0 1
< [19:37:46] 0 +1.373 +1.799
< [19:37:46] 1 +1.045 +0.702

So, it’s better, and I can probably repeat and fine tune, at least for X. I still have about the same magnitude of variation in Y though.

  1. Is this belt twist thing really the best way to level X?
  2. How is Y adjusted, if not with shims at the corners?

This post started in 2018 and the title refers to a TAZ 6. The latest entries refer to a Workhorse which is an entirely different printer. Can someone with powers please separate the Workhorse entries into a separate topic with a meaningful title.

The spacers go between the Y-axis mounts and the corner of the frame. They just sit in the rail. Looking at the frame differences, you’ll need to shorten them by about 20mm to account for the inner 90 degree frame mount in the workhorse and Pro.

The key thing is that they give you a consistent spacing in there. If they’re not properly square, your bed travels diagonally. It’s easy enough to measure by printing out a big square outline on the bed, and comparing measurements from diagonal corners.

For a culprit for the Y axis, it could be down to warping from warming the bed, but a 1mm change over 300mm is easy enough for the bed leveling to compensate for.

If I were to say there’s any worthwhile place to shim, it would be between the metal Y axis bearing holders and the plate:

Those are printed pieces, and there’s likely some variation in them. Shimming at that location will actually tilt the bed instead of trying to fake the numbers by changing the washer-to-surface distance.

I can tell you from experience, it’s super fiddly to get 4 or 8 washer/shims in between the printed part and the bottom of the build plate frame. And that was with a much smaller Mini 2.

Definitely tough to try and get it near mechanical zero on a machine that wasn’t really designed to be mechanically zeroed. Lulzbot definitely put their trust in the four-washer leveling and assembly quality to make up for any variations.

Handling during shipping and the realities of plastic on nozzles and how bad that affects electrical connections really should have been seen and better dealt with.