Hello Team,
I have a TAZ 6 that I have had for several years. The printer usually prints without a problem. I finally decided to fork up the money for a dual tool head (v3.1). At this point, either of the heads will grab the filament; it just goes in and chews it up after 1cm. I am using 2.85 filament. Here are the things I have tried and have not succeeded.
Cold Reboot
Changing tension knob, up, down, manual feed
Cold Pull
Using a mettle scrub pin, clean any residual filament residue from the feeder wheel
Disassembled the tool head to make sure there was nothing stuck in there
Both heads calibrate just fine
Tried loading with a fresh spool of ABS, PTEG, and PLA
I tried an older spool ABS and PTEG(known good)
Verified all cables are connected correctly
X, Y, Z, are all controllable
Feed wheel 1 and 2 both moving and heating on command
Using front pannel, so software should not be an issue
For what its worth, I also recalibrated to Z access using a sheet of paper
Ya, that was done. I ordered some of those tiny nozzle-cleaning thingies. Planning on doing that tonight. I just hate seeing those wheels spin and not pull any filament.
Ya, did it manually with the intention removed, with the same results. Very frustrating…
If you can’t manually push filament through, the gears definitely don’t have a chance.
The nozzle cleaning needles aren’t great, and it sounds like the clog is above the hot end.
I never really like the 3.1 design much, but try just taking off the hot end and verifying the clog is there, the way it routes filament through the body is not ideal for a badly-angled cut on the filament to navigate through.
Remove the heatbreak fan:
And the heatbreak:
You should be able to bring it up to temp disconnected from the body, and try and push through any jam. Just mind the hot nozzles when handling.
Ok, so here we are. I have one of two paths clear. I used asatone on both sides of the heartbreak down to the nosel. I used heat with and without on all of my troubleshooting.
Notice that one side will not go any deeper with the cleaning needle on either side. I tried several times to clean with acetone, with the same results.
At first, it felt like it was hitting something soft, but after a few cleanings, it felt like the needle was hitting metal.
I really would prefer not to have to pull it apart any further. In theory, could I replace the extruder hotend(hotblock and heat stop) with any that fits in the same space?
If it’s PLA plugged in there, acetone won’t do any good in cleaning it out.
Those acupuncture needles aren’t strong enough to push any jam out of the thing, especially not when it’s cold.
If it’s scorched plastic in there, then heat won’t help. Cold pulls can, but depending on the amount in there, it can take dozens (or more) of those to clear it out.
You can probably get a strong pick in from the filament side of the hot end and start scraping away at whatever is in there, but at this point, you’ve got it so disassembled that heating the jammed end and removing the nozzle is going to be the easiest way to start clearing it. Afterwards, follow standard reassembly instructions. Tighten nozzle with very little force. Heat to 180c. Tighten nozzle again with little force. Heat to 200c. Tighten nozzle again with little force. Heat to 220c. Tighten nozzle again with little force. Heat to 250c. Tighten nozzle again with little force. Heat to 270c. Tighten nozzle again with little force. Heat to 285c. Wait about 5 minutes. Tighten to 2Nm torque. Allow to cool.
I let it sit in acetone overnight. When I started poking at it in the AM, was still clogged but with a little force I was able to get it to go through with the needle. Every time, the needle came out with a little more stiky goo. I scraped it until it stopped. Now I just have to put it all back together and see if it prints.
While I was working on everything, I came across the really great article about nozzles, different types and materials and their properties.
Thanks everyone for all the help. I’ll update you when I finally print with it.
I hope this does not come across as an ad or something. It was just such a great article.
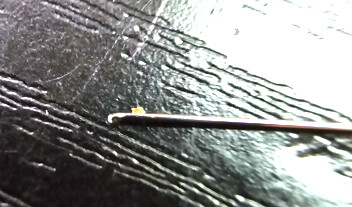
Oh, Something else that seemed to help. I dinged up the needle, like slamming the tip against something hard.
Then, when I came in from the top, I was able to get in there and spin it around to clean up any other junk on the sides, from the fins down through the hot block. Think of it like a drill.
The needle will not go in from the nozzle with the bend on it.