Anyone know how to reset the Y positioning so that the wipe pad is in sync with the nozzle?
You need to insert a G92 Yxxx command after the G28 (home) and before the wipe command (G12 or manual G1 movements) in the startup GCODE.
Thanks, will do as you suggest… in a few days. Found that my X rail bearings need to be replaced. Might be the source of the close/far variance in the print you commented on.
G92 Y???
wipe position is about 10mm in front of pad. To position it further back, use a smaller of larger value? And is the value the amount Y is off (Y-10 or Y+10)?
looks like all the wipe instructions are hard coded as 178-176. Change these values as well?
G1 X45 Y178 Z-.5 F4000 ; wiping
G1 X55 Y176 Z-.5 F4000 ; wiping
G1 X45 Y177 Z0 F4000 ; wiping
So, if it’s only wiping wrong, but the rest of the coordinates are correct, just adjust the wipe coordinates. If it’s wiping too far forward, add 10 to the Y coordinates in the wipe section.
If all the Y coordinates are wrong when printing and wiping:
G28 XYZ
G1 X10 Y10 Z10
G92 X10 Y0 Z10
Will home all three axes, move the nozzle to X10 Y10 Z10, then tell the machine that the current position is actually X10 Y0 Z10, effectively shifting Y’s physical position for any given coordinate to the rear of the machine by 10mm.
After homing all three axis, via the Console I send G0 XYZ commands to attempt positioning the nozzle over the wipe pad to determine the Y value needed. However, for Y axis I can’t enter a value high enough to be over the pad. Highest value is G0 Y200. No movement with G0 Y220 etc.
The Y position for the Z leveling routine is off by same amount as wiping.
It sounds like the Y axis is physically mounted wrong then, causing the homing position to be inaccurate.
Edit; With the machine off, can you physically move the bed far enough that the nozzle could wipe?
1 Like
Yes, I can move Y into position.
With
G28 XYZ
G0 Z0
Nozzle sits 35mm in front of wiper pad center.
I’ve looked back through the OHAI Bed Plate Assembly Workflow and can find nothing that is wrong with my reassembly unless… I’ve mounted the Y bumpers (front/back) incorrectly or messed up the electrical connections (positive/negative). Not finding pictorial or wiring documentation online to help figure this out.
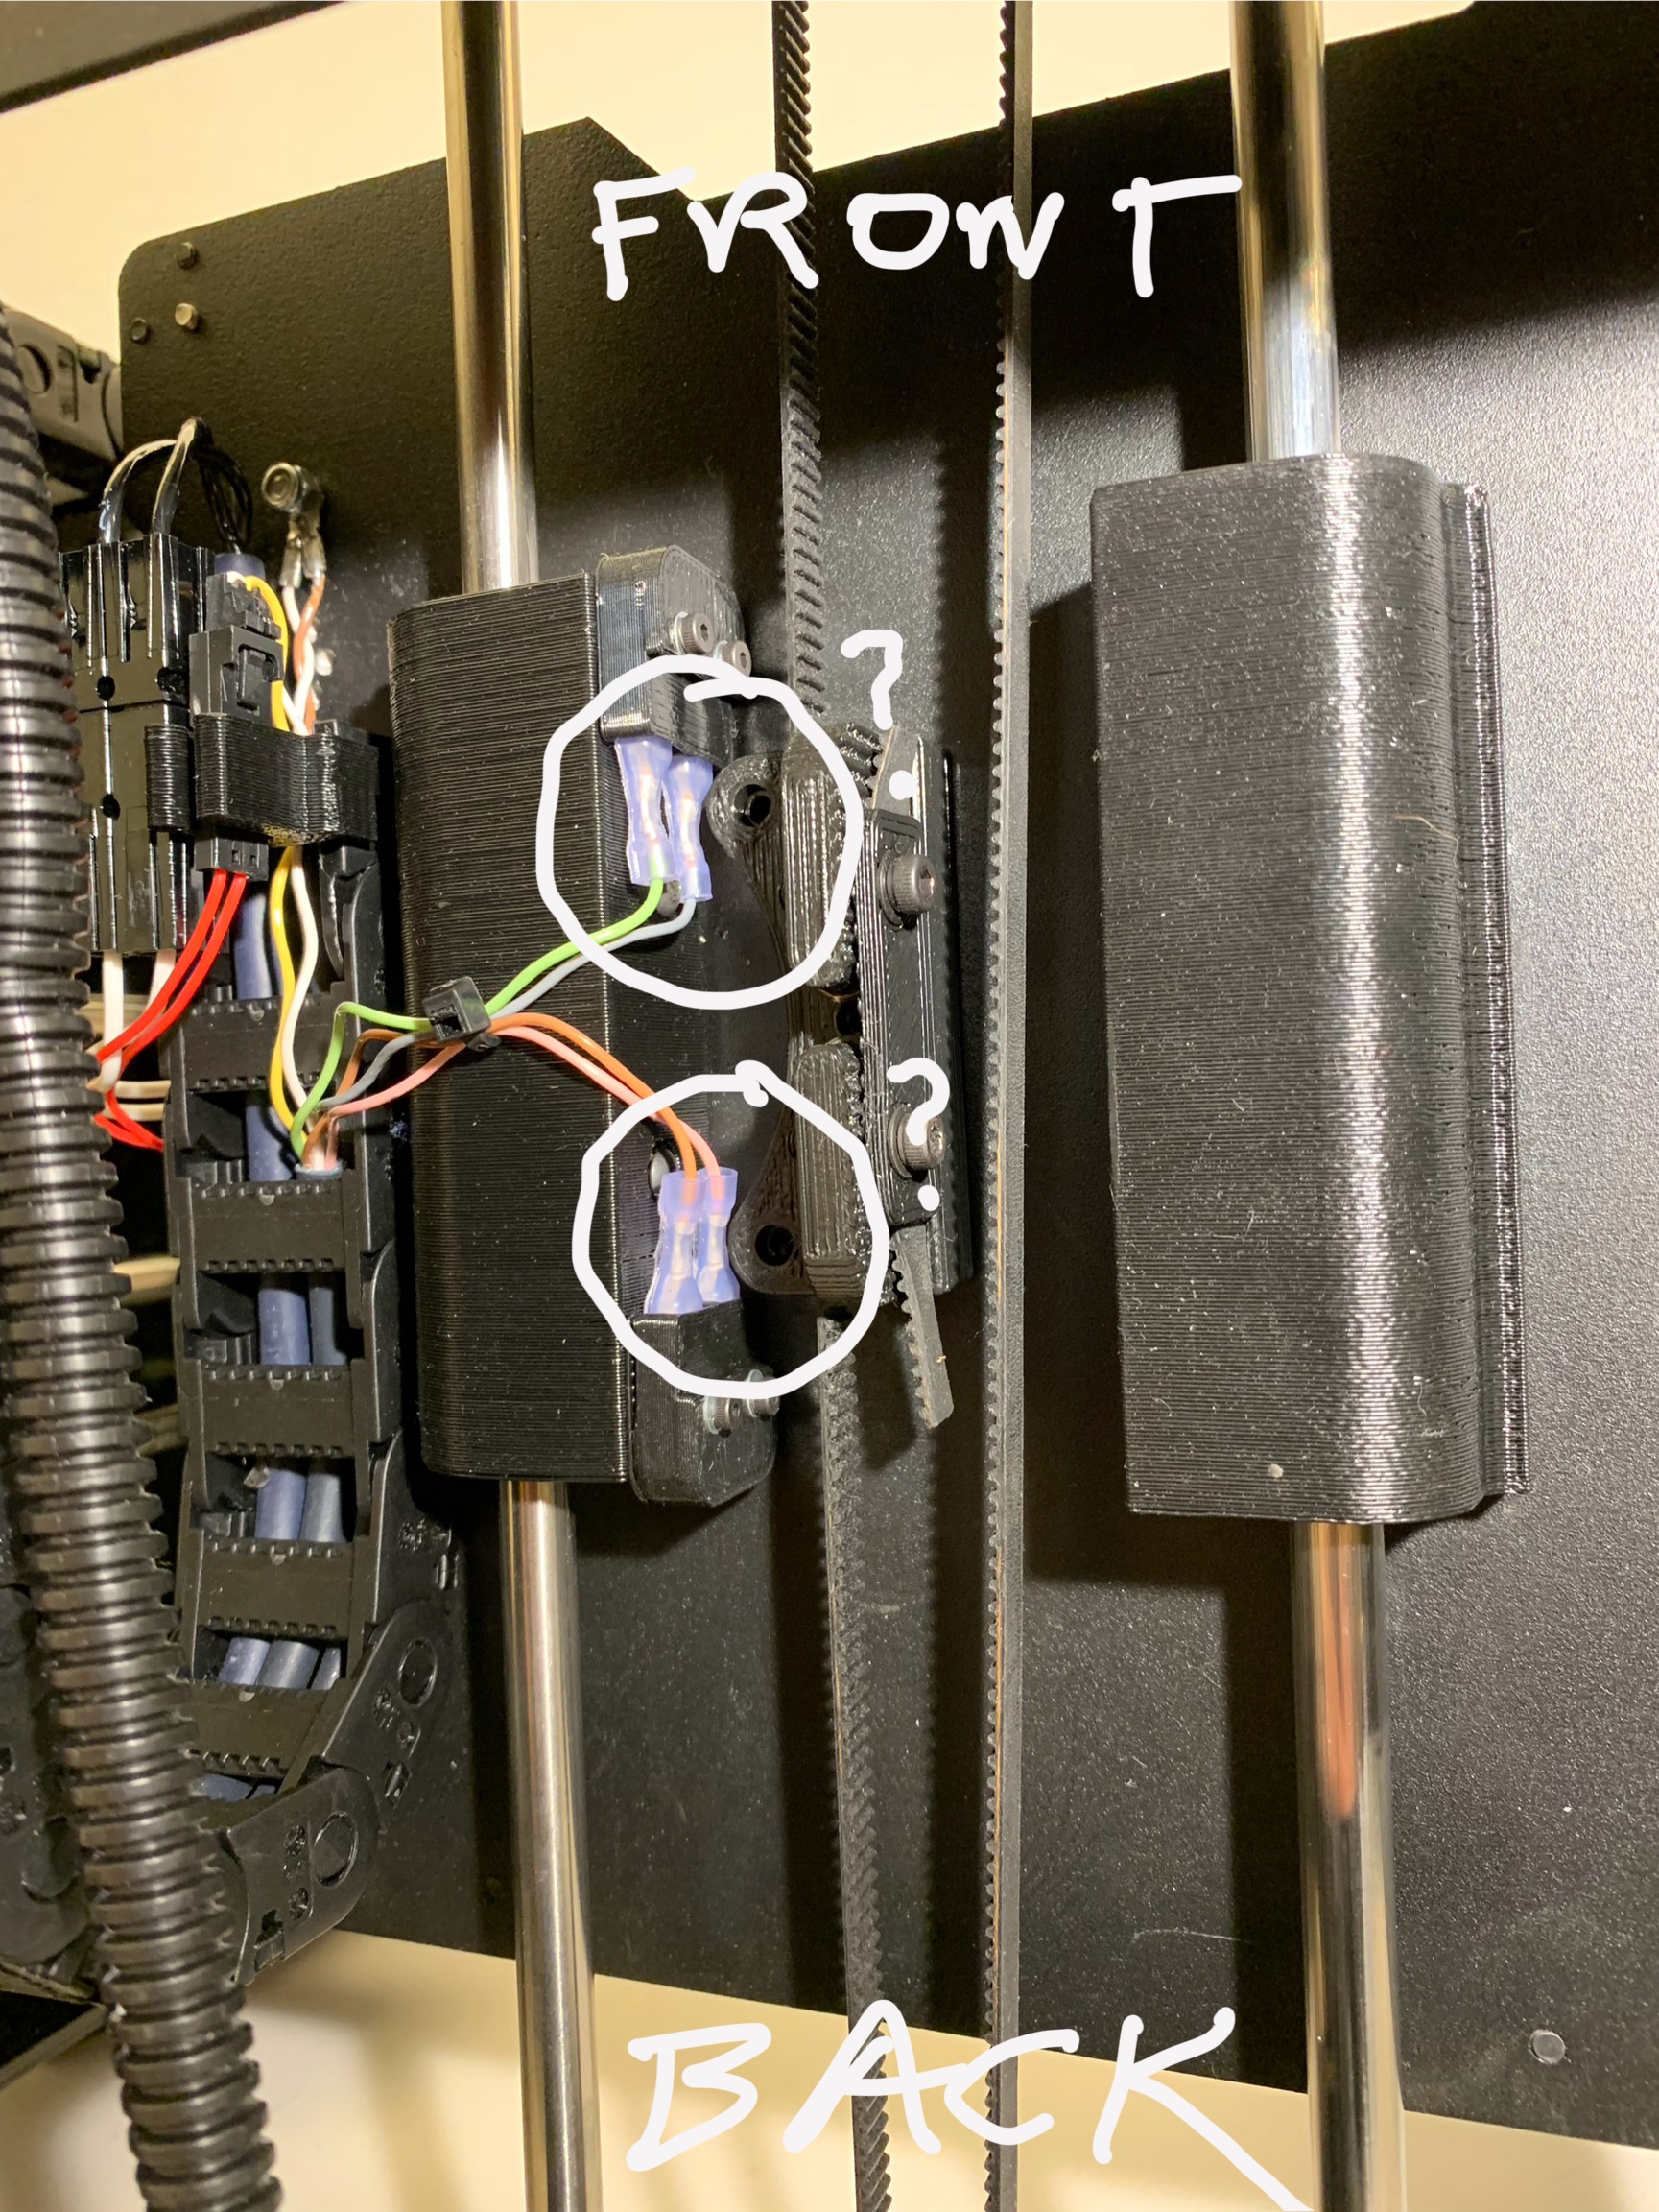
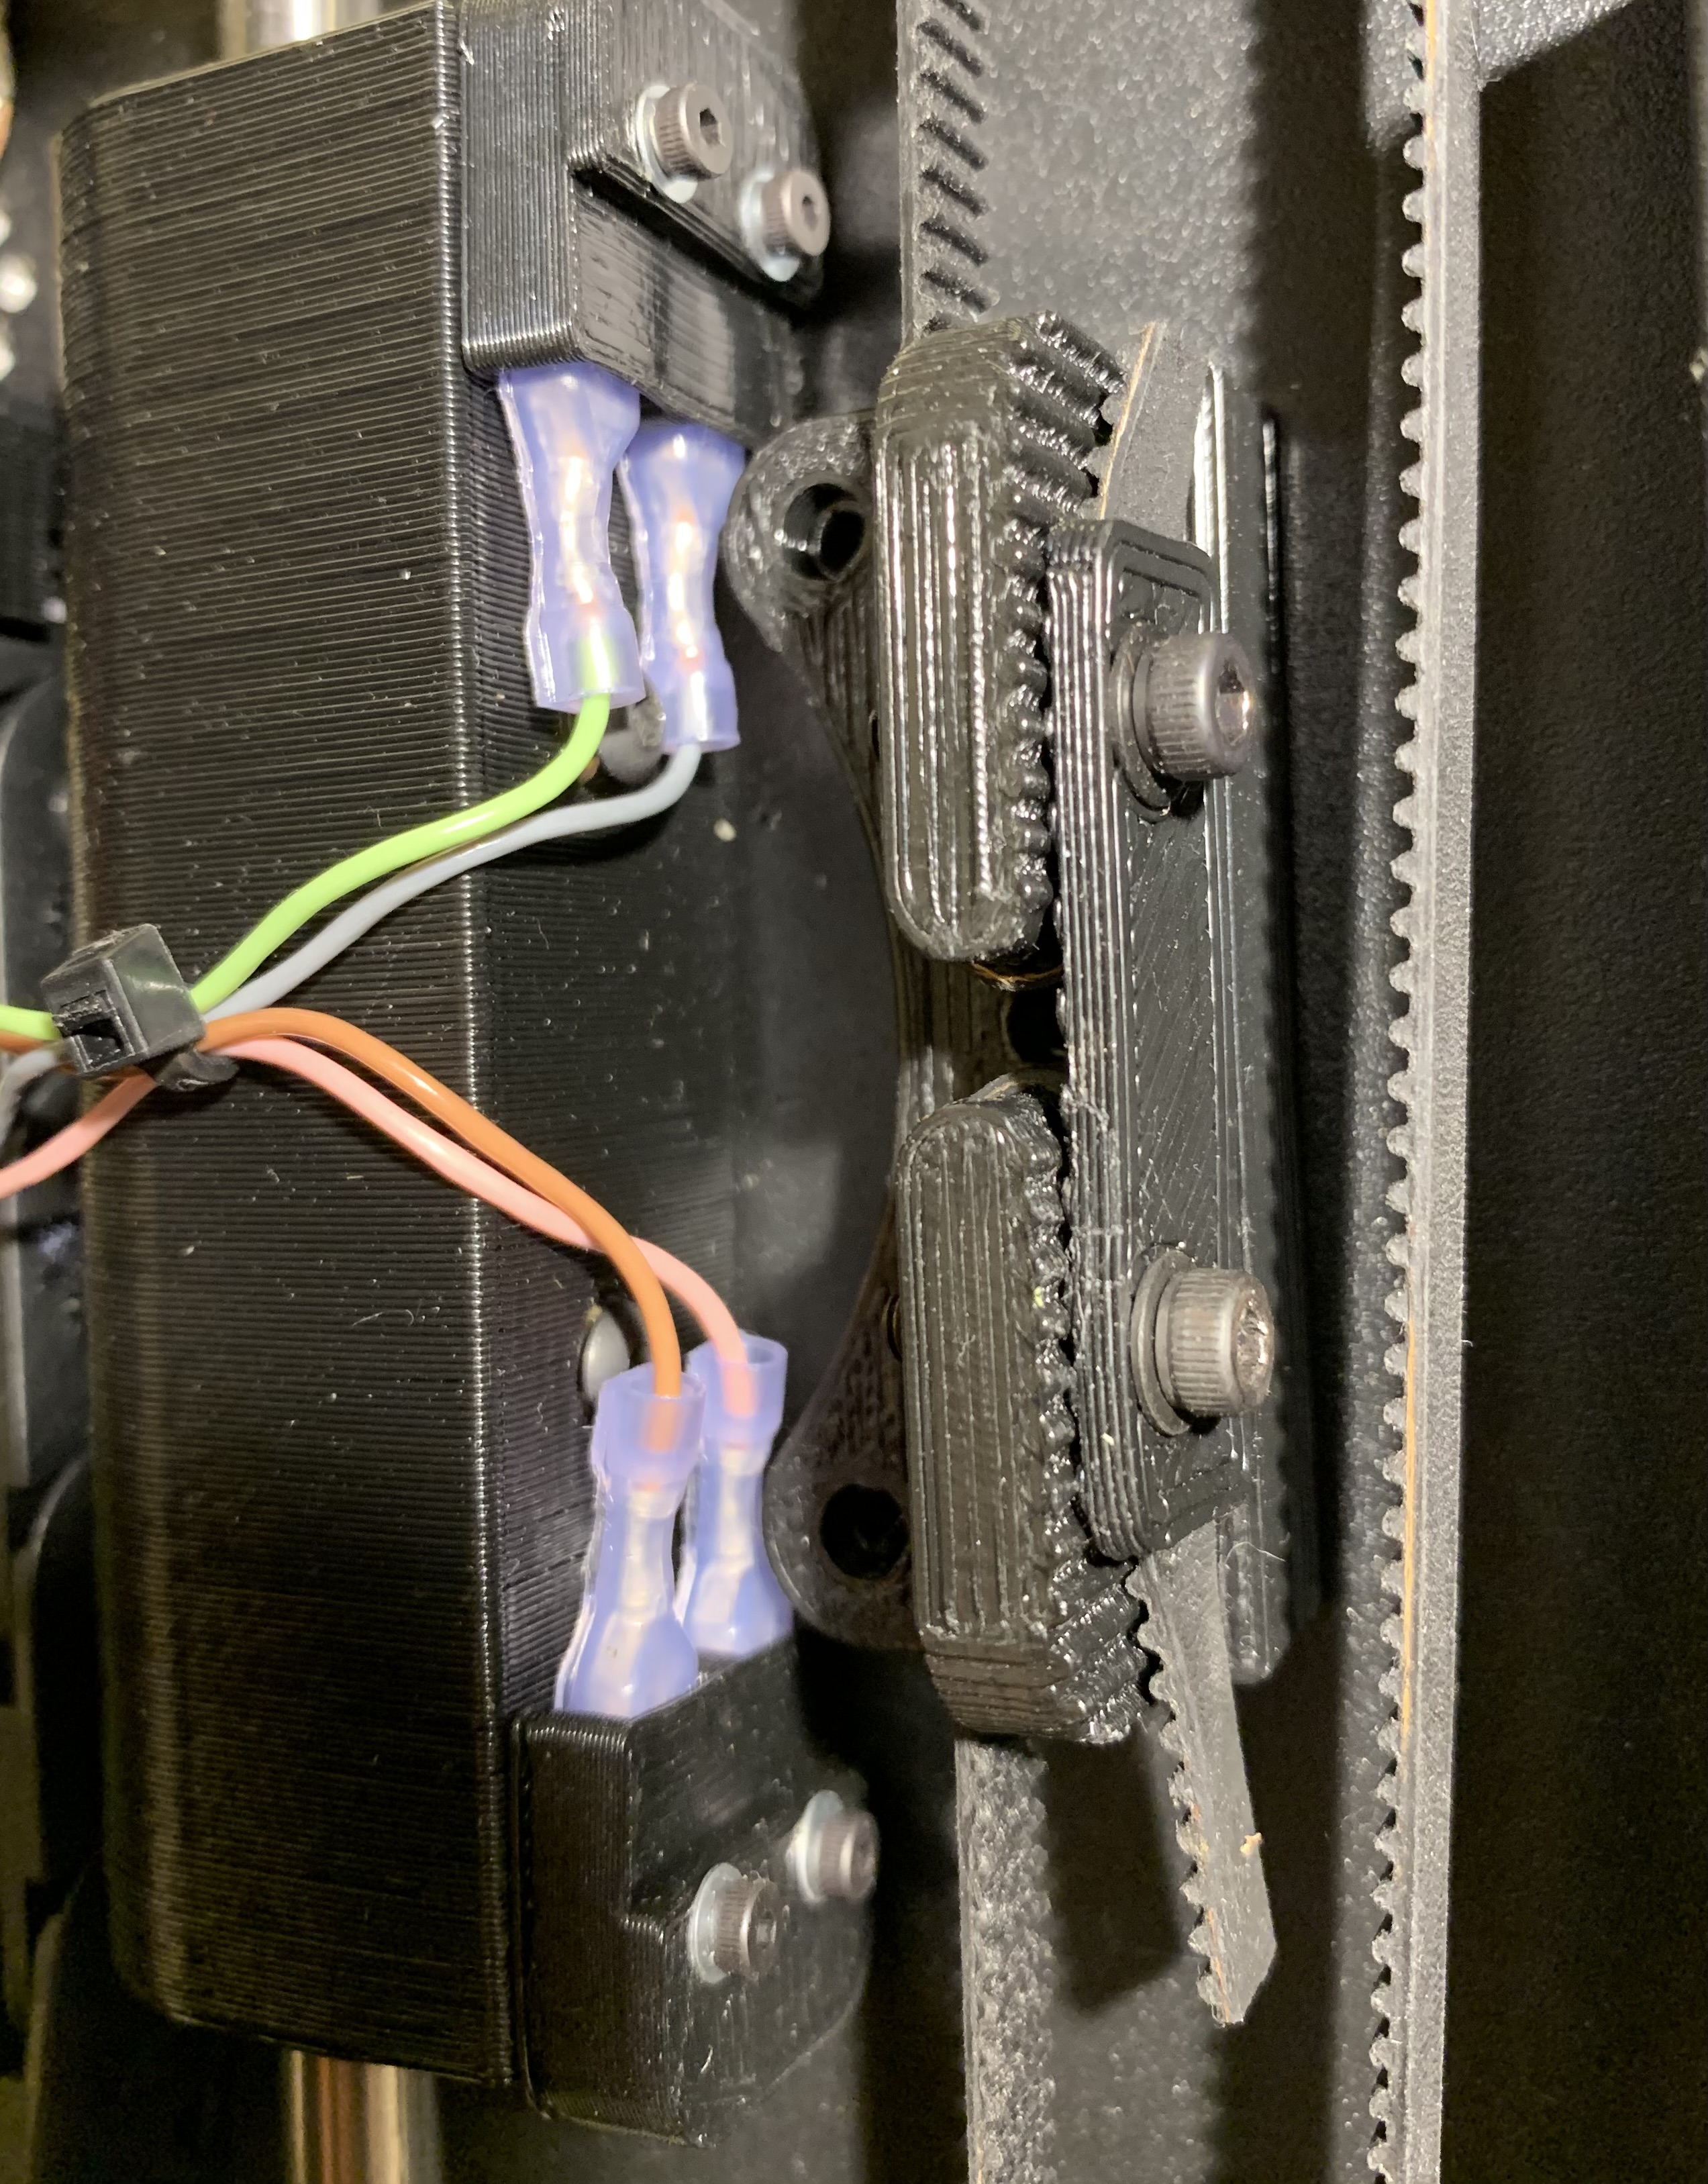
The Mini2 uses sensorless homing, so those vestigial wires don’t connect to anything.
Can you confirm that the bumpers are contacting when homing, or is something else catching and causing it to stop?
Can’t find an obstruction. Have disassembled again. When a couple of parts arrive I will carefully follow the Ohai assembly instructions.
My bearing holders house 2 each side. At what point did they move to a single bearing one side?

Still trying to get the Mini2 up and running again.
Installed CURA 3.6.40.
The machine startup code section handles wiping differently. Since nozzle is positioned 10mm in front of wipe pad, do I just change Y from zero to 10 in the first M206 command?
M109 R{material_wipe_temperature} ; wait for extruder to reach wiping temp
;M206 X0 Y0 Z0 ; uncomment to adjust wipe position (+X ~ nozzle moves left)(+Y ~ nozzle moves forward)(+Z ~ nozzle moves down)
G12 ; wiping sequence
M206 X0 Y0 Z0 ; reseting stock nozzle position ### CAUTION: changing this line can affect print quality ###
G28 X0 Y0 ; home X and Y
If the nozzle is in front of the pad when wiping, you need to subtract from the Y with the M206 command.
The M206 command says “wherever the nozzle is now, consider this its new coordinate”. So using a theoretical 100x100 bed, if you’re physically at the center of the bed (x50y50) and issue the M206 X50Y0 command, it’s going to consider the center of the bed X0Y0. When you go to wipe at the top of the bed, which is physically at the centerline of the bed and 10mm past the top, it’s now going to try and move 110mm in the Y direction, far past the top of the bed. If you instead gave a M206 X50Y40 from the center of the bed, it would move 70mm in the Y direction when given the command to move to the wipe spot.
But there still shouldn’t be a need to do this, it’s treating the symptoms, not the root problem.
bump pads vs limit switches
Which is more accurate?
Possible for mini2 to use limit switch signals?
Ultimachin offers option for switches with Einsy board.
Limit switches.
Sensorless is accurate to 1-4 microsteps, while microswitches are somewhere around 0.001mm.
Mini2 could use switches just fine if you configured Marlin to use them. I think all the bump pads mounts are dimensionally identical to standard microswitches. Wiring would be the most frustrating part, assuming you are familiar with building Marlin.
With bump pads, is limit determined by some torque and voltage increase via stepper signal?
Would not know how to modify Marlin
Yes, it’s sensed by the increase in power draw from the motor. It’s plenty accurate for x/y where starting position can vary without affecting the print, but it’s not good enough for Z.
Marlin’s pretty easy, with a few good guides online. I don’t really program, but it’s mostly just selecting options from a list of what to enable/disable.
Are the two screws that are in-line with the Y stainless rods (back of Y stepper mount) intended to take up any play (front-to-back) regarding rod length? Ohai notes indicate they should be flush with back face of mount.
I am not completely sure what you’re asking, can you post an image of what you’re referring to?