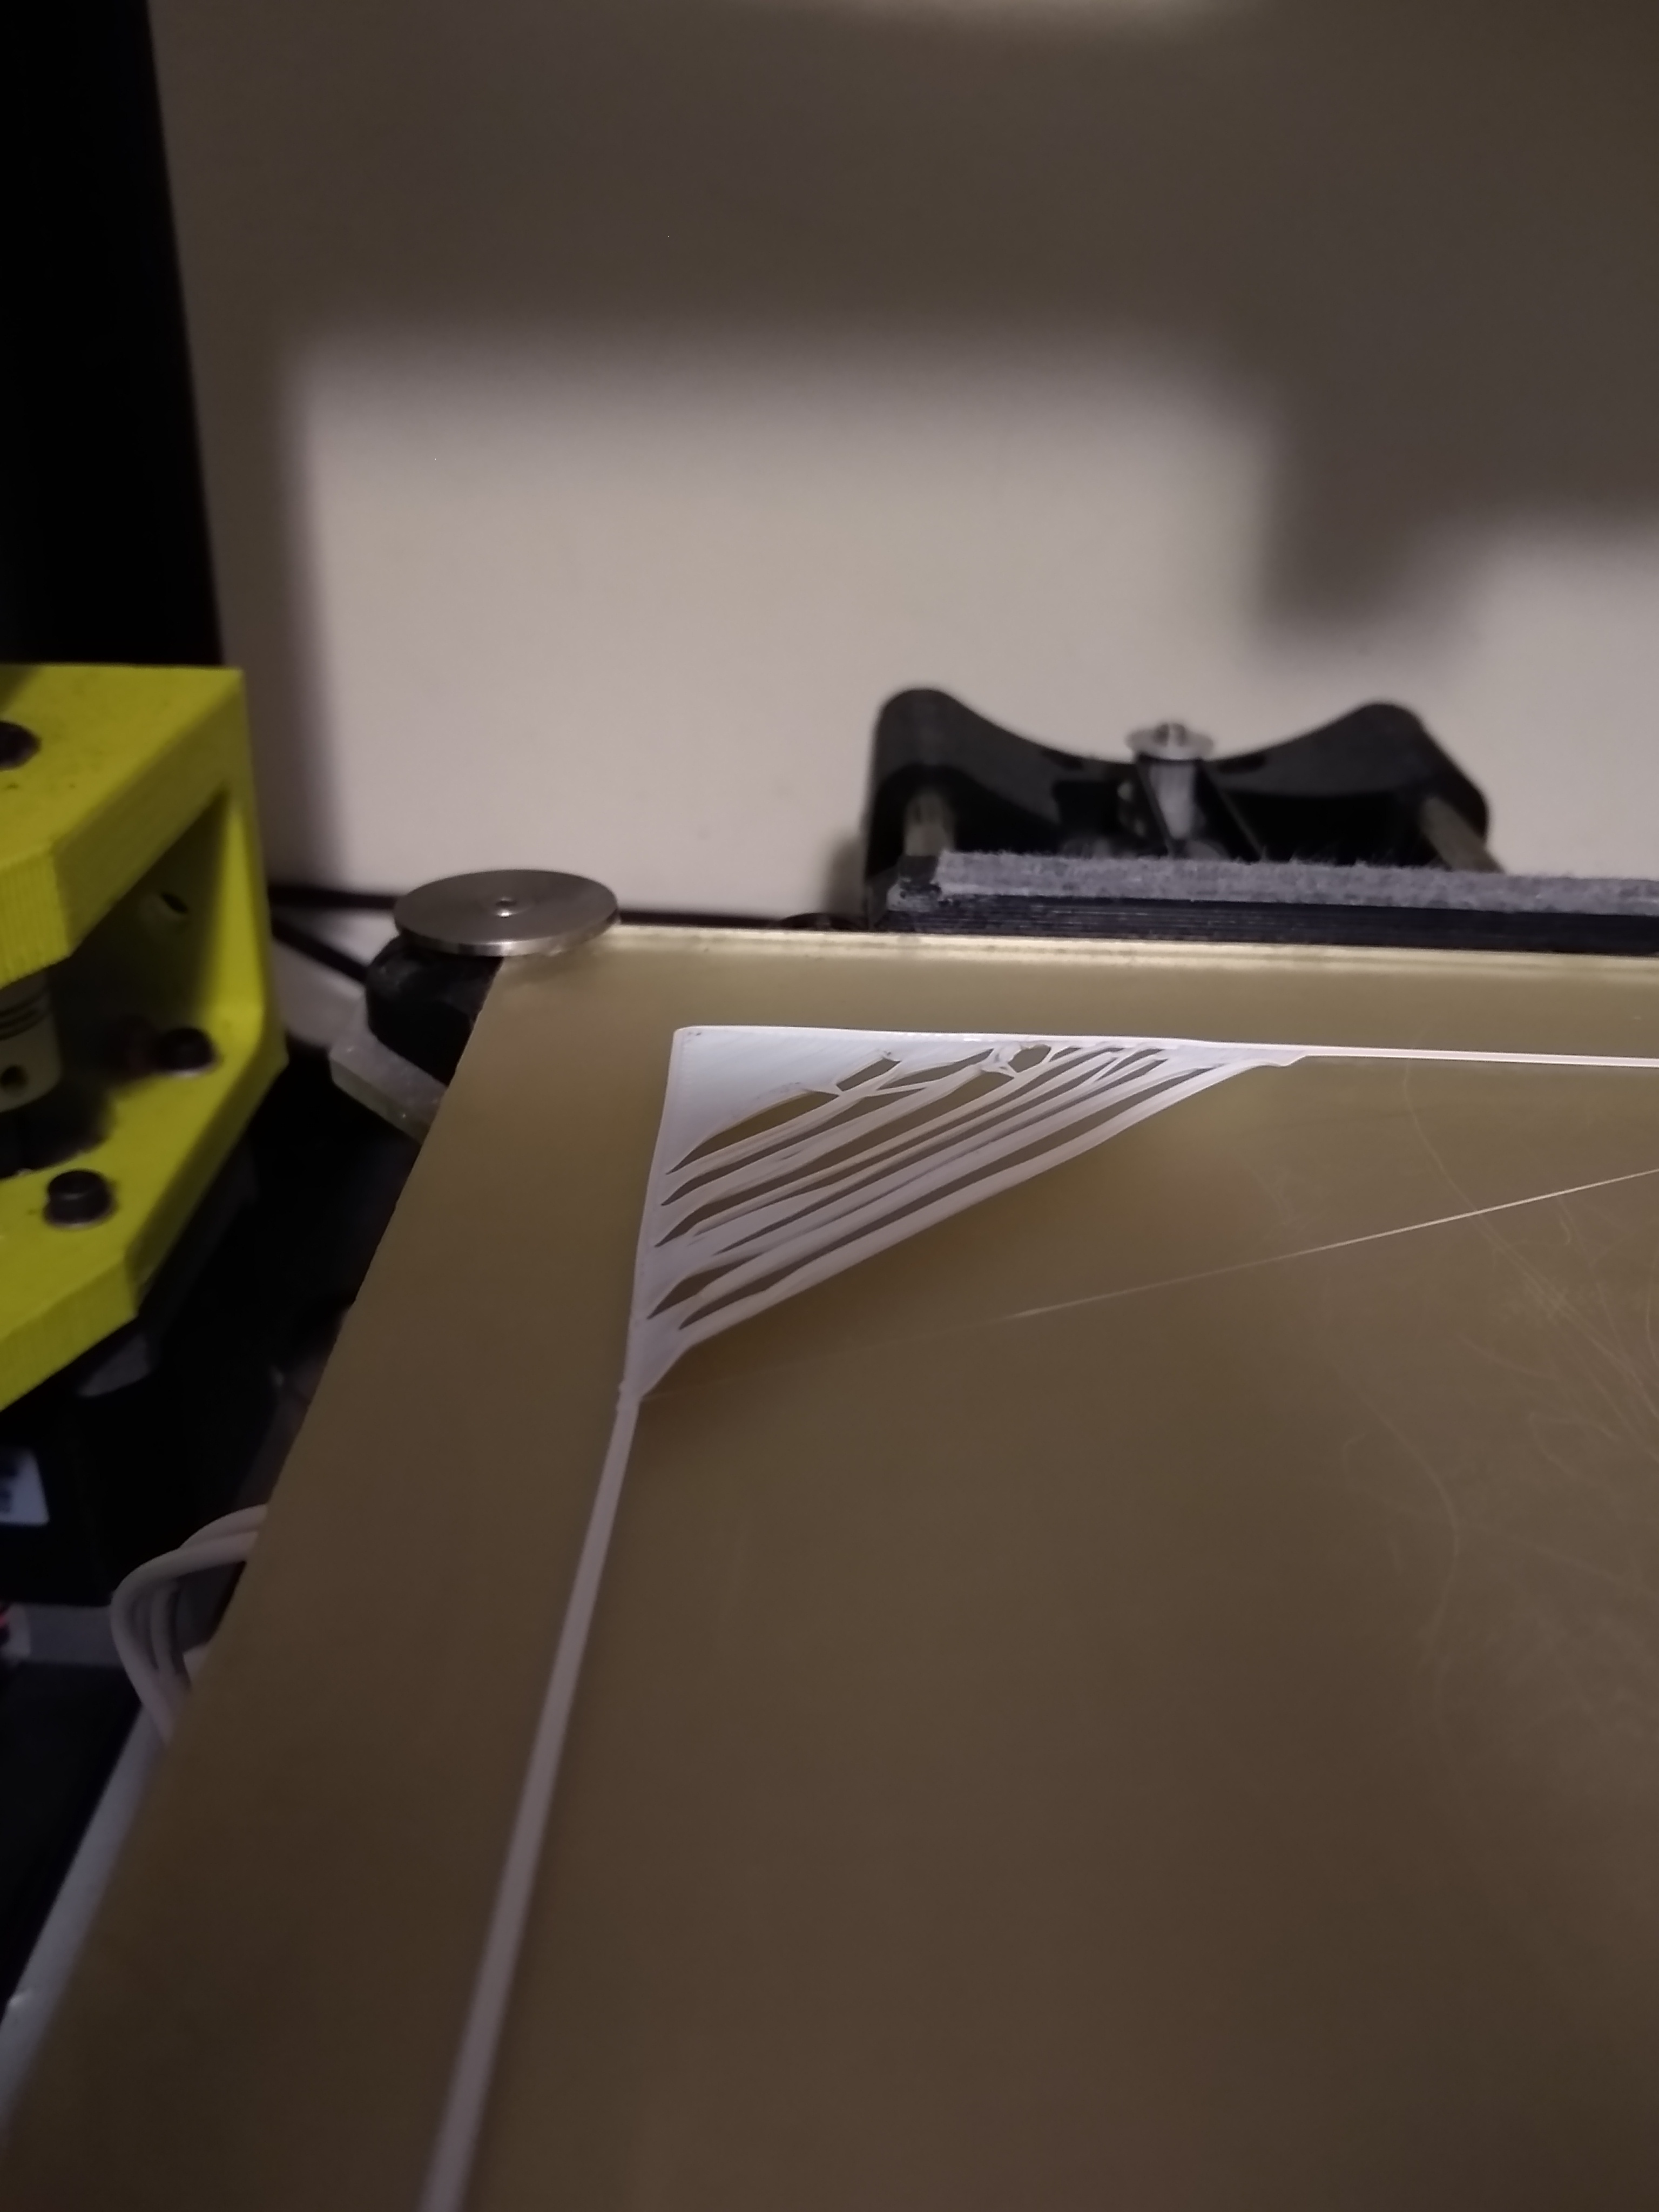
I recently swapped out my original nozzle for an E3D 0.4mm hardened steel one in my Mini 1. I updated Cura’s configuration to accommodate the new nozzle, and am getting prints bad enough that I cancel them. Here’s an image:
It looks to me like this is mostly a problem with adhering to the bed; is that right? I’m printing with PLA Pro from MatterHackers; I’ve tried a range of different temperatures from 210C to 220C with very little difference between them, except that at 220 I start to get some hair showing up.
I’ve also tried changing the Z Offset to values from -0.9 to -1.2; no luck there.
My next attempt will probably to try blue tape to see if that helps.
Any other ideas? I’m worried that I haven’t diagnosed the problem correctly.
-1.2 is very far away, .9 is even further. Ground zero is the the top of the bed’s corner washer. The washer is 1.5 to 1.6mm thick(mine measure’s to be 1.6mm). I run my prints with the z-offset set to approximately-1.4 to -1.45.
What is your initial layer height set to? A good rule of thumb is to set it to 65% of your nozzle’s width (more really won’t hurt).
What is your initial flow rate? It should be 100%.
The nozzle’s cooling fan (side fan not the heat-sink fan). Should also be off on initial layer. Default is set to off so more than likely it is.
What type of 0.4mm nozzle? (I’m going to guess hardened steel). Steel doesn’t conduct heat as well as brass so temperatures are usually higher. Best way to figure this out is to print a temperature tower. What bed temperature are you using? What fan speed (first layer should be off, with PLA 100% at Z=1 mm and above)?
You may also need to print slower again because of the slower heat transfer.
Thanks for your response; it was very helpful. At a Z offset of -1.40, I got a significant improvement, but not enough. -1.45 so far is working well; as I type this I’m in the middle of my second layer.
Thanks for the information. JoeBowler300’s post seems to have done the trick, but I’m going to keep your ideas in mind. I’m ignorant about a couple of things that you mention, though; what are a “temperature tower” and “E-steps calibration”?
Don’t worry about the actual Z value go by how the first layer prints. I’ve gone from -1.2 to -1.5. It also varies with material too. As long as your not digging into the bed you’re good.
Search this forum for “temperature tower” and “e step calibration”.
Search the internet for “3d print temperature tower” and “3d print e step calibration”.
This forum will find mostly text descriptions / procedures. The internet will add videos.
A temperature tower is a P.I.T.A. to setup because for most of them, you have to edit the G-code. However, once you have one (or more) setup, they are very useful in dialing in the proper temperature for each filament type, filament brand, and/or color.
E-step calibration is usually done once for each tool head and eliminates one of the causes of under and/or over extrusion.
There are other “calibration” or “test” prints that can help dial in your printer / slicer settings. The classic one is a 3DBenchy. Search the internet for “3d printer calibration objects”.
That looks like under extrusion. Corner starts out okay since PLA is hot enough when it starts but cools down some as it gets into the longer paths. Check estep calibration and make sure you are printing at a hot enough temperature. Did you also switch to 1.75mm PLA? If so make sure CURA profile has 1.75.