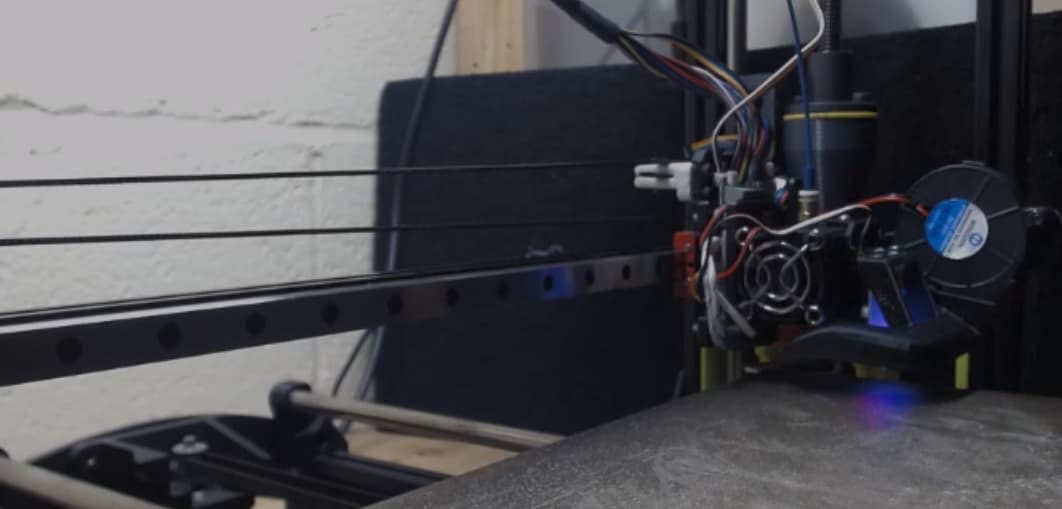
I got klipper firmware compiled and flashed to the Rambo board OK. I used TAZ6 config file for the time being. But obviously that doesn’t work. I was able to somehow get x/y homing. I have no problem with configuration of Ports/Pins, what confuses me are the limits, to save myself a headache, does anyone has config file for TAZ5?
I have single extruder, moarstruder and flexystruder. Ideally I would like to have config for each of them or whichever way klipper is supporting different heads.
Here’s what I’m using. I started with the base printer-lulzbot-taz6-2017.cfg file in the ~/klipper/config directory but a bunch of things didn’t feel right so I changed a few things here & there. I have Rev 1.3L boards in all the TAZ 5 printers we bought.
I break up my printer.cfg files by using [include file.cfg]. I think it makes it easier for things like using a rPi Pico via USB for input shaping and adxl345 because you just comment out the [include pico.cfg] then you can just reboot/refresh and unplug the pi pico, etc.
Usually I use pastebin but Cloudflare said it was down so this one seemed to work. Just click the links and it should come up with the text files for my config files.
Here is my printer.cfg:
Here is my macros.cfg file. It’s a little bit of a mess. It’s something I pulled from another printer. The START_PRINT and END_PRINT macro’s work fine but I haven’t shortened the start purge line and I also still need to move the purge line closer to the edge of the bed.
Here’s my kinematics.cfg file. It’s pretty short and to the point.
Here’s my taz5.cfg file. This is just a catch-all file with stuff like the LePotato MCU board’s onboard temp (klipper_host_mcu) to show up on the graphs, and it’s got the extruder, heat bed, retraction settings, etc. I’m not going to bother with dealing with a bltouch or probe because I’m in the process of converting them over to btt skr3 ez boards and a IDEX config with canbus ebb36 & ebb42 toolheads so I’ll deal with stuff like bltouch and KAMP (bed mesh auto level stuff) later once the IDEX is done.
Here’s my pico.cfg file. That’s just the stuff for adxl345 input shaping. There’s a ton of stuff commented out. That’s my general pico.cfg file that I copy from printer to printer so it’s got config settings for a bunch of random different printers. Anything commented out you can ignore. Well, at the very bottom there is [output_pin power_mode]. You may want to read up on that and see if you want/need it for your setup.
That’s it. How is yours printing? I haven’t done input shaper yet. We picked up a bunch of taz5 printers recently and they all came with 0.6mm, 0.8mm and 1.2mm nozzles (and a ton of 3mm filament). I bought some 0.4mm nozzles but haven’t changed from 0.6mm yet. They print OK for being a base config file. You motivated me to print a retraction calibration test. I haven’t even done that yet lol. I just guessed up to this point. Haven’t done input shaping either.
Good luck!
Thanks a million for this. I will need to read through it and adapt if needed. I got stuck with klipper so reverted back to custom Marlin with BLTouch and octoprint.
I am having wear and tear issues atm. Recently Y axis idler broke, so had to re-print that, then whole idler assembly on extruder broke, so that reprinted as well and small herringbone gear broke as well ![]() In the meantime I got 12mm rods for X axis upgrade, so looking forward to get that fitted and see if that helps the quality a bit.
In the meantime I got 12mm rods for X axis upgrade, so looking forward to get that fitted and see if that helps the quality a bit.
Second TAZ5 is waiting in the box for more space in the workshop ![]()
What is the procedure when changing nozzles on klipper firmware ? Is it just matter of changing extruder config ? I have stock Single v2, Moarstruder and Flexystruder.
Have to re-print head block assembly with bltouch for Moarstruder… Not gonna buy 3 sensors, but just re-attach sensor to different head, if I have same holder.
You dont have BLTouch ?
Nope. Not yet at least. They are going to get converted over to a TazWire IDEX first (GitHub - IggyTheWolf/TazWire: Lulzbot Taz6 to core XZ via Voron Switchwire), and then I’ll probably do a Klicky-Probe variant: GitHub - jlas1/Klicky-Probe: Microswitch probe with magnetic attachement, primarily aimed at CoreXY 3d printers.
Need to sort the bed situation first. I wish there was a CoreXY conversion for the TAZ printers because then you could keep the (heavy) glass bed… slap a magnet on it and use a spring steel build plate. Lulzbot parts upgrades are cost prohibitive (when you need to do 6x printers).
I’m hoping the switchwire thing will help, and I’ve got a bag of Klicky-Probe endstop switches so I’ll figure something out. Also doing skr-3-ez boards with ebb36/42 canbus on the idex toolheads. Lots of work to do before I need to worry about a bl touch ![]() .
.
I’m going to keep the 10mm rods. My hope is that by making the print head lighter it won’t bend and deflect the rods. The tazwire thing I linked above: I’m adding a second 10mm rod to each side of Z and I’m going to keep the igus bushings. And keeping the 10mm 2x rods on X… We’ll see…
Changable toolhead just like Lulzbot is today (I need to print 3mm and 1.75 single extruder and idex). I’ve been working on an X-carriage that will keep the canbus board on the toolhead --lulzbot I’d love to know what you are going to do to change canbus toolheads in the future…
Going to go with something smaller like this https://www.printables.com/model/543772-taz-56-to-stealthburner-v12, and then LDO Orbiter F285 for 3mm: The Orbiter F2.85 Dual Direct Drive Extruder for 2.85mm Filament by lorinczroby - Thingiverse, and I really like the Mini-AfterSherpa: GitHub - PrintersForAnts/Mini-AfterSherpa: A Modular Voron V0.1 Style Toolhead. I’ve got those on all of our other non-Prusa printers with Slice Engineering stuff and Sherpa Mini extruder. It’s awesome. All of our Prusas are stock lol… Well not exactly: Bondtech+capricorn bowden tubes. Other than that, stock everything.
So the Taz-5 will end up being a big idex voron switchwire. (GitHub - ankurv2k6/voron_idex_switchwire: IDEX version of Voron SwitchWire CoreXZ 3d printer)
I’d highly recommend swapping the X rods for linear rail. I did it and was amazed at the quality improvement, let alone the reduction in weight. I’ve got 1515 aluminum profile extrusion holding it, and have the BTT Hermit Crab quick change plate system bolted directly to the linear rail.
I’d love to measure the weight difference one of these days.
1 Like
The last big upgrade/mod thing I did was a Monoprice/Wanhao D6 (Ultimaker clone, crossed-gantry) I took those linear rods and swapped them to linear rails. Sort of like the Annex Engineering K3:

(link to github: Annex-Engineering · GitHub)
The printer rips. It’s ridiculous. It’s really really really awesome --except I bought cheap rails and now I’ve replaced the balls twice, the carriages are starting to go, etc. and it’s to the point that I might just go back to rods and re-design the hotend for rods.
Taz is a big printer and after my linear rail experiences, I’m not sure I’d buy anything unless it was Misumi brand which is not cheap for a TAZ 5.
Hello, I have installed klipper in my TAZ 5 with your files, but I’m having some problems with the control board fan 2, I don’t find the pin out, even tho I tried most combinations as possible. I gave up and resorted to ask you if you know which is the pin out for fan 2 in klipper?
EDIT: I have found a way to connect the heat break fan, I changed the cables to the extruder 1 fan, and used it for the heat break since I dont have a second extruder and can use it at will