I have a Taz 6 printer. It has been rock solid for the past 9 months or so that I have had it. However over the past couple weeks the X-Axis drivers on the Rambo board went bad. I thought it was the motor. But I moved the motor to the Y-Axis motor and it worked. So I ordered and replaced the Rambo board and installed it in the Taz 6. I went through the calibration documentation on the Lulzbot website. Ran the .050 extruder calibration and everything was fine. All the motors are functional, it auto levels, and the nozzle extrudes 100mm of material in the calibration.
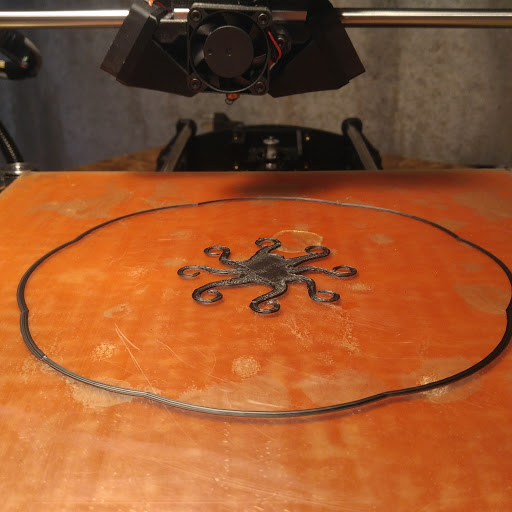
Then I started to print, using lulzbot 3mm black ABS. I used the ABS standard profile in the Cura v20. The printer used to run with this profile just fine. I tried to print the rocktopus on the SD card calibration directory and I get the picture below. After 2-3 layers the plastic stops coming through the nozzle.

The next picture shows that the printer continues to try and deliver the plastic and strips the plastic since it is stuck.
I have double and triple checked the wiring of the Rambo board against the assembly manuals. I have also removed the nozzle and cleaned all the plastic out of it and reinstalled it. But the same problem continues to occur. Just as a note the extruder head is also brand new because of a fault on the original (that one is in repair with Lulzbot but I didn’t want to be down while it was being fixed).
Don’t know where to go next on this one.