Hi all,
The x belt is really loose - is there a way to tighten it without taking eeeeverything apart?
Newbie here, and my school district doesn’t believe in maintenance contracts for this equipment, so it’s just me.
Hi all,
The x belt is really loose - is there a way to tighten it without taking eeeeverything apart?
Newbie here, and my school district doesn’t believe in maintenance contracts for this equipment, so it’s just me.
Do you have the newer Mini 2 that has two tensioning screws or the older one without it? The older one - it’s pretty hard as the belt is so short and it’s hard to get good tension on it.
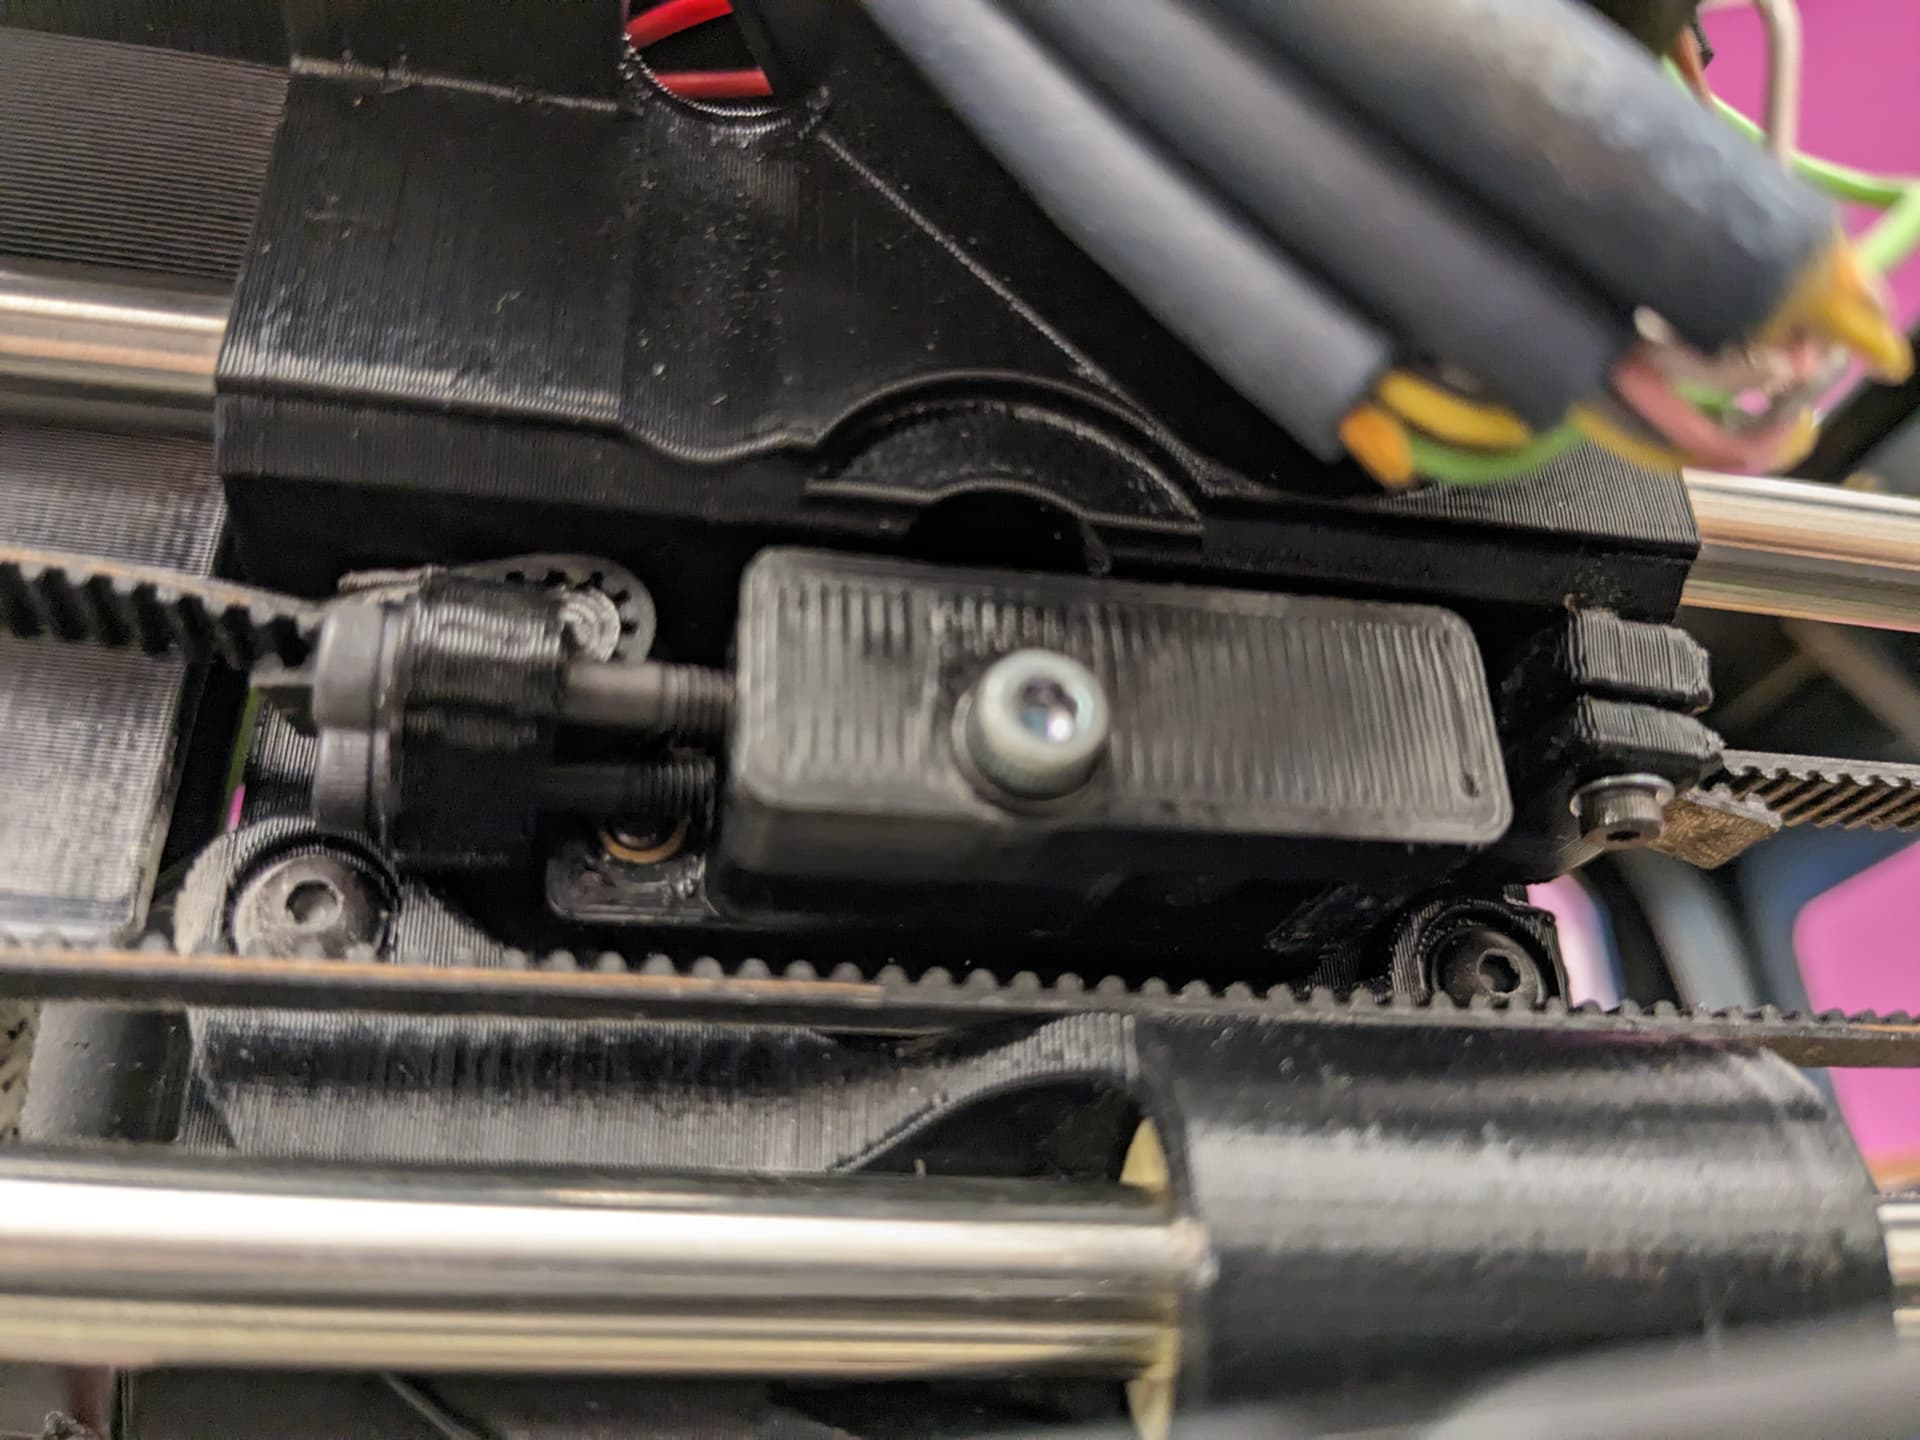
Send a picture of the back of the x carriage.
If you’re doing all the maintenance yourself, you need to get familiar with
It’s basically everything you need to know about physical assembly of these machines.
Specifically, you’re looking at Step 4 of OHAI: Open Hardware Assembly Instructions
It may help to print up the jig they show, but I wasn’t able to immediately find it on download.lulzbot.com
Those instructions don’t show the older Mini2 with the one piece belt harness without the tensioning screws. It would have been nice if they did because it was very hard trying to tension that version.
Which is made harder since nobody has that 800 dollar gates belt tension meter.
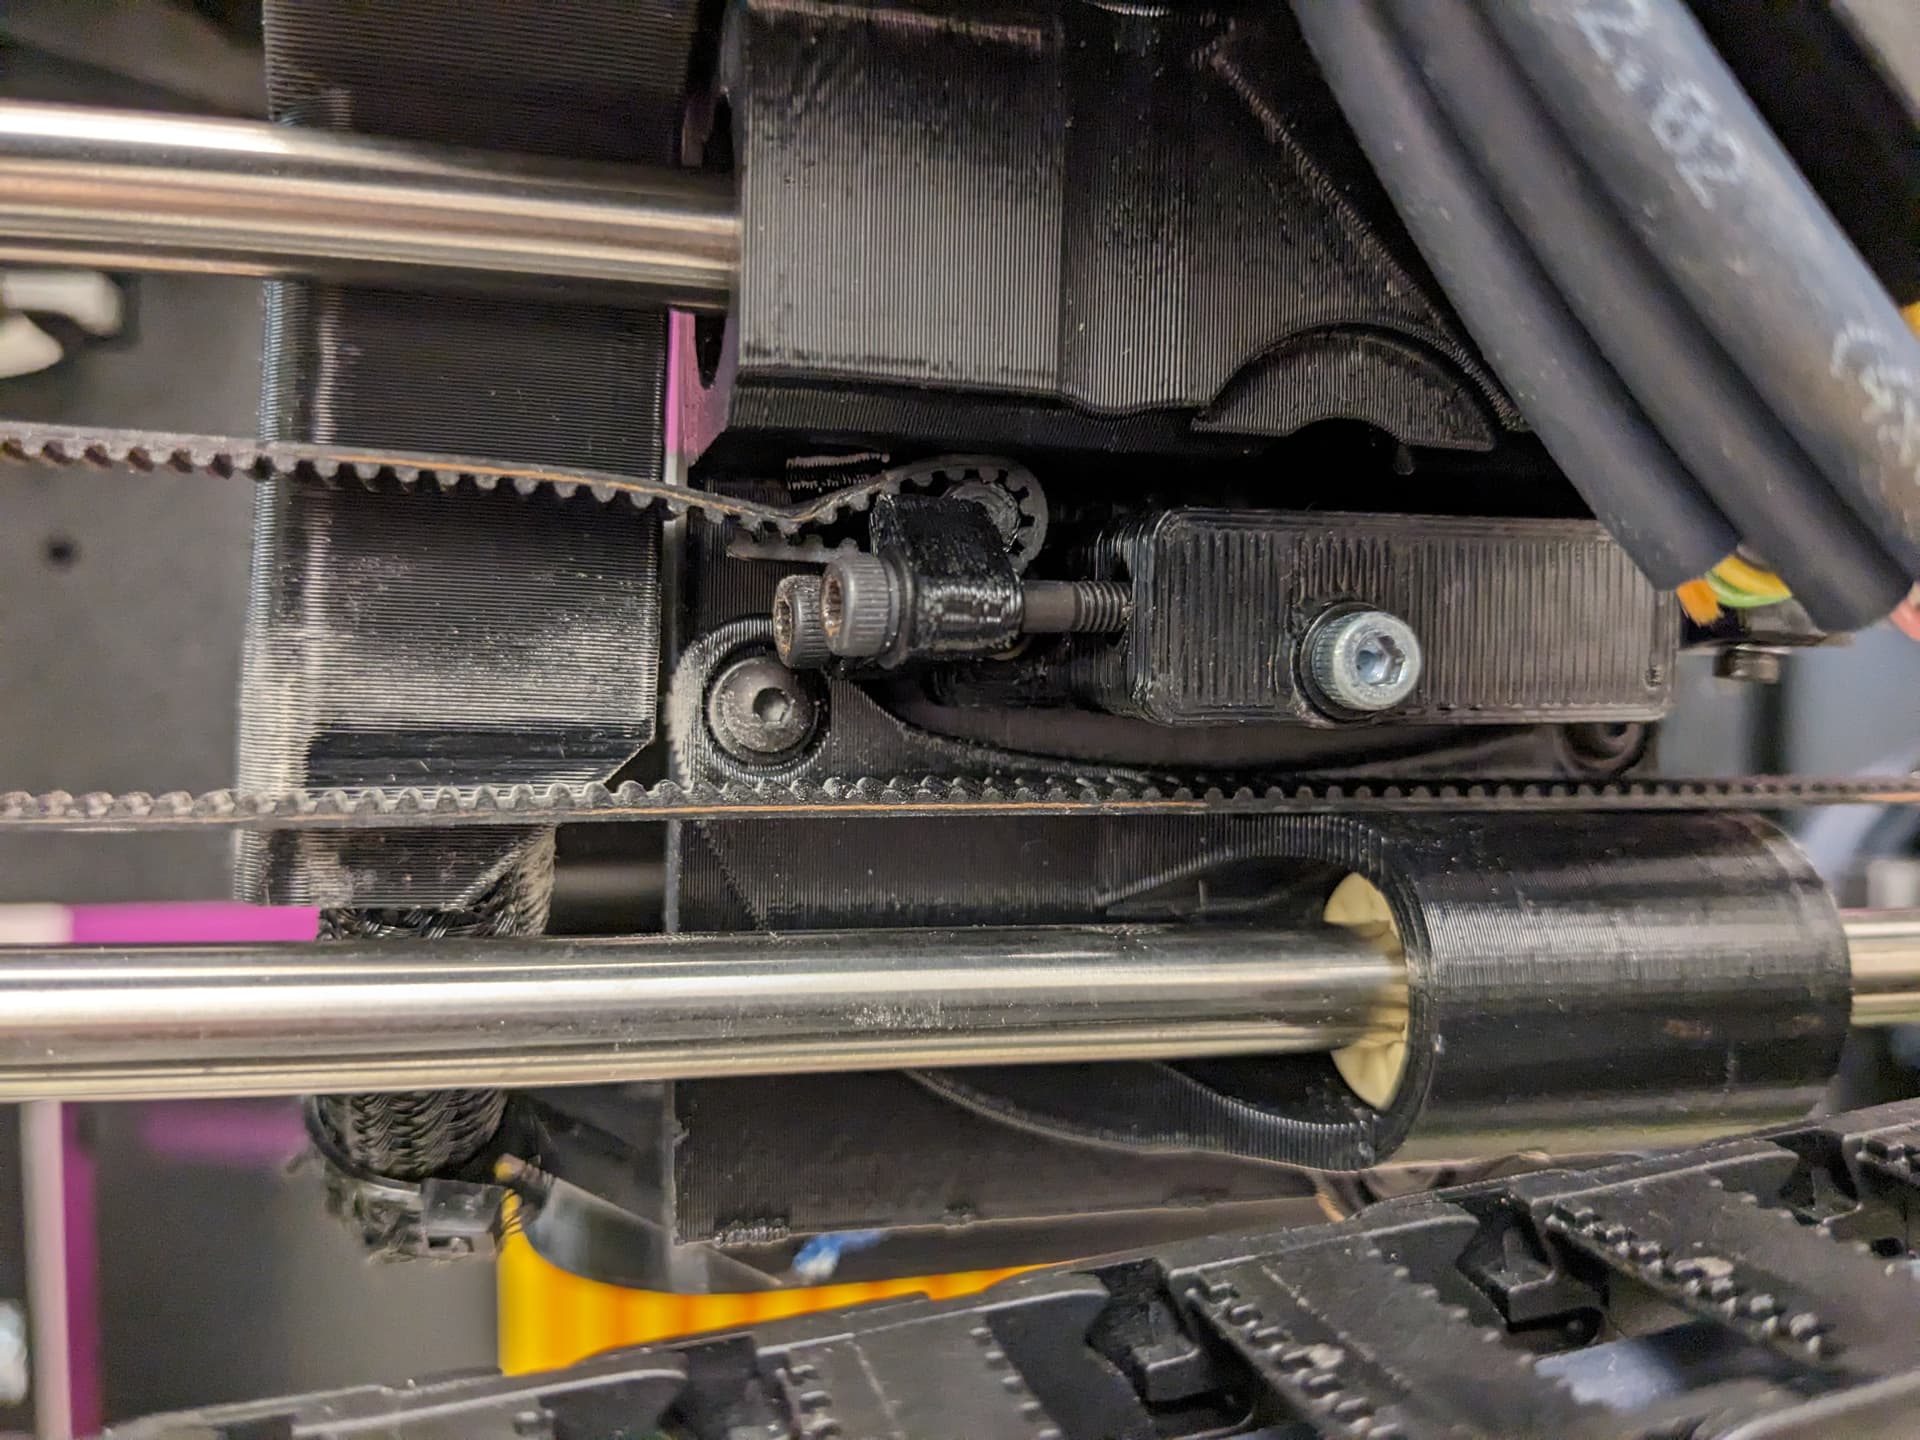
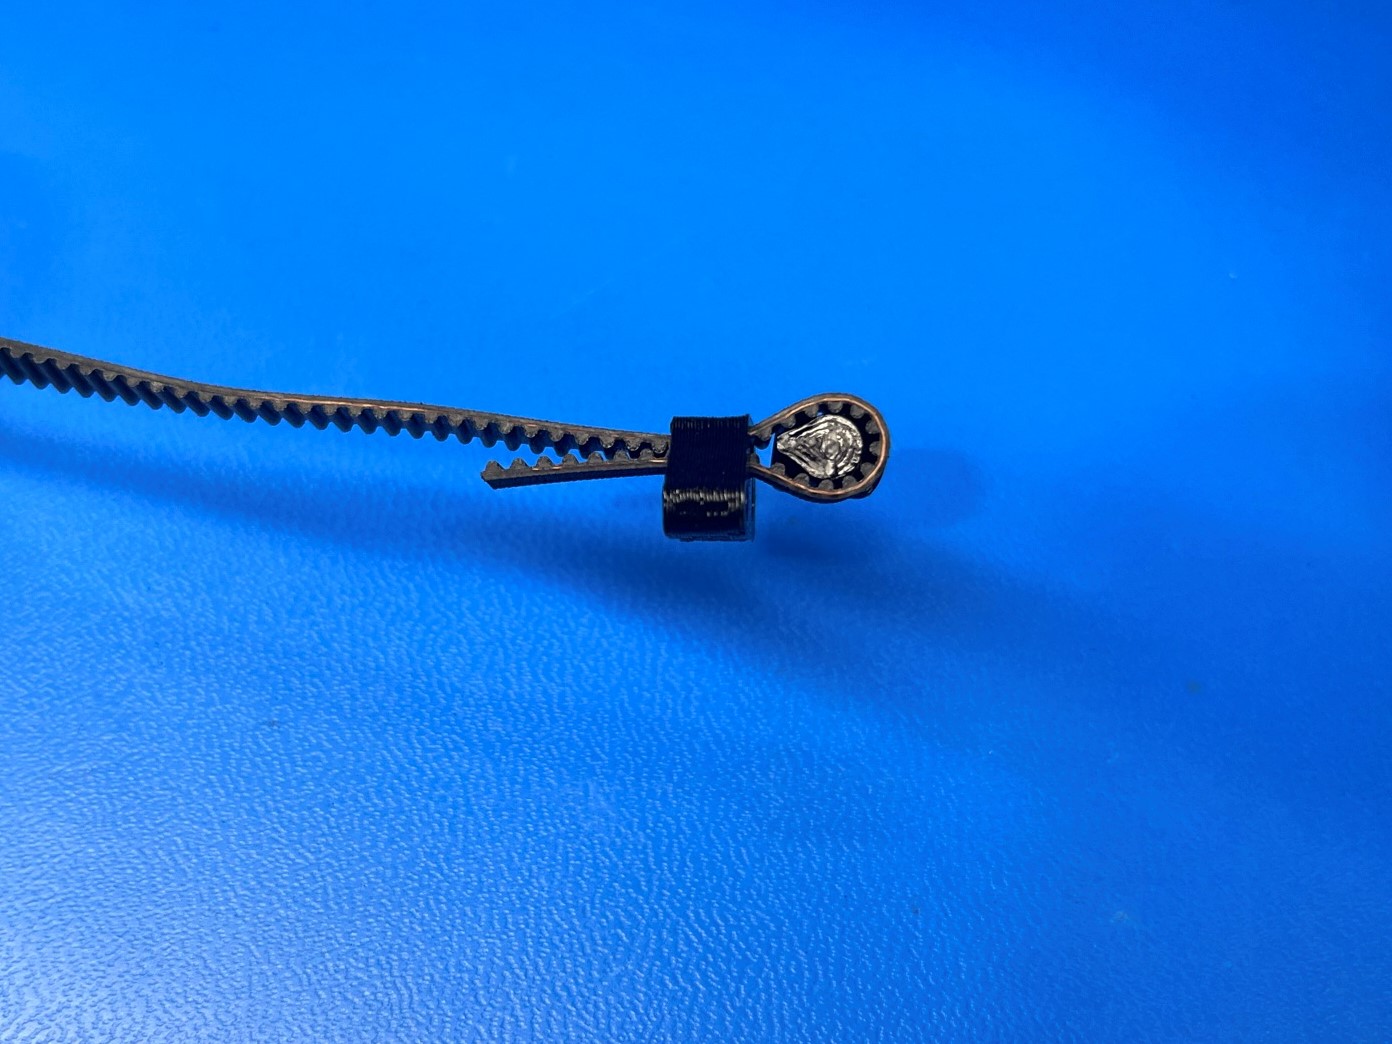
Unfortunately it looks like the “belt collar,” the part on the screws that the belt loops through is broken. The bolt should go through the square hole, loop around the teardrop shaped peg to the right, then go back through the same hole. Because the belt is visible going over the top of that part, this indicates that the top of that part has broken out. It will need to be replaced and the belt reinstalled. It should look like this:
I don’t think that side of the belt assembly is broken, maybe it wasn’t the best pic. I suspect something is wrong inside the case the tensioning screws go into, but I can’t see how to take it apart without taking everything apart, and I haven’t found the instructions in the OHAI pages.
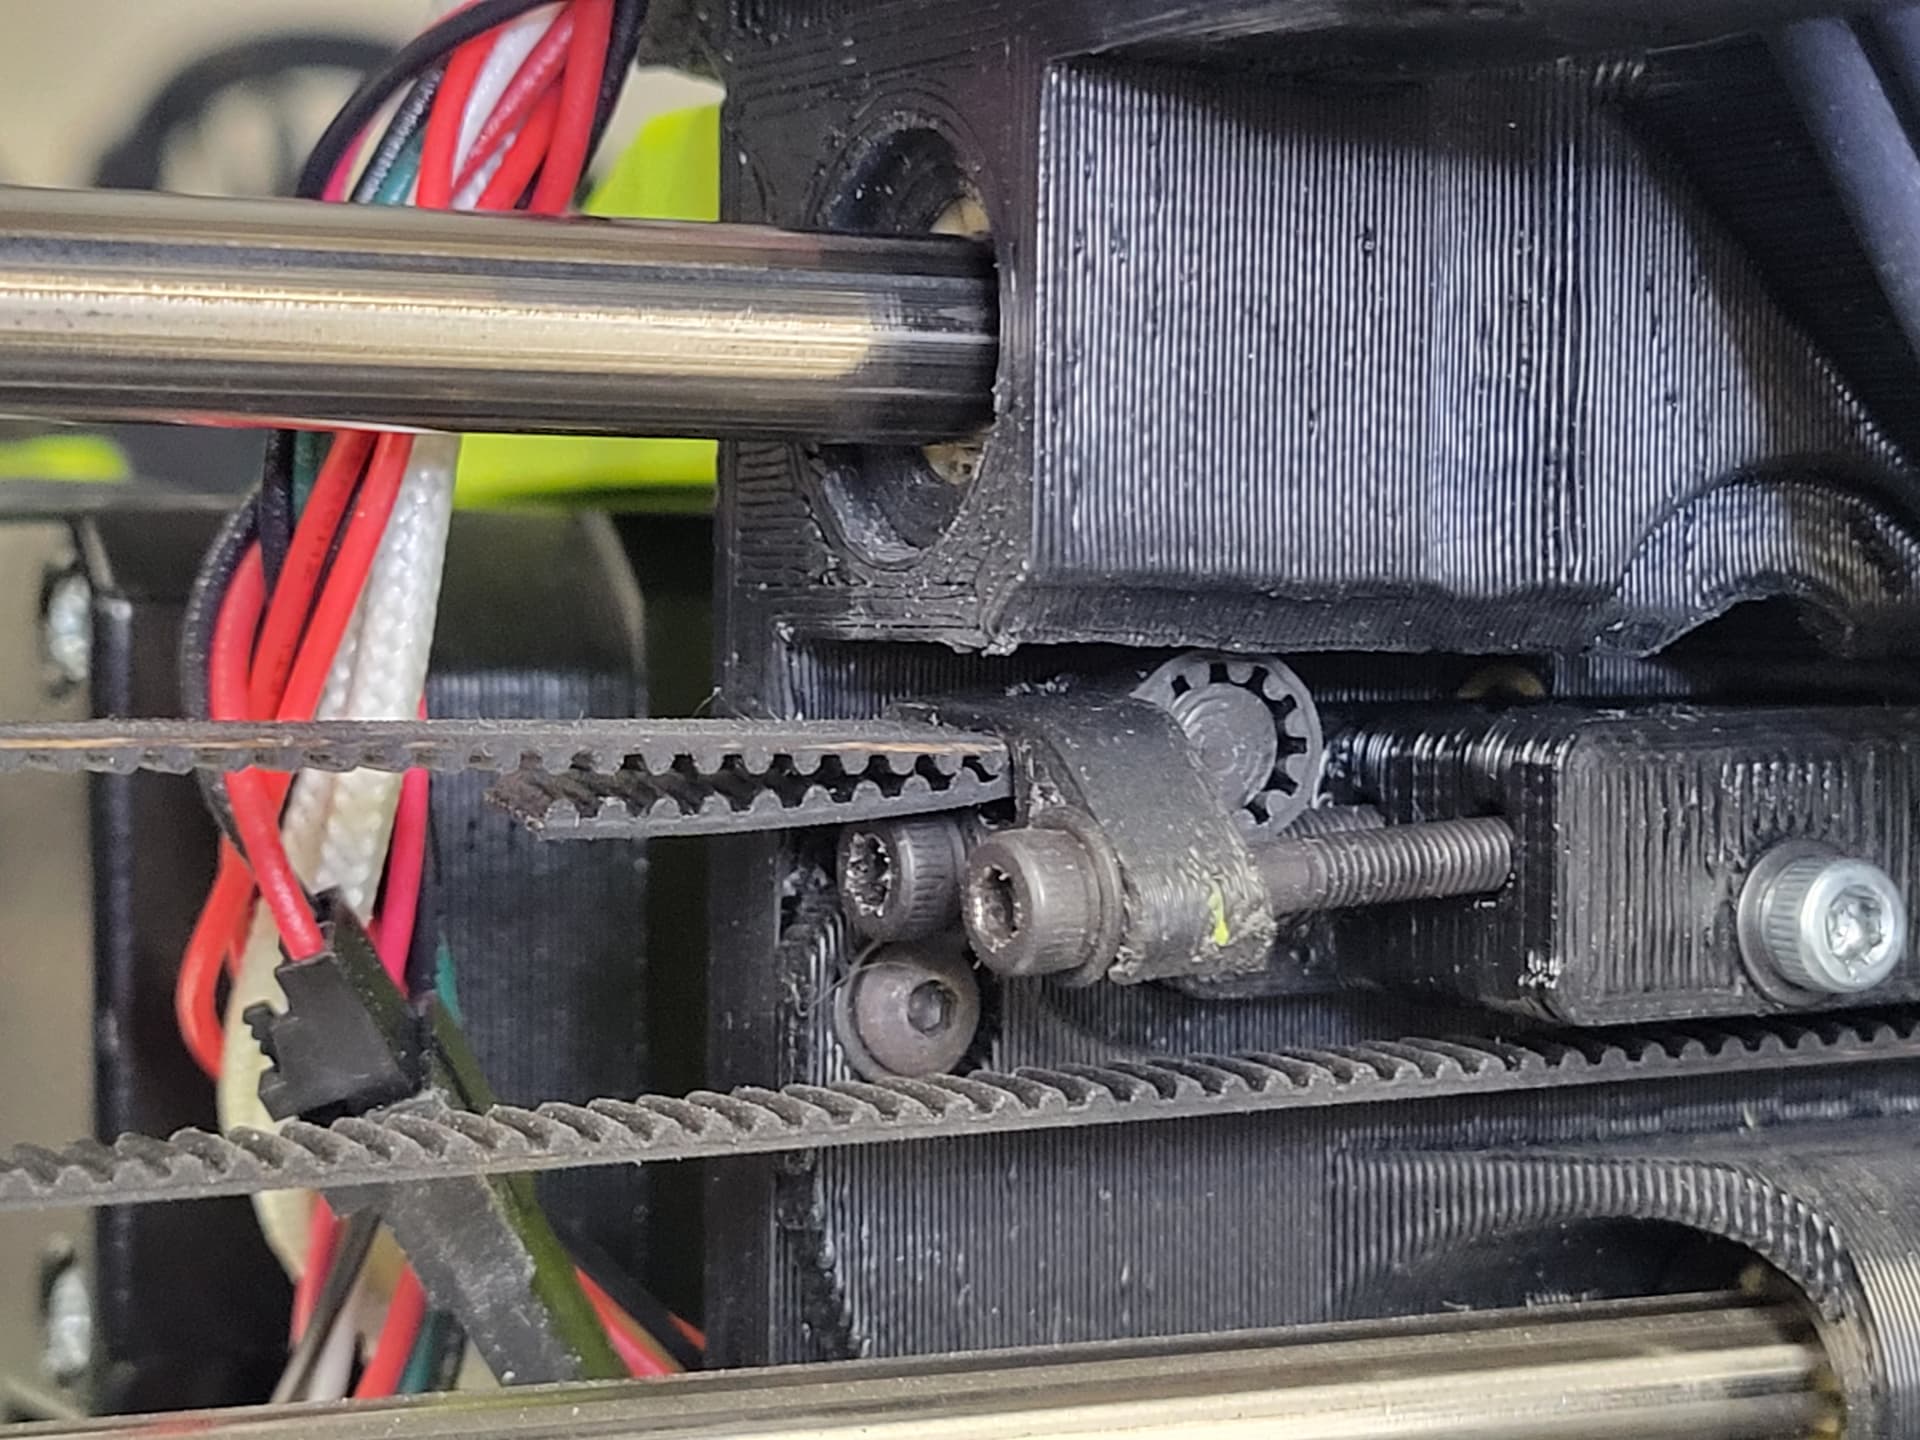
The collar has to be broken. That is the only way that you could end up with the top span of the belt visible going over the collar and not through the hole, with the end still in the hole. It should look like this:
You can remove the tool head, then remove two screws that go through the front of the X carriage to detatch the block the screws go into. Then you can slide the carriage one way and the block the other way to get it out of the carriage and work on it easier.
The OHAI doesn’t have instructions for disassembly. You have to look at the assembly instructions and work them in reverse to undo the assembly steps. Go to the end of Step 4 here: