Hi everyone, I’m trying to print a relatively large item, and I can’t seem to get it to work, I believe because of ABS shrinkage. Here is what it looked like when I originally tried it:
I googled and read through the forum, and attempted the following things to fix it:
Turned down the temperature on the bed to 85 (I’d still had it at 110 even though the newer instructions said to lower it, mainly because when I lowered it before, things didn’t stick anymore. I have since added ABS slurry to help make things stick)
Added an additional “skirt” around the bottom of the model to help the corners to stick better, which I will then chop off when it’s done. The shrinkage occurred on corners that had not peeled up as well as the ones that did, but I figured this was a good idea anyway.
Put a large cardboard box over the printer to keep the heat in
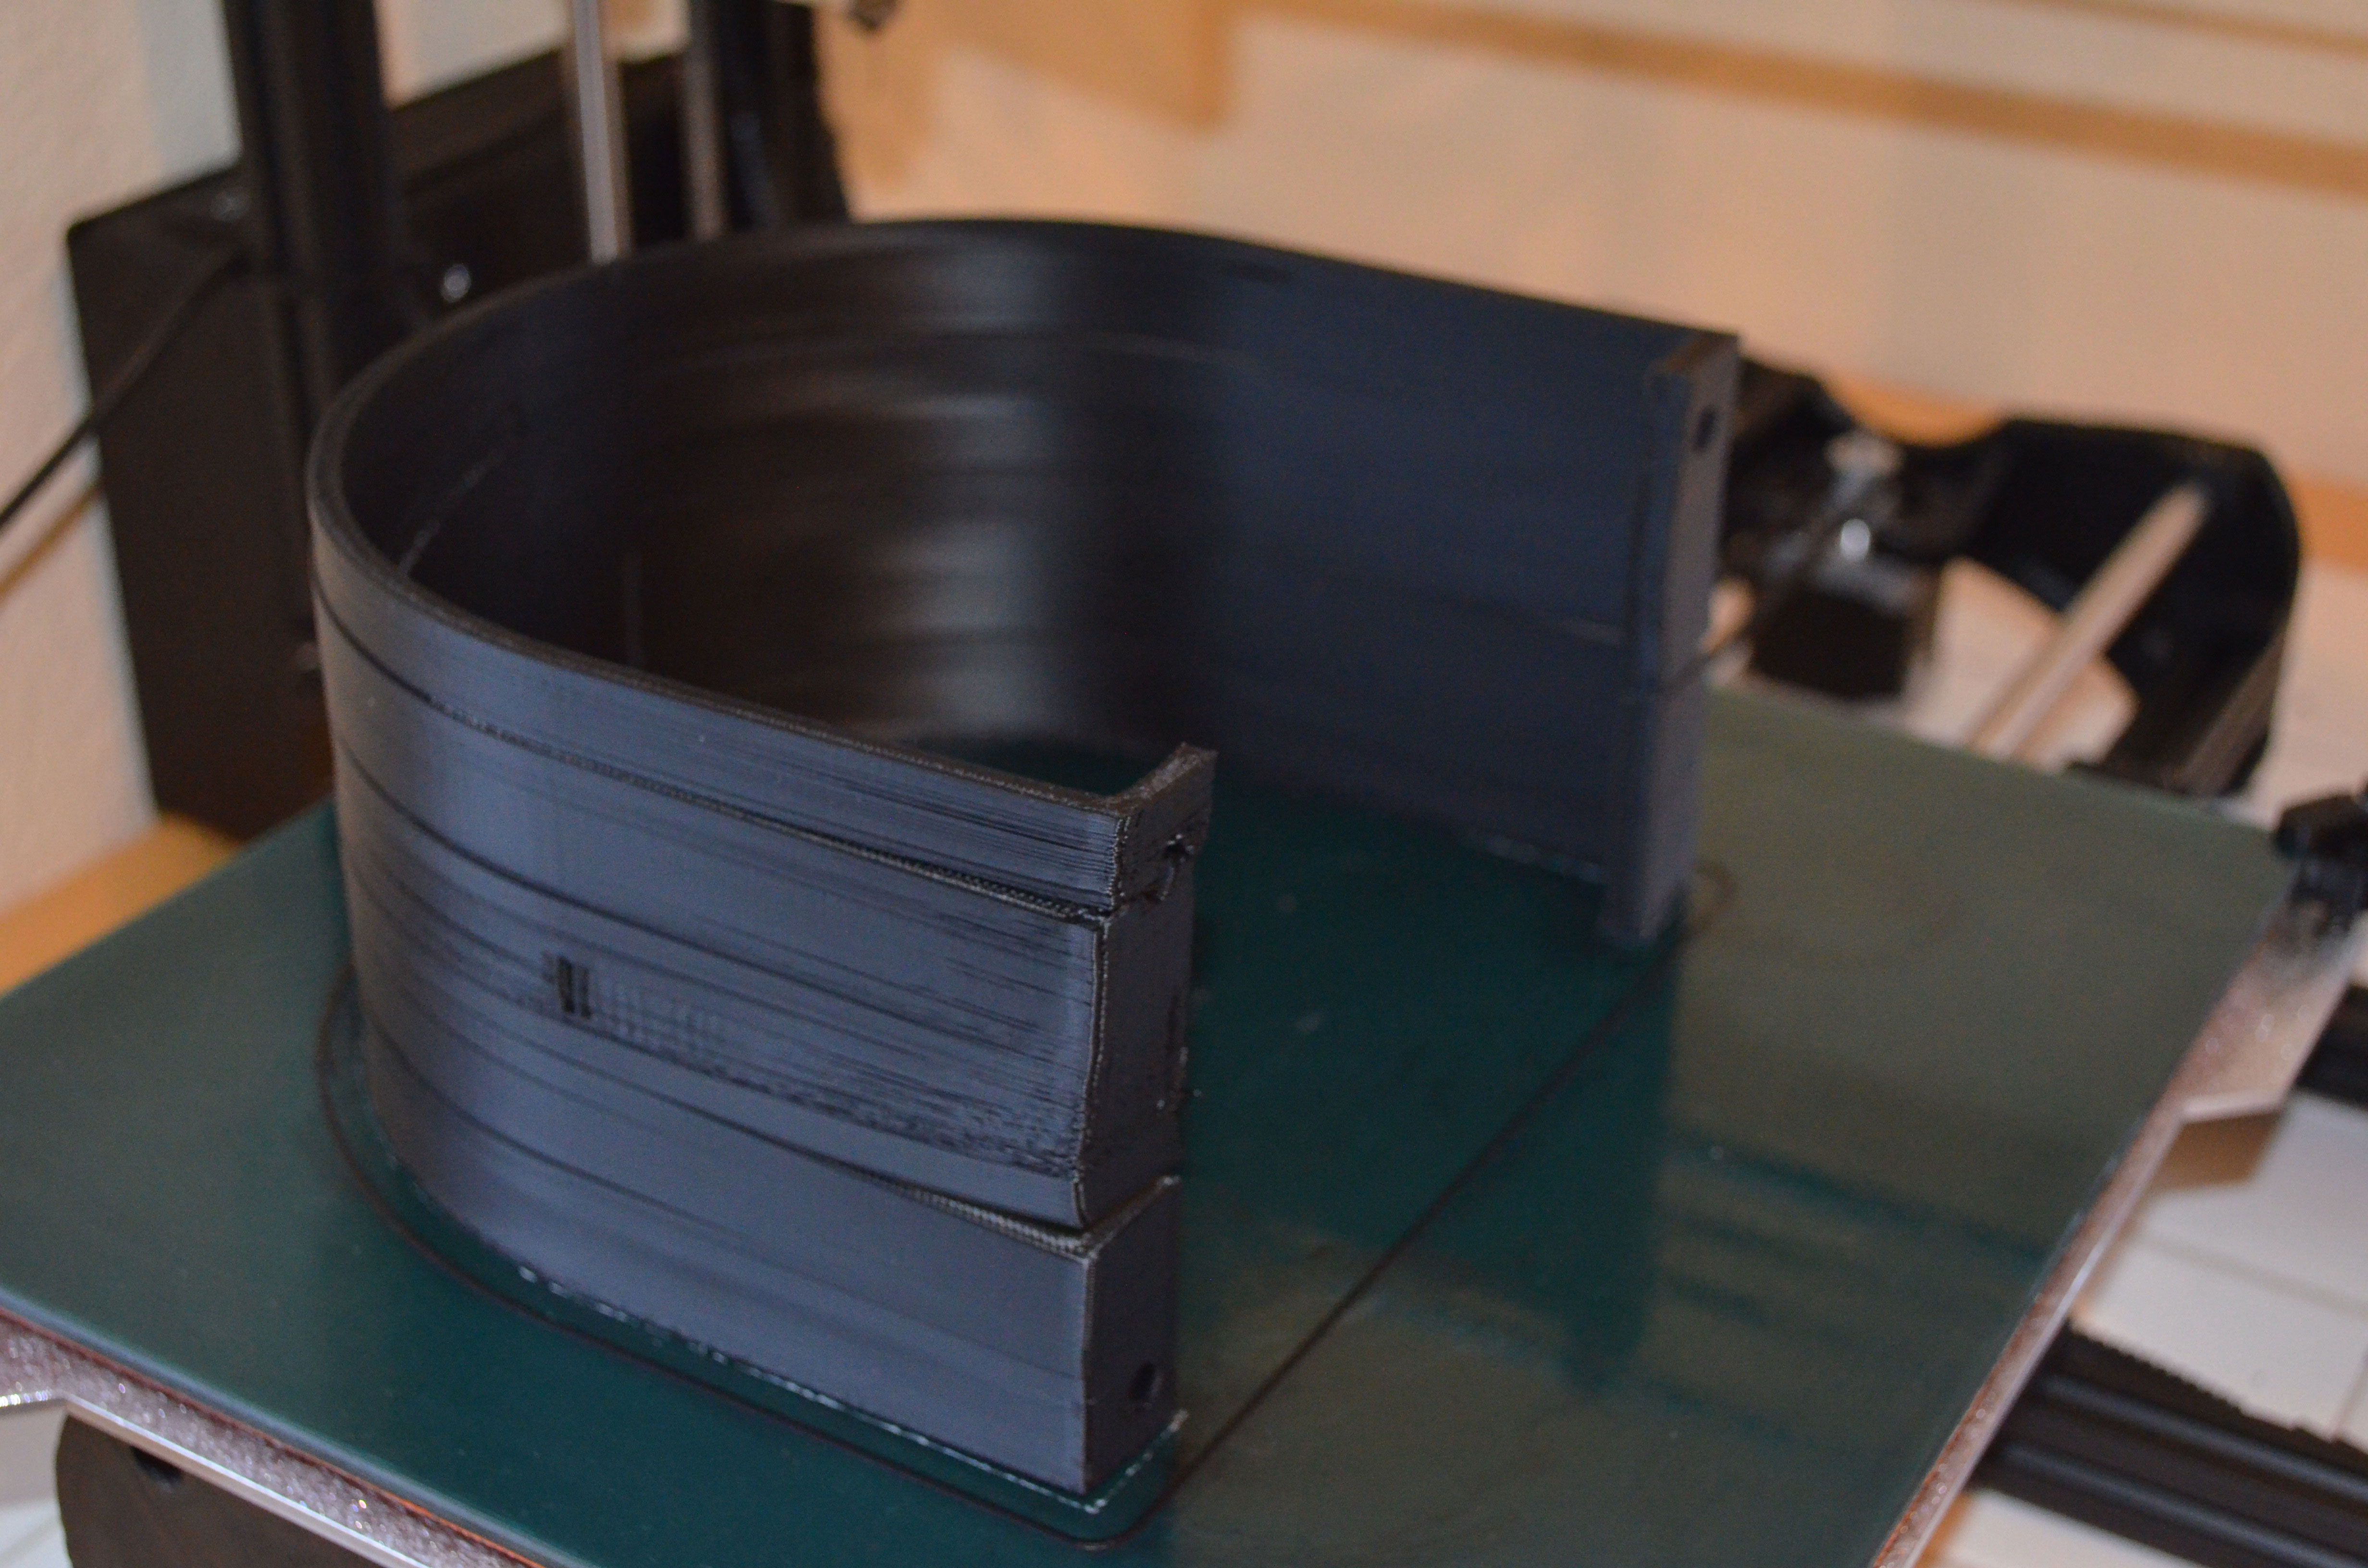
I then reduced my model by 50% to test my improvements, but it’s still a problem. Here is the result:
and
Not only does it still have cracks, but the sides are now kind of chewed up. I believe the reason it has less cracks than before is probably mostly just because the size was reduced by 50%, but maybe some of what I did helped. In any case, I still need to fix it. Does anyone have any additional suggestions?
I can’t break this into smaller pieces and then assemble (plus, the whole reason I bought this printer was for the larger print size), and I can’t make the piece any thicker.
Enclosing the printer will certainly help, with either a box, blanket/sheet or an enclosure. Would you mind posting the gcode file/model/Slic3r config?
I have a fully sealed enclosure and any large, thin walled parts I try to print still end up just like yours with pretty serious cracks. My enclosure definitely helps, but it didn’t stop the cracking like I expected. Small prints are fine and I haven’t noticed it with pretty solid parts, but thinned walled stuff is a no go for me. I’ve also tuned my nozzle temperature to make sure I’m getting the best layer adhesion I can with the particular ABS I’m using, but that didn’t help.
I’m adding a PLA fan to my TAZ to see if PLA will let me print larger parts like this. I’ve lost about 2kg of filament on large parts that cracked like this.
Have you sorted this out? I didn’t see “gcode file/model/Slic3r config” posted, hopefully you haven’t given up! I’m really interested to know what can be done about this as I’ll be printing large pieces as well.
Sorry for my delay, I have some out of town visitors and I haven’t gotten a chance to post my config yet, but I will either tonight or tomorrow night. I have not sorted it out yet These pieces are very important to me and are the main reason I bought the printer, so I really hope I can get this worked out.
Adam,
I know how you feel, I have also lost tons of filament trying to get this to work Please let me know if your fan mount and using PLA makes a difference. I’d really like to be able to do this in ABS though. I will attach my config here and see if anyone has any other suggestions.
Has anyone had any luck with this by perhaps increasing the fill density? I’ve tried tons of things and nothing has worked, so I’m hoping someone has had some success with this kind of object that can give me some pointers before I continue to lose filament with my failed attempts.
I’d try bumping the perimiters to 3, extending a skirt up a rediculous amount, and if possible put in some internal temporary support to stabilize the mid structure as it cools assuming that is feasable for the design.
You could also try the turkey bag trick. Take a standard issue turkey bag and attach it to the corners of the heated bed bed up to the frame above extruder, taped up with kapton as much as you can where you need to split it to go around rails, etc… instant enclosure around whatever you are building.
If you are printing out in a cold garage, a space heater and or moving the printer indoors to print that large thing might be warranted.
OK I tried the previous suggestions, but my skirt got mangled since it’s such a thin wall (pic below). I usually can’t get a thin wall like that to print properly, but I know other people are able to successfully use a high walled skirt to keep heat in. Does anyone have any suggestions for making the skirt not get mangled? It was starting to affect the actual print so I had to stop it.
Your layer height is really high. A general rule is your layer height should be no greater than 80% of your nozzle diameter. So your TAZ, which ships with a 0.35mm nozzle should be operated with a layer height of 0.28mm or less. Since we use M6 threaded rod for the Z axis, you’ll want to use layer heights in increments of 0.05mm, so I’d start with a layer height of 0.2mm for this print, or 0.25mm for most quick prints.
If this doesn’t help, even with an enclosure, printing this item in PLA or T-Glasse will be easier.
I am having similar problems with a thin wall housing (4.5mm) using ABS. Enclosing the TAZ in a cardboard box helped, but I still have substantial delamination. I used the Lulzbot 35mmnzl_draft.ini configuration file which has a 0.30mm extrusion height. I am wondering why this is provided as a suggested configuration if the general rule for layer height is no greater than 80%? Is this specific to ABS or in general?
I am going to try an insulated chamber but it would be good to have some guidelines from Lulzbot for a target chamber temperature for ABS.
My original attempt had no enclosure and used the Lulzbot supplied 35nzl_draft.ini configuration. The delamination was so bad I had to stop the print. For these prints, I increased the extrusion temperature to 235 and the bed temperature to 90. I also increased the speed by about 20%. Attached is the .ini file (the .stl and .gcode files appear to be too large to upload).
I may try adding a small heatlamp directed at the part, but need to get a thermometer to keep track of interior temperature. It would be helpful to have some advice from Lulzbot on enclosure temperature, and extrusion and bed temperatures to prevent ABS delamination. DWW35nzl_draftHousing.ini (3.19 KB)
I think a tiny amount of separation on your initial layer is occuring. Maybe try printing with a 3mm brim layer? for the rest of it, maybe try an even smaller layer height. Also, increasing the machine adds additional nozzle drag on the extruded plastic and is more likely to pull it away from the print surface before it bonds. slowing the print down should usually result in a better bonding layer. you may start to see “fuzzy” prints at that point with random little blobs though dur to your extruder calibration. either the filliament daimeter or the extruder itself is slightly off from the pictures anyways.
The fleet uses enclosures on the racks, which are passively heated to around 90-100F. You’ll find that some models are more prone to splitting than others, and can either use a different material, or modify the model to print with that in mind. Adding tabs on corners, adding holes in long thin walls can help minimize the buildup from ABS shrinking.
Would high impact polystyrene be less likely to delaminate in a thin walled piece such as this? What other materials would work better?
Since the problem seems to be bonding of the molten extrusion with the cooled surface, wouldn’t it help to raise the extrusion temperature substantially? What limits the upper temperature - does the extrusion get too runny?
First I would like to thank everyone for the questions and answers in all areas of the forum. It has been a tremendous help as a newbie to 3d printing.
I too had the shrinkage issue and have done a couple things that has eliminated it. I followed Triffid Hunters calibration guide and recommendations to use a .2mm layer height. That has been the most help with each nozzle, .35mm, .5mm, and .75mm also. In addition I use a small reptile heat lamp with a 25watt bulb pointed at the work piece. The light is located at the front of the machine where the Lulzbot sign is at on the Taz 2 pointed down at an angle to the center of the bed. I have done some pretty nice sculpted vases with no delamination using both the .5mm and .75mm nozzles. I prefer the .75mm nozzle as the vases are heavier. I also am running a 3mm brim on all my pieces now. This eliminated any warping around the corners. I intend to add another heat lamp in the same location on the back side of the machine.
I did try the skirt before all the above and it did help unless the skirt delaminated, broke, and caused other issues. I contemplated building the enclosure but opted for the heat lamp after coming across a picture of a student making a sculpted vase on a rostock style printer. He was using 3 radiant heat lamps pointed at the object being made.


 These pieces are very important to me and are the main reason I bought the printer, so I really hope I can get this worked out.