I noticed Tomas Sanladerer ran into the same issue in his review as I did with some of my prints. Namely, that the layers near the bottom get “squished”. He attributed this to the nozzle being set too low by default to improve bed adhesion and adjusted it up by ~0.15mm: https://youtu.be/_RzFC5FplmY?t=9m4s
If this is true, where in Cura do I adjust that parameter? I don’t see any setting like that. Or is this done manually?
So far I’ve only been printing with HIPS.
Your print looks terrible, you have more going on than bottom layer height. I would un-install Cura and download the new or newer version and use the defaults in Quick print. You can adjust parameters in the Expert mode but really the Mini does an excellent job with the defaults.
Hmm, I have been using the latest version of Cura (15.02.1). With default settings! (“medium” quality on the white print).
Your print looks terrible, you have more going on than bottom layer height.
Could you be specific about how I could improve my prints and what else you see wrong with them?
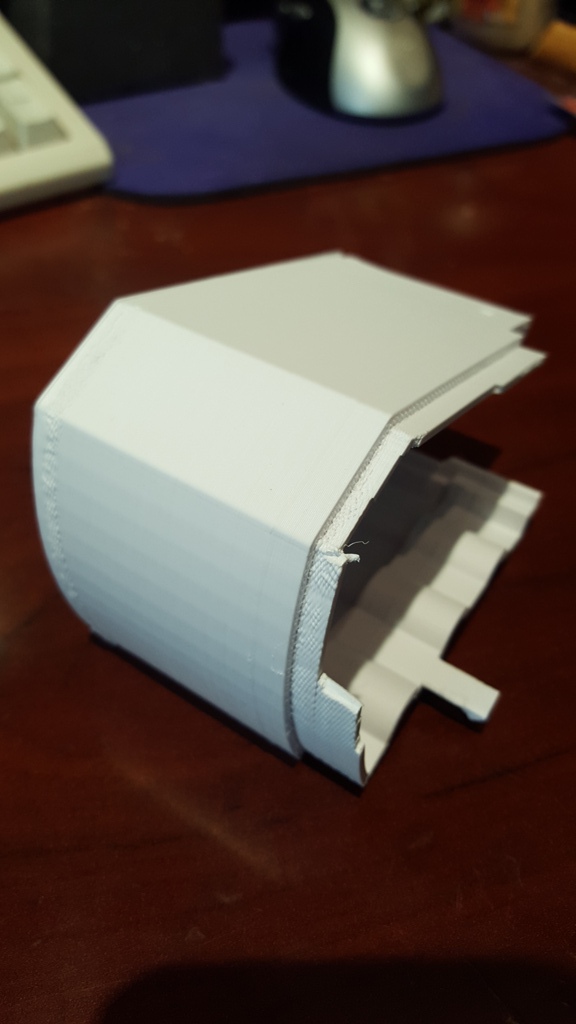
I did manage to make the pictures look dramatic, the top-down lighting exaggerates any bit of unevenness and makes it look like there are other problems with the walls, see the latest one for comparison. I believe my print quality is otherwise close to normal for this printer.
With all printers in general, there are two things that contribute to a starting layer that is too wide, aka Elephant Foot Syndrome. Most printers out there are set to use a 200% starting layer width for better adhesion. I find that if you reduce this to 180% on a Taz, you still get decent adhesion and you don’t end up with the squished out starting layer. The other thing that affects it is starting layer distance from the bed, which can be adjusted under the “Z offset” setting. With a 0.5mm nozzle on a PEI bed, you want at least a 0.40mm layer height to start, with the Z offset set so it doesn’t appear squished, but still sticks to the bed. This task is much easier to write than it is to accomplish in fact. Keep a backup of your starting settings, make sure your extruder is 100% calibrated first, then attempt to adjust.
Thank you. This appears to be different from “elephant foot” though. The starting layer I had at 120% with the large white print, and at 100% with the small grey. I’ve never had issues with bed adhesion, so until I do, I’ll keep that setting low.
The bulging I see happens a little further up.
…starting layer distance from the bed, which can be adjusted under the “Z offset” setting.
“Z offset” setting? In Cura 15.02.1 (Lulzbot edition) I cannot find such a setting. Where is it located?
Keep a backup of your starting settings…
Why do I need to keep a backup of my starting settings when I can always just “Reset profile to default”?
make sure your extruder is 100% calibrated first
What do you mean by that? The Mini calibrates itself, no?
From the pictures, I can tell you are probably overextruding a bit, but your infil % is low enough that it is clearing out after the first few layers. You might have your filament diameter set wrong, or your extruder calibration might be slightly off.
Switch to Full Settings. Click on the “Machine” menu item, then select “machine settings”. A dialogue box will appear, in the first column is the Z-Offset setting.
Off topic - where’d you get that HIPS? Is it as wonderful of a bright matte white as it looks in your photos?
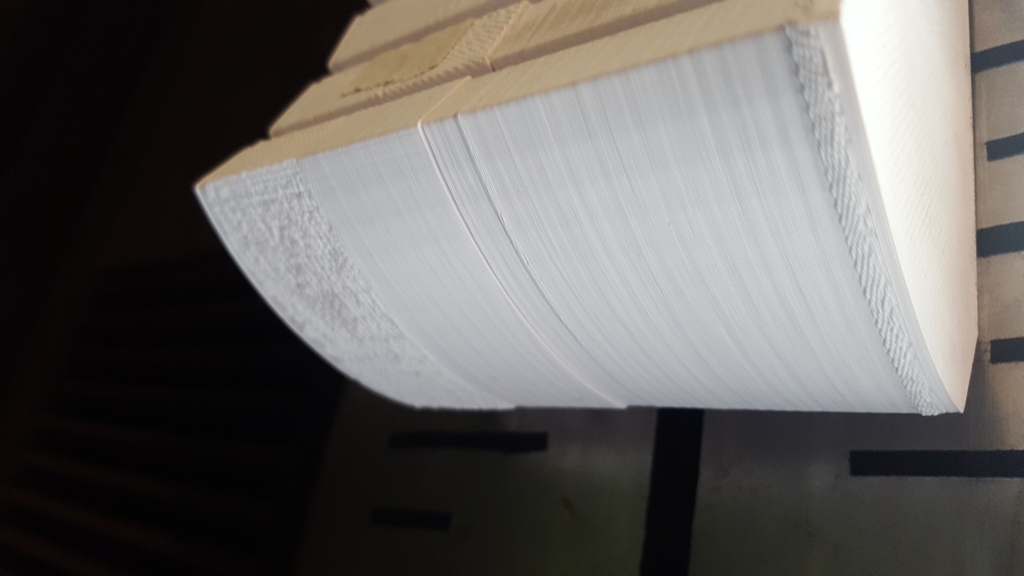
I agree that it looks like you may have something else going on. Can you send a close up shot of that white shell? That last photo was a bit blown out, making it hard to see details, but your layers seem wavy and irregular.
Thank you! I understand this will affect Z-offset on every layer though, not just the starting layer as “piercet” suggested in post #4.
Can you send a close up shot of that white shell? That last photo was a bit blown out, making it hard to see details, but your layers seem wavy and irregular.
See new pics below. The cause of the intermittent roughness on the white shell walls I’d still like to understand. When I print organic, irregular shapes (eg: rocktopus, statue of liberty, etc), the prints look flawless.
Off topic - where’d you get that HIPS? Is it as wonderful of a bright matte white as it looks in your photos?
It appears, in general, that the white HIPS filament exhibits the slightest layer inconsistencies a LOT more visibly than other colors. Compare the white & yellow versions in the pic below. Both Rocktopuses (Rocktopi?) were printed with identical settings, and are the same quality prints.