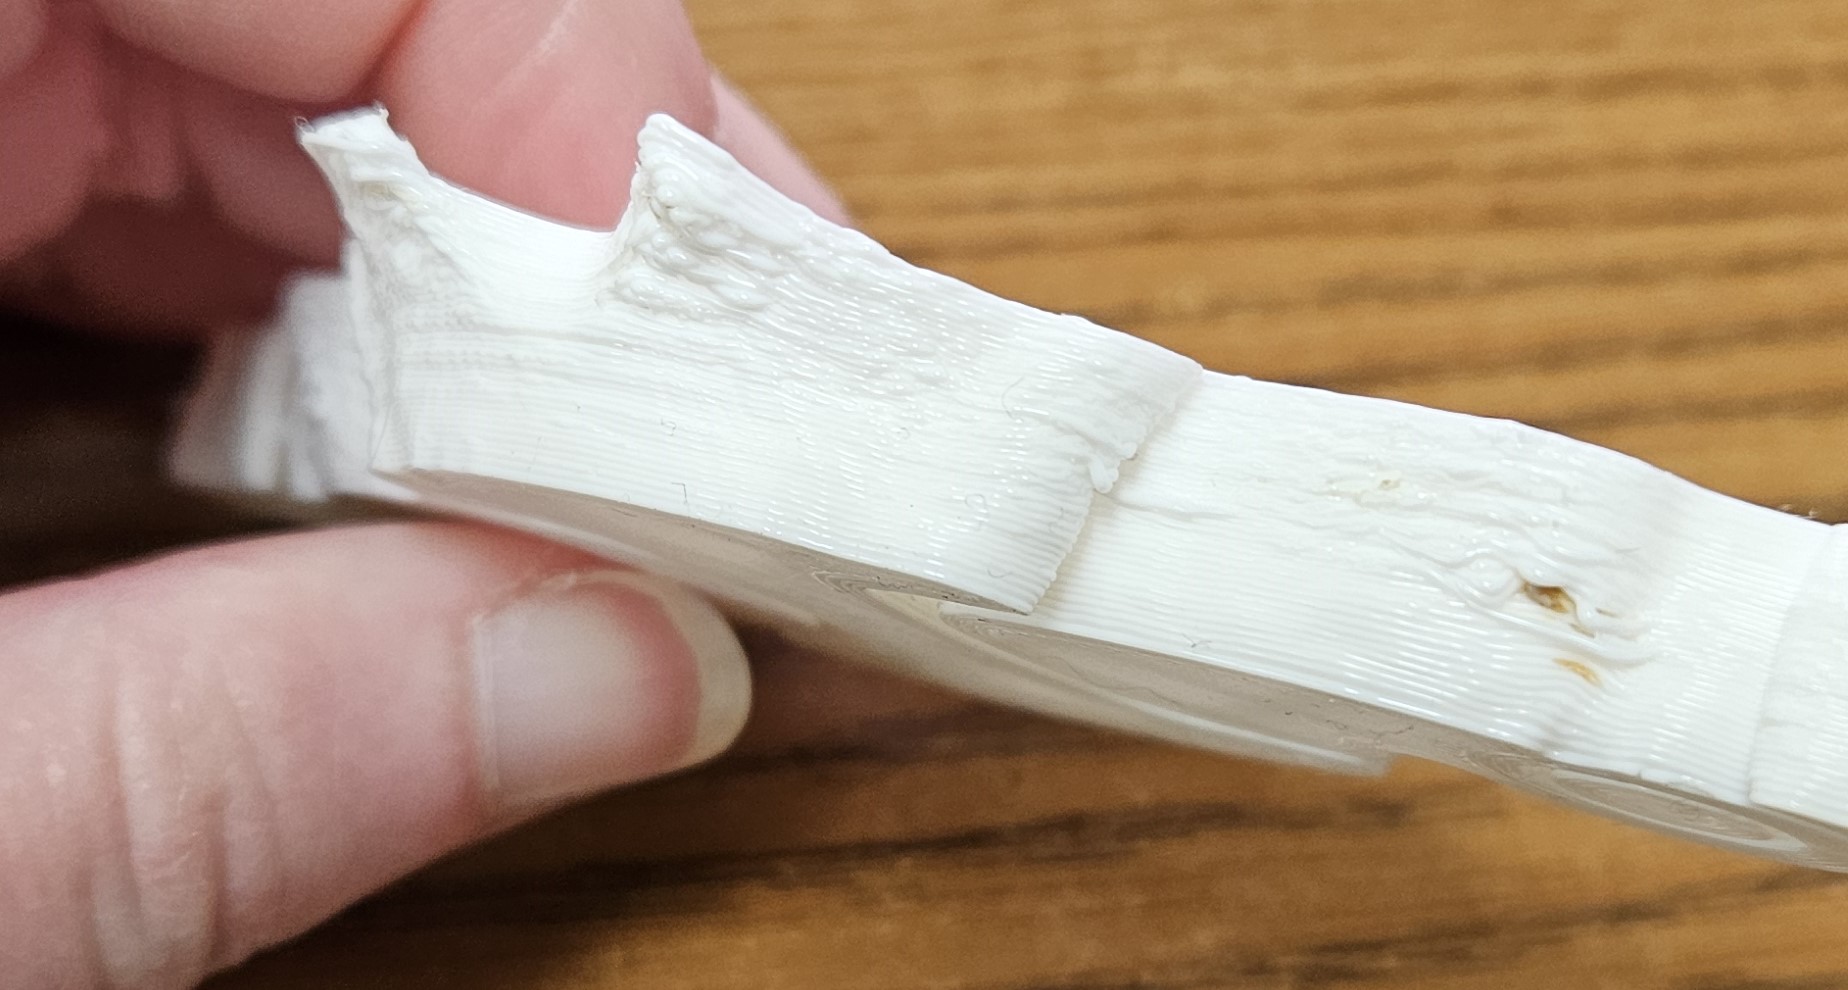
I was doing a print of “Rat Articulated Fidget Figure” by MatMire_Makes over at Cults3d and noticed that some sections of the print (including some some of the joints) looked like they were not cooling fast enough. I don’t think it’s step skipping since other sections of the print on the same layers is fine (there are supposed to be some bumpy areas as it’s supposed to be “fur”) and we did a print a few days ago that was mostly just a cube with minor issues on one side of the print at different points but nothing like what happened with this print.
Is there something I need to adjust to see if it helps with this problem? This is only the first attempt at the print as we can only print on the work machines for 8 to 9 hours in the day.
The machine we are using is the Taz6 with SE Tool Head (0.5 mm). Cooling is Enabled though the only fan I notice running is the one on the left side of the tool head, not the front one… so not sure if that is playing a factor. Default printing temp is set to 205℃, with initial layer being 210℃ and initial print temp at 195℃. Build plate is set to 60℃ with flow set to 100%.
The SE side fan should always be running. This fan keeps heat from the hot side of the extruder / nozzle from “creeping” past the heat break to the cool side of the filament path.
The SE front, part cooling, fan is controlled by the gcode commands M106 (and M107).
The extract you posted from (I believe) CuraLE (unknown version) shows that the part cooling fan should be off for the first layer and then on at 100% for subsequent layers. Although you didn’t mention the type of filament, the temperatures you are using suggest PLA. This type of filament loves part cooling so if the part cooling fan isn’t running, this could be causing the issue.
On the TAZ 6 LCD, you can select Temperature and then `Fan Speed 1’ and adjust the fan speed from 0% to 100%.
If your TAZ 6 is connected (via USB) to the machine running CuraLE, then you can also adjust the fan speed by selecting Monitor, Connect, ‘Console’ (check Show Debug Messages) and entering M106 or M106 S255 (S0 - S255). Enter M107 or M106 S0 to turn the part cooling fan off
The front (part cooling) fan will come on and off via control by the slicer. As B-Morgan said, if you aren’t seeing this fan on during all but but the first few layers of the print with PLA, there is something wrong with the fan, wiring, or control board.
When testing fan operation from the temperature menu on the printer, keep in mind that you after setting it to 100%, you have to press the dial before it sends the command to start the fan, it doesn’t adjust the speed “live” as you see the numbers change from 0% to 100%.
If the fan doesn’t turn on when set to 100%, swap the toolhead for your original Single Extruder and see if the part cooling fans work. If neither of the part cooling fans come on with the other toolhead, you need to test wiring, and ultimately the board if no wiring problem is found.
I was able to do a quick test and it seems the part cooling fan is connected to Fan2 in the settings on the machine. The only reason I can think why this would be the case is because sometimes that machine is converted to a duel extruder tool head. I don’t suppose there is a way, outside of redoing the cabling, to have the gcode kick on fan2 instead of fan1? We typically use the SD card for printing and only hook up the printers to the computer for firmware updating.
Are you running under the Dual Extruder firmware? Custom firmware?
It sounds like somebody has made some modifications to the machine, possibly to work around a failed part, or just reassembling it wrong.
If you open the case, you should be able to see if it was wired incorrectly. On the board, Fan 0 pins should be the first part cooling fan (which is called Fan #1 in the printer’s temperature menu), Fan 1 pins should be part cooling for extruder #2 (Fan #2 in the printer’s menu), and Fan 2 pins go to the case fan. The 5v fans are the heatbreak fans. The part cooling fan wires are the same color, so they may have been inadvertently swapped if somebody took the machine apart.
I think you need to pull that side panel and give some good pictures of the wiring on the board, this is sounding like you inherited a bit of a project.
Simply unplugging and swapping the FAN0 and FAN1 connectors would probably solve this problem, but if there’s other underlying reasons that swap was done in the first place, you may do damage.
It looks like we did accidently swap fan0 and fan1 at some point. It might have been before we did the duel extruder upgrade for the machine a while back as I do recall we had to replace the board on one or two of the machines (one of which we did label the wires but this one we don’t have labeled wires for some reason).
I’ll be able to do a test print tomorrow to see if all is working again (and pray that nothing else goes wrong as I have another machine pending to be fixed)