So I was printing some parts last night. Two out of the three parts printed out fine. The third part came out very unusual this morning. I tried to print a different part and now I’m getting this error message. “Probing failed PRINTER HALTED Please reset”.
I cleaned the printer head, I took the whole thing apart cleaned it real good still didn’t work. Then I calibrated the printer adjusted the Z axis the X axis still getting the same error message.
So I’m running out of options not sure if I had to replace the head. Any suggestions?
What printer do you have?
It’s a Lulzbot Taz 6.
part 1 of 2

Here is a video of the issue.
I will get that error on my TAZ 6 when either the nozzle or the corner washers are not clean enough. Which corner is it failing on (1st, 2nd, 3rd or 4th)? If it is the 1st one, the wire that connects the nozzle to the controller board may be loose or broken.
part 2 of 2

I don’t see the nozzle even attempting to touch the corner washer. Are you using the USB port? If yes, what is it connected to? If it is CuraLE, what version?
What version of firmware is installed?
The more details you provide, the better chance we have of helping.
Right! That’s what blows my mind. I don’t know, how the heat Tip thinks it’s dirty.
I use the SD card media to upload my designs.
It was working just fine last night. It finished up two out of three of my parts. Do you know if a new firmware dropped last night? I’m not even attempting to print. I’m just trying to get it calibrated right now. This morning I did opened up the cover and checked the fuse to make sure I did not blow any out. They all are good. Is there a recalibration scrip to run via computer?
By the way, thank you for trying to help me figure this out.
If you have the printer connected via USB, it is possible to send gcode commands and receive the responses. It can sometimes be easier to troubleshoot when you have that ability.
Firmware for the printer is loaded via USB so if you don’t have it connected, new firmware doesn’t matter. When you first turn the printer on, the LCD screen should display the version of the firmware.
What sequence of commands are you using from the LCD panel?
I have my TAZ 6 connected (via USB) to a Raspberry Pi 3B running OctoPrint. I send commands and receive responses through a web browser.
My primary slicer is CuraLE 3.6.37 running on a Windows 10 computer. CuraLE can also be connected to the printer via USB to send and receive gcode commands and update the firmware.
Yes, im using this slicer too CuraLE 3.6.37. do i update the firmware from the slicer program?
So my Firmware is 2.0.9.0.13. I updated the firmware again. Still the same issue.![]()
The sequence of command I am using is Motion> Level Bed.
Firmware is 2.0.9.0.13 is the Universal Firmware which supports multiple tool heads. You have to select your tool head from the LCD menu. Have you done that?
Ok, so did a little experimenting with my Taz 6.
Two things I tried cause the observed behavior of press Z button successfully, followed by wiping of the nozzle.
1: Button press happened too early, a malfunctioning button can cause this, but when this happens, the nozzle never reaches the button.
2: The nozzle is reading connectivity to ground immediately when it starts probing the first point.
You’ve got #2.
The probe wires on the Taz 6 connect to the board here, at MX1.
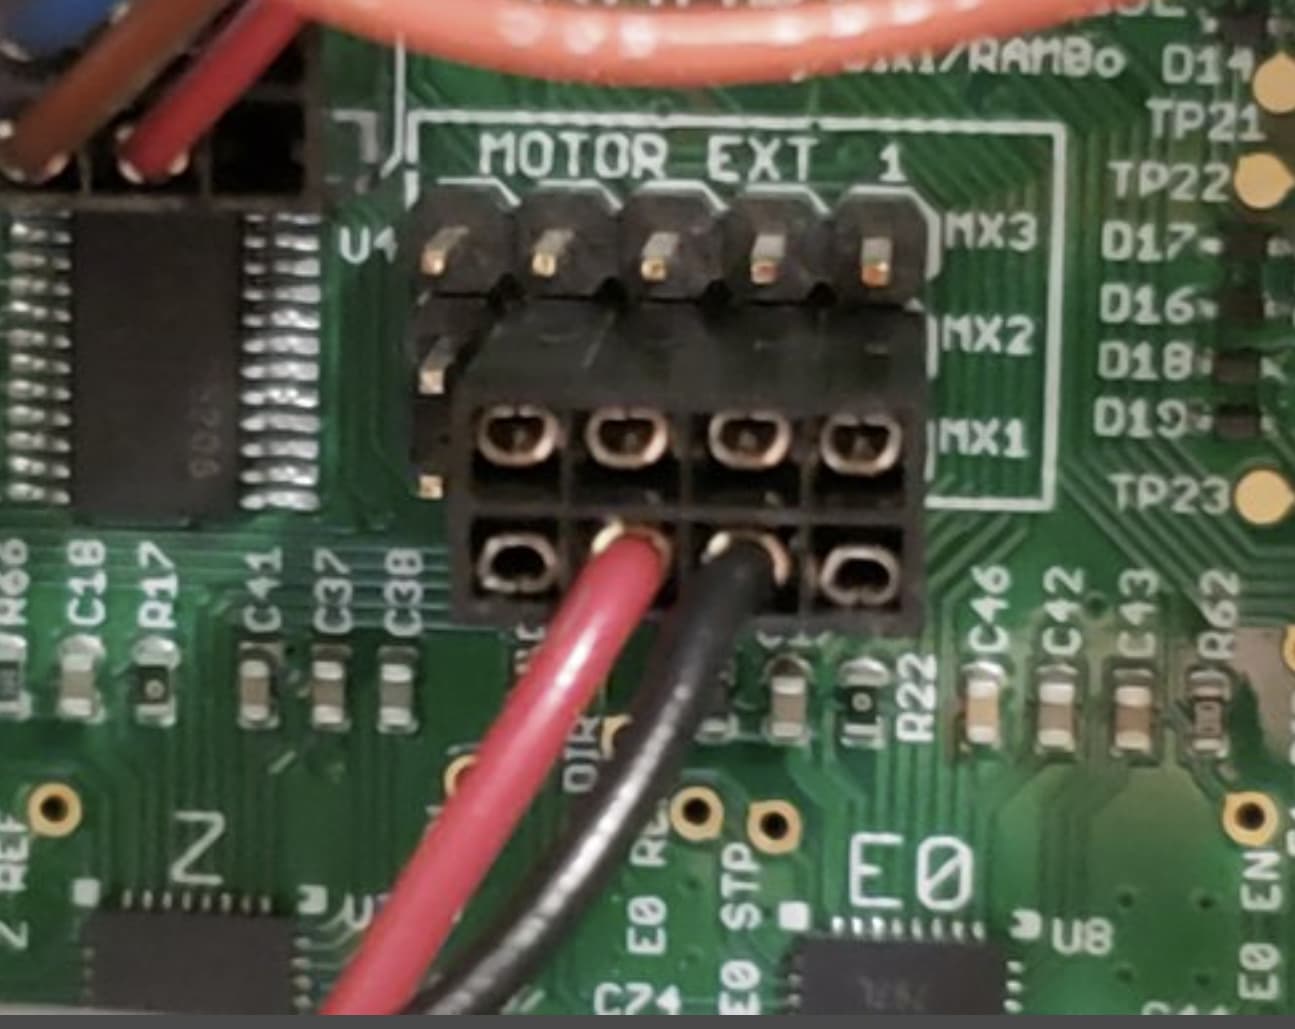
The red wire goes to the nozzle. The black wire connects the bed washers to ground, but any time the red wire is connected to the ground, it is the same as if it had touched a washer.
Since it’s clear your nozzle never touches the washer, the red wire going to it is shorting to ground at some point. The video shows that repairs have been done to the tool head, so that’s where I would start.
With the machine off, unplug the tool head harness. Do a quick continuity test between the probe wire (zero sense) going to the control board and the chassis ground inside the control box to see if there’s a short on that side.

More likely it’s going to be in the toolhead, and you just need to examine the wiring to find where that zero sense wire is frayed, broken, or otherwise connecting with another wire. I think the most likely spot would be with a fan ground somewhere, but could also be from the end stop switch. Just put your continuity tester on the zero sense wire and poke at each of the other pins on the harness until you find where it’s been shorted to.
If you can’t find a problem in there at all, you can disconnect the zero sense plug from the control board, and WITH YOUR FINGER ON THE POWER SWITCH, initiate the bed leveling process. Without that plug connected it would continue to keep going down even after touching the washer, but you don’t want it to go that far. You’re just verifying that it actually tries to probe instead of instantly going for a wipe. If, with that plug removed from the MX1 pins, it immediately goes for a wipe again, the problem is with the board.
2 Likes
I am having the same Issue but in my Mini 2. I was printing perfectly with the .5mm toolhead, then switched to the .25mm and the problem started. I switched back to the .5 and the problem continued. Something went wrong, but I can discard the toolheads, right?? I am a little bit lost.
I’d guess you damaged the zero sense wire on the harness.
Any advice on how to replace it or how to confirm that is the issue??
Check for continuity from the nozzle and work back to the control board.
First, test your continuity tester by tapping the leads together. You don’t want to find out something was wrong with your tester after tearing your hair out.
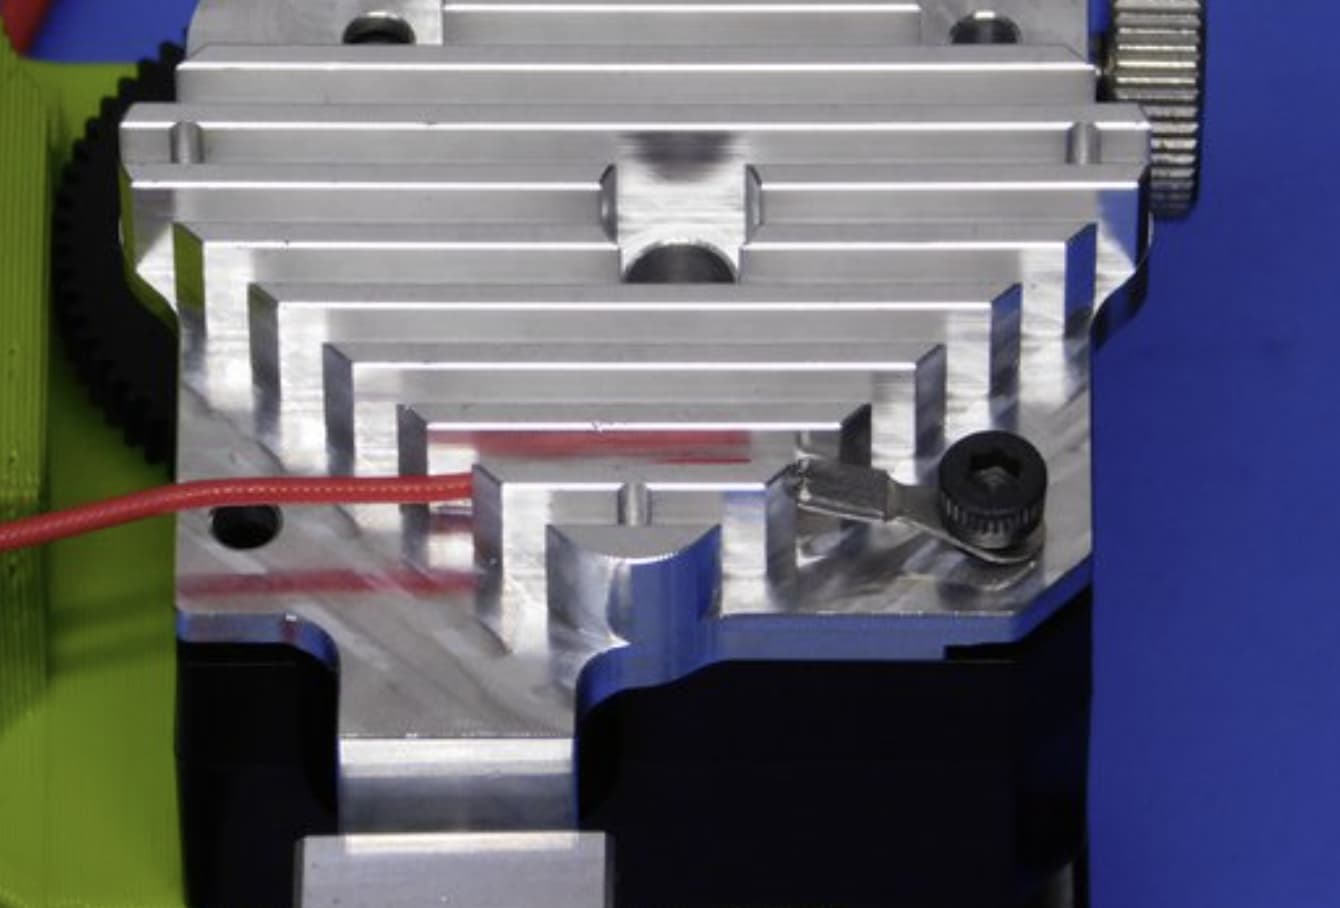
Second, between the nozzle and the ring terminal on the side of the heatsink.
Hopefully you have some alligator clips to keep clipped to the nozzle as you continue, because you’ll keep one wire on there the rest of the time.
Third spot, check zero sense at the harness:

Next, at the board:

If that wire has no breaks in continuity, you can check on the bed. Since you have the board exposed at this point, start by checking between one of the washers and the zero sense wire on plugged in beside the wire from the nozzle. I may be wrong, but I think it’s white for the nozzle, green for the bed.