Well, I am STILL drawing on the body but I got the nose/cowling printed out this weekend! I think I will be ready to do some serious printing on the body next weekend!
You know, this thing is really coming out big. The wing is 6 foot. This cowling is huge! A smart person would have started small and worked their way up. {sigh}
Bah, that’s defeatest talk, make it bigger and then make the next one even bigger than that! pretty soon - worlds first fully 3d printed passenger plane!
I was out on RC Groups this weekend as they have a 3d printing forum now. I saw some mind boggling printers. I saw a child standing in the print volume area of one printer. I saw another that took 1/2 of a one car garage!
Well I got drawing the body of the plane close enough I went ahead and started printing. The printer ran nearly 24 hour days for several days and I have a lot to go yet
On a side note, with all the things I have learned here on the forums about accuracy (proper filament diameter in Cura, z-offset and e-steps) I have gotten much better accuracy. In fact, even with cheap filament I have nailed down that .3 mm per side seems to be the perfect clearance so parts snap together with minimal sanding/trimming! So if tab A is 3 mm I will make the slot B 3.6 MM and 98% of the time they will snap right together! (that is not a percentage though. .3 each side whether it is 2mm or 20mm)
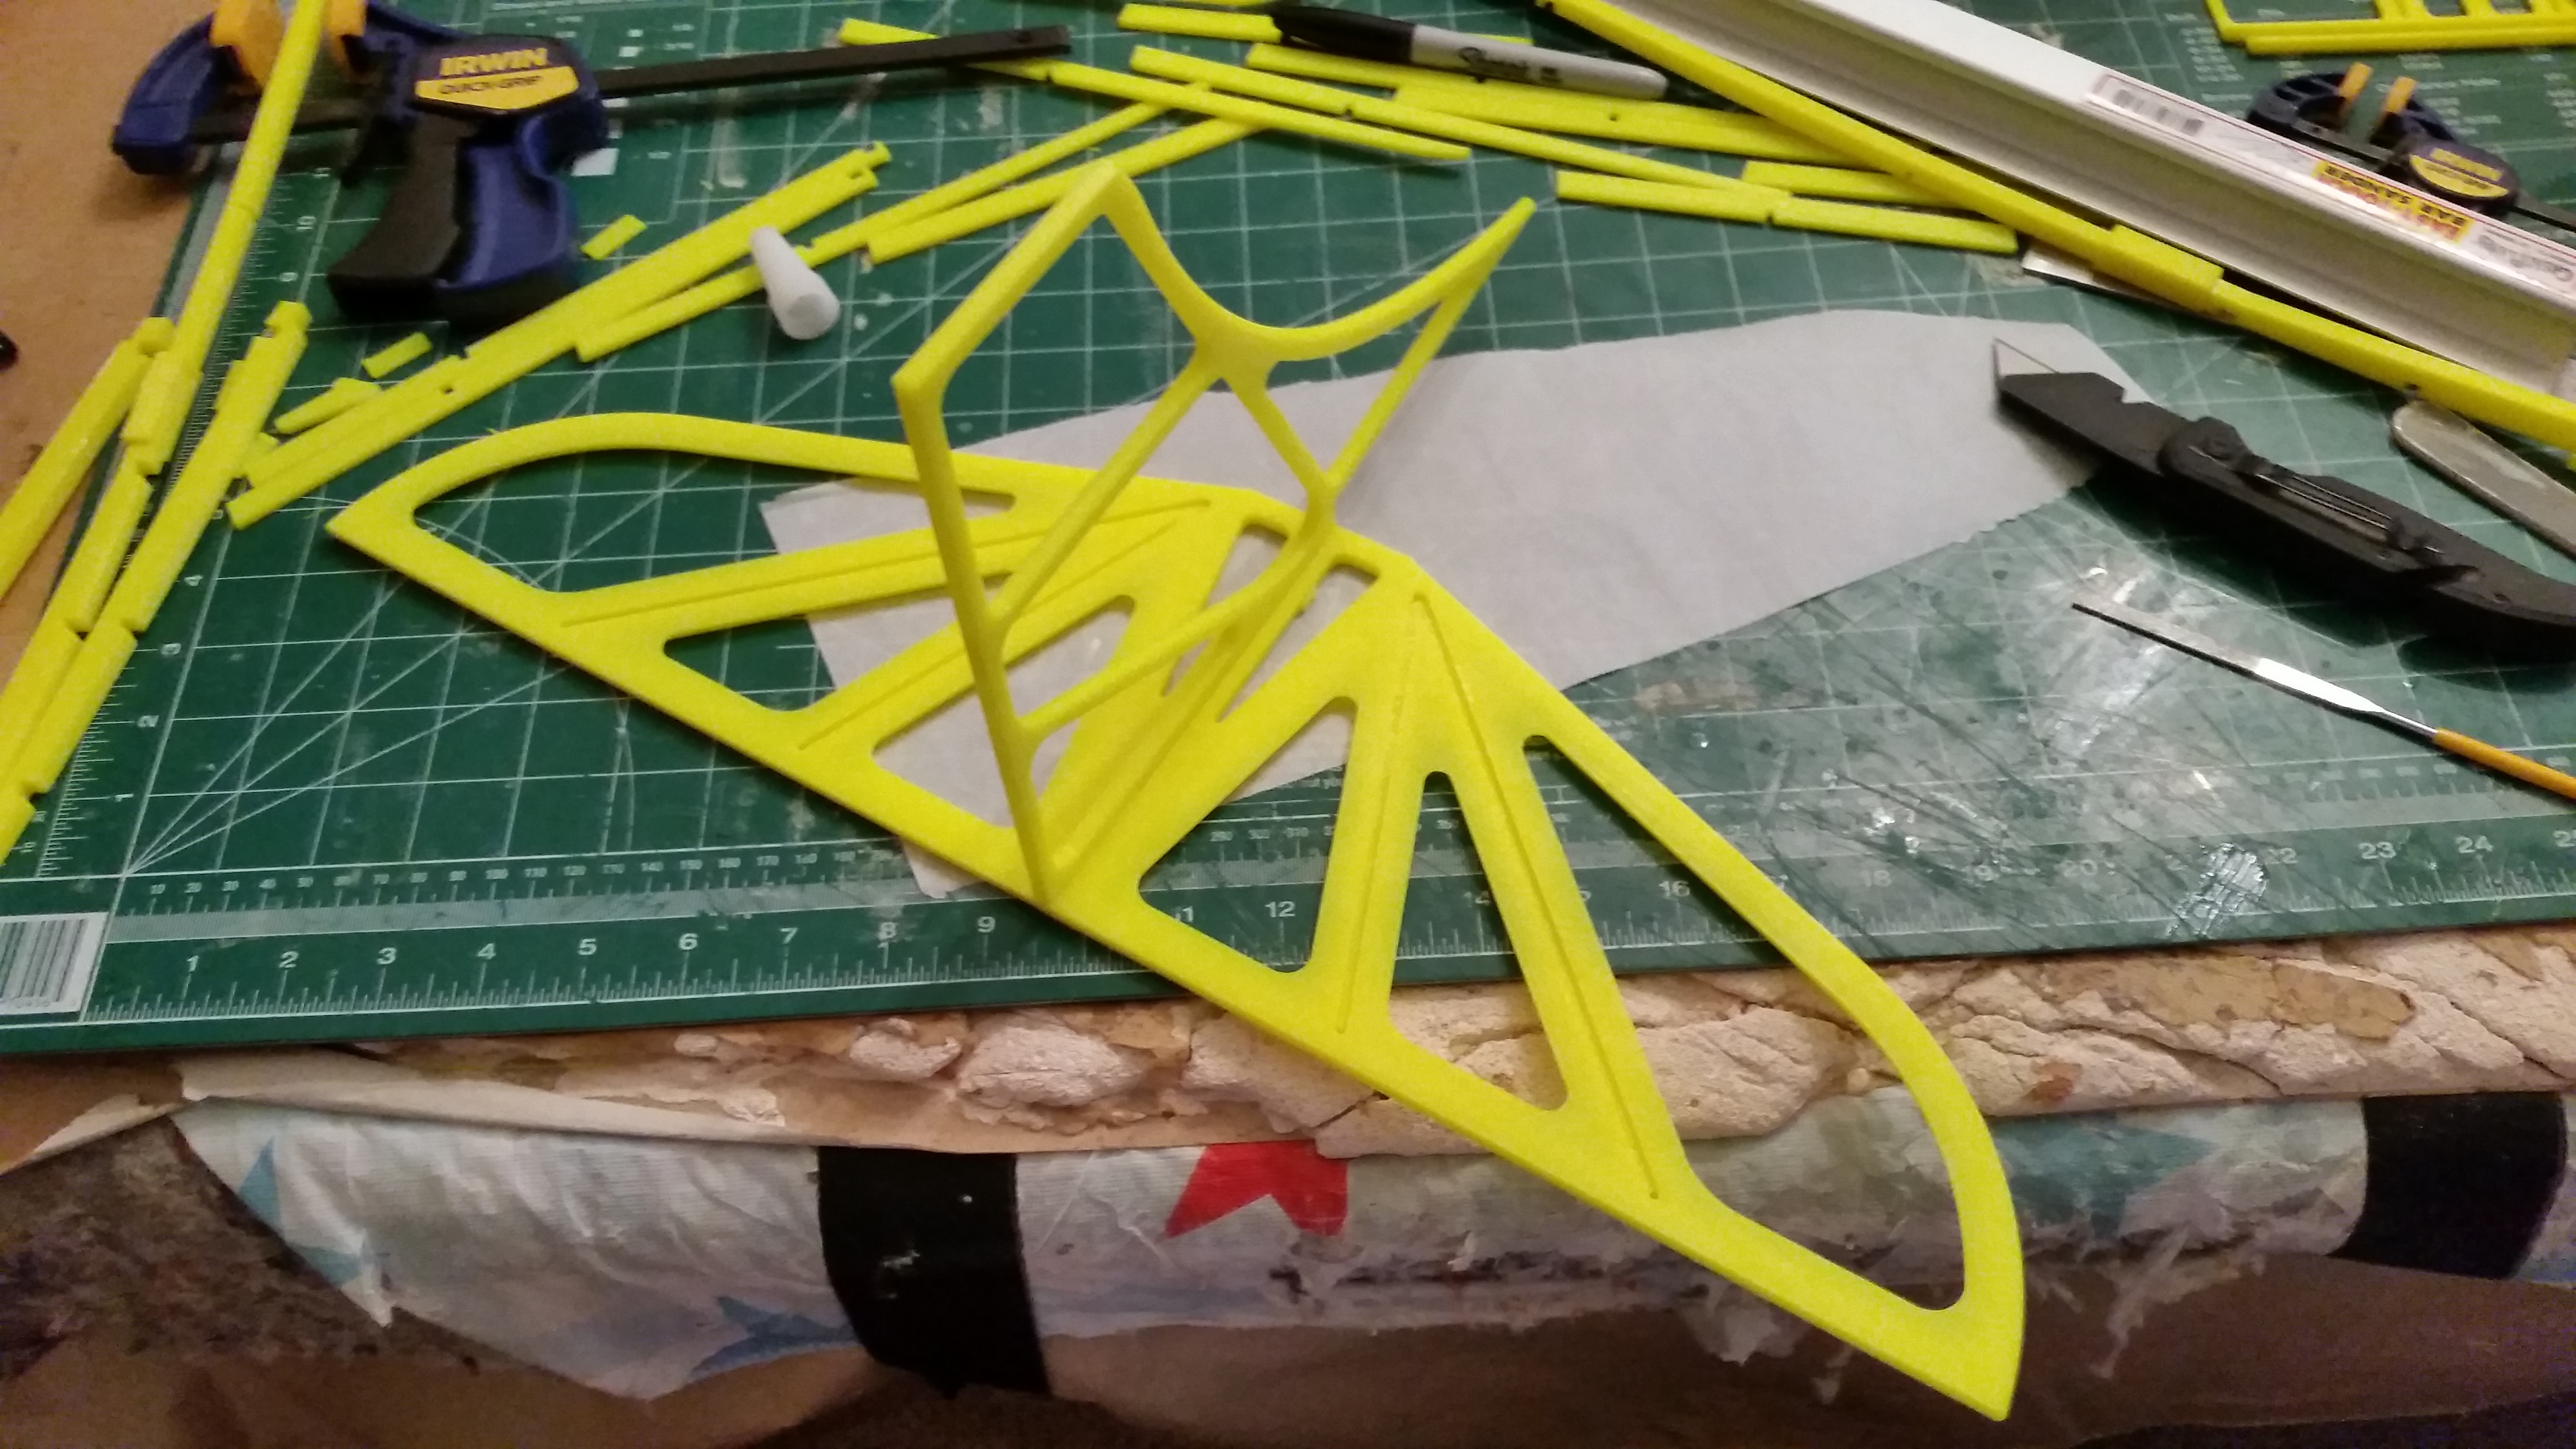
Ok shut up Rob and show us some pictures… Here is a small stack of parts I printed this weekend.
I started assembling and again, I was thrilled with fits tight enough to ‘click’ into place. There is no glue on these parts yet!
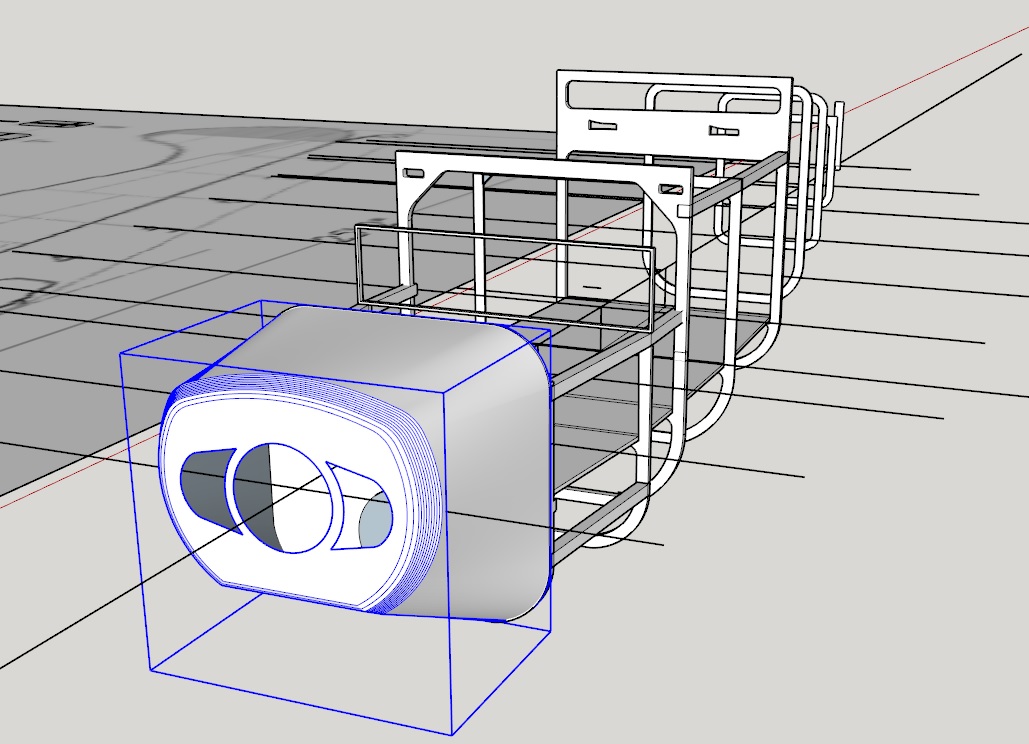
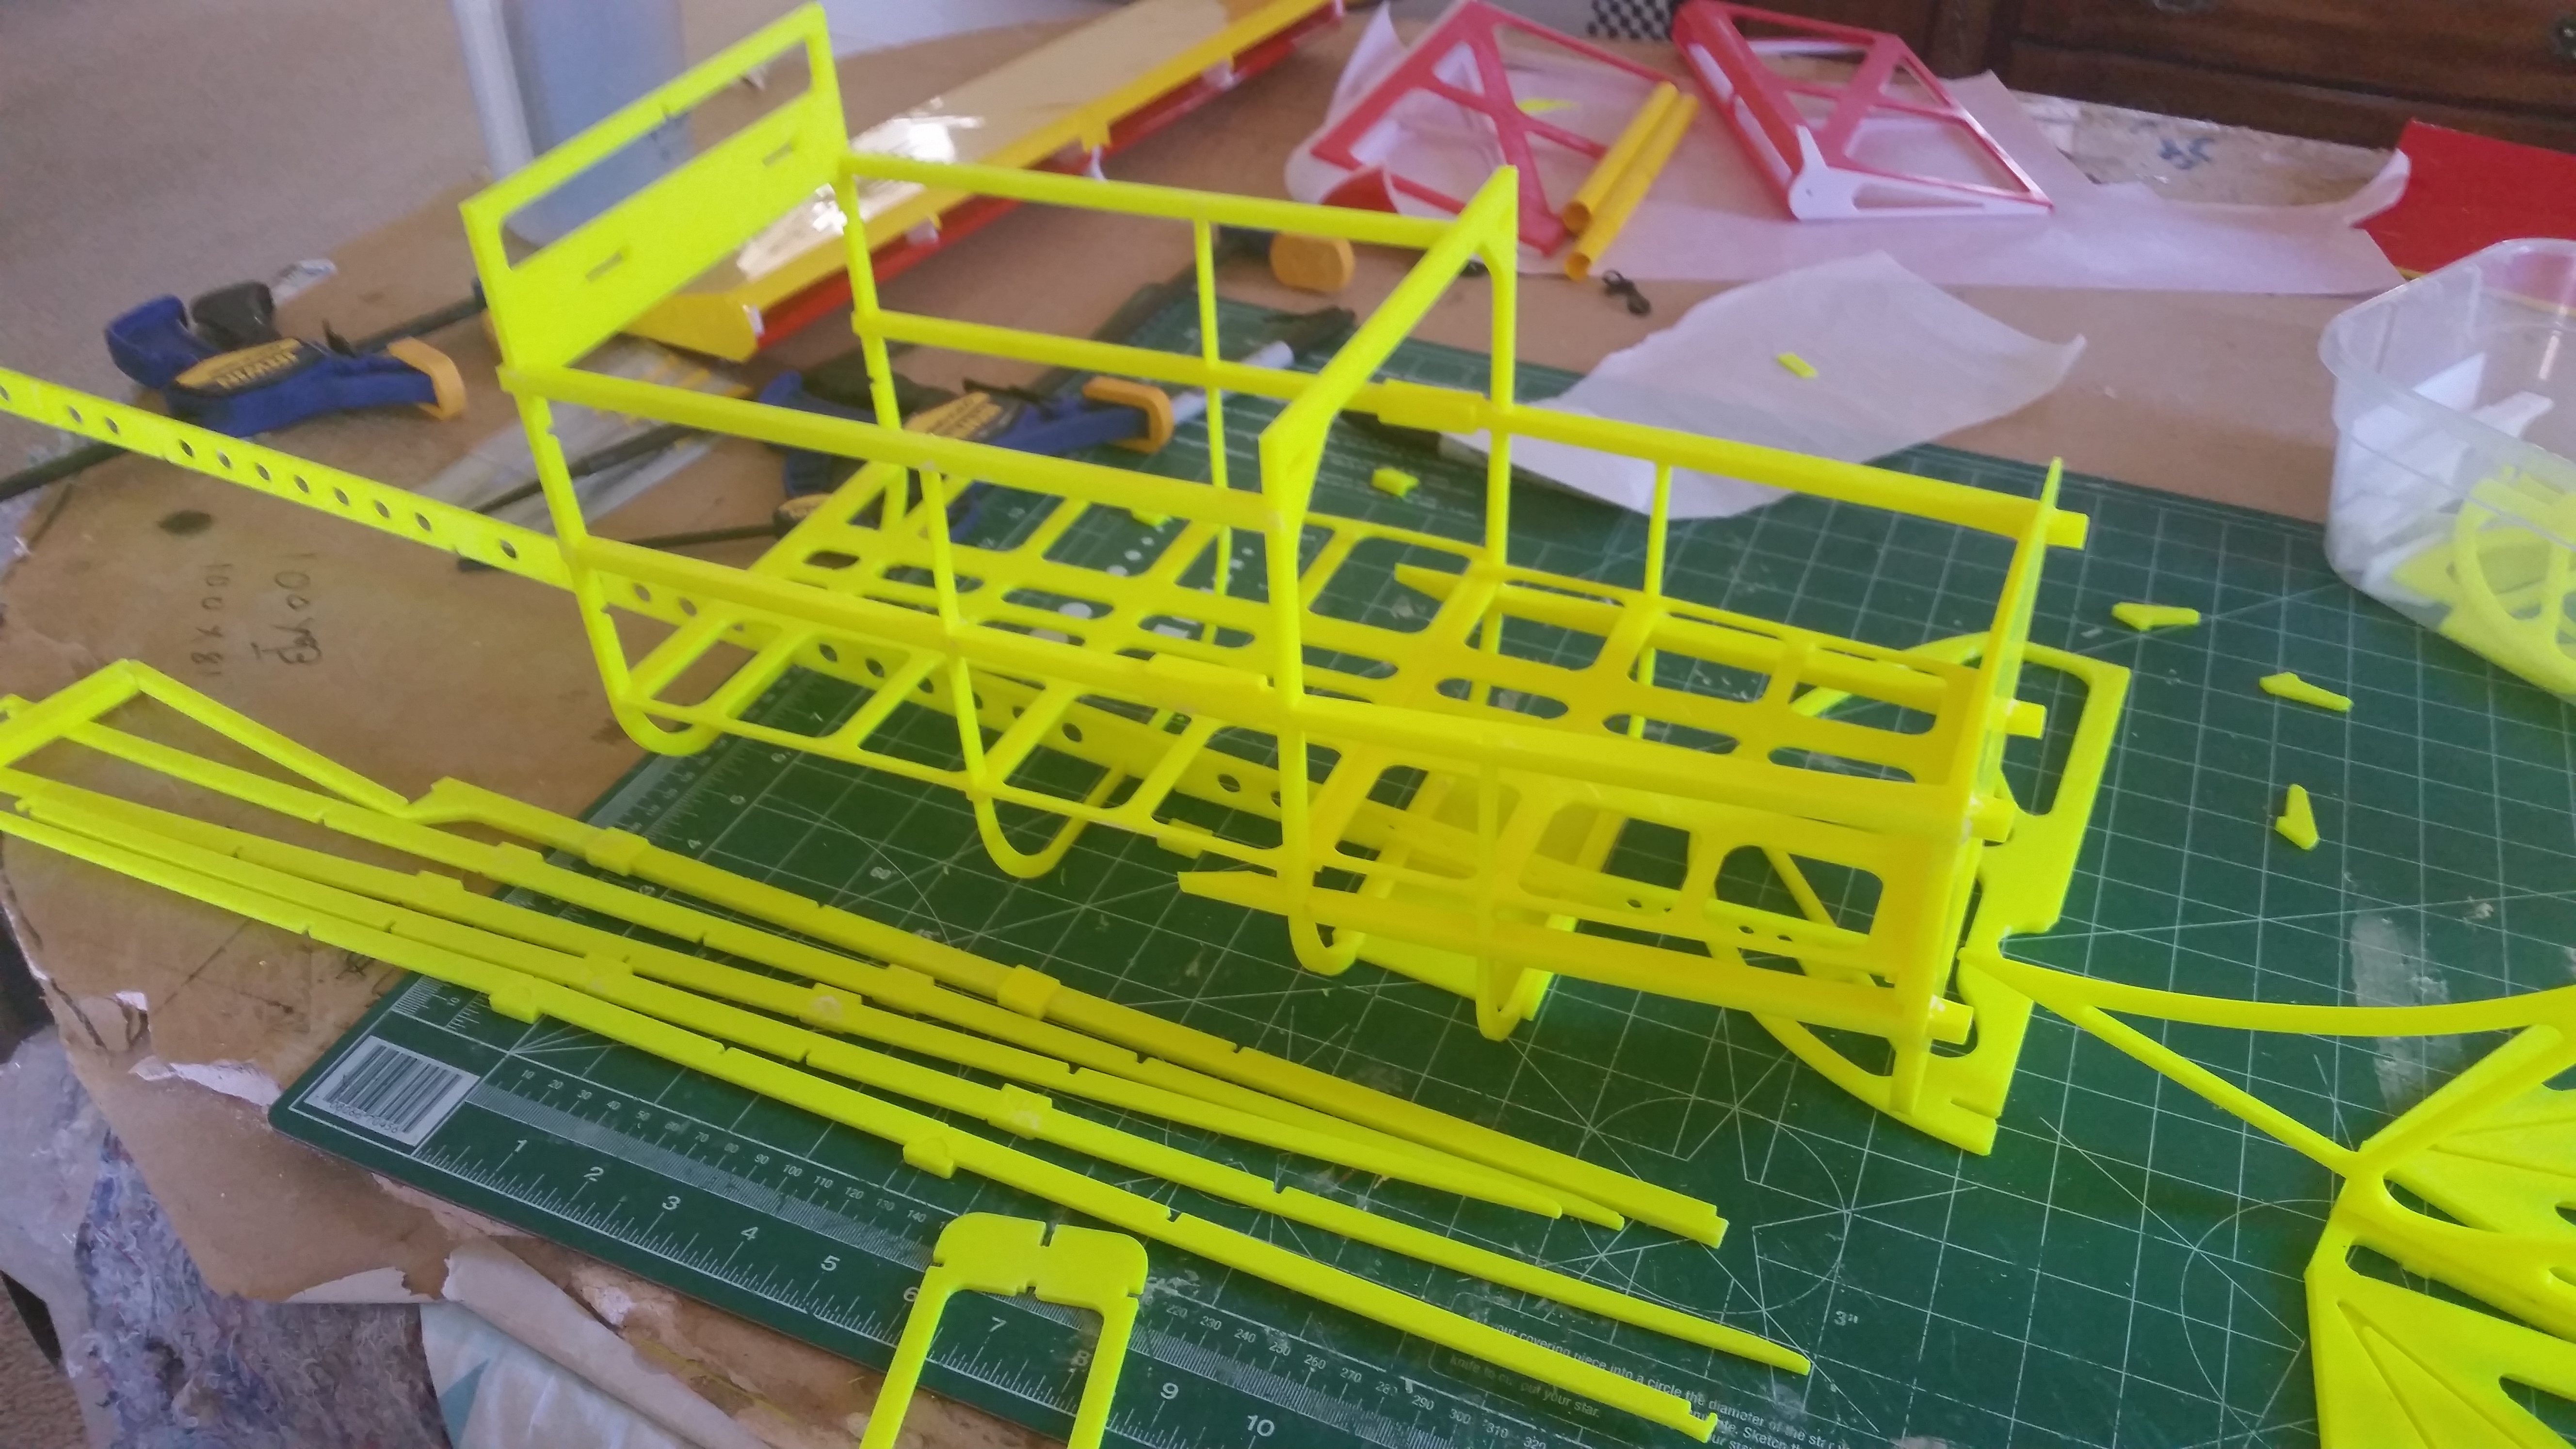
Check out this firewall and motor. I can’t believe how big I let this plane get on me!
Coming together, note the 1 foot ruler in the fore ground!
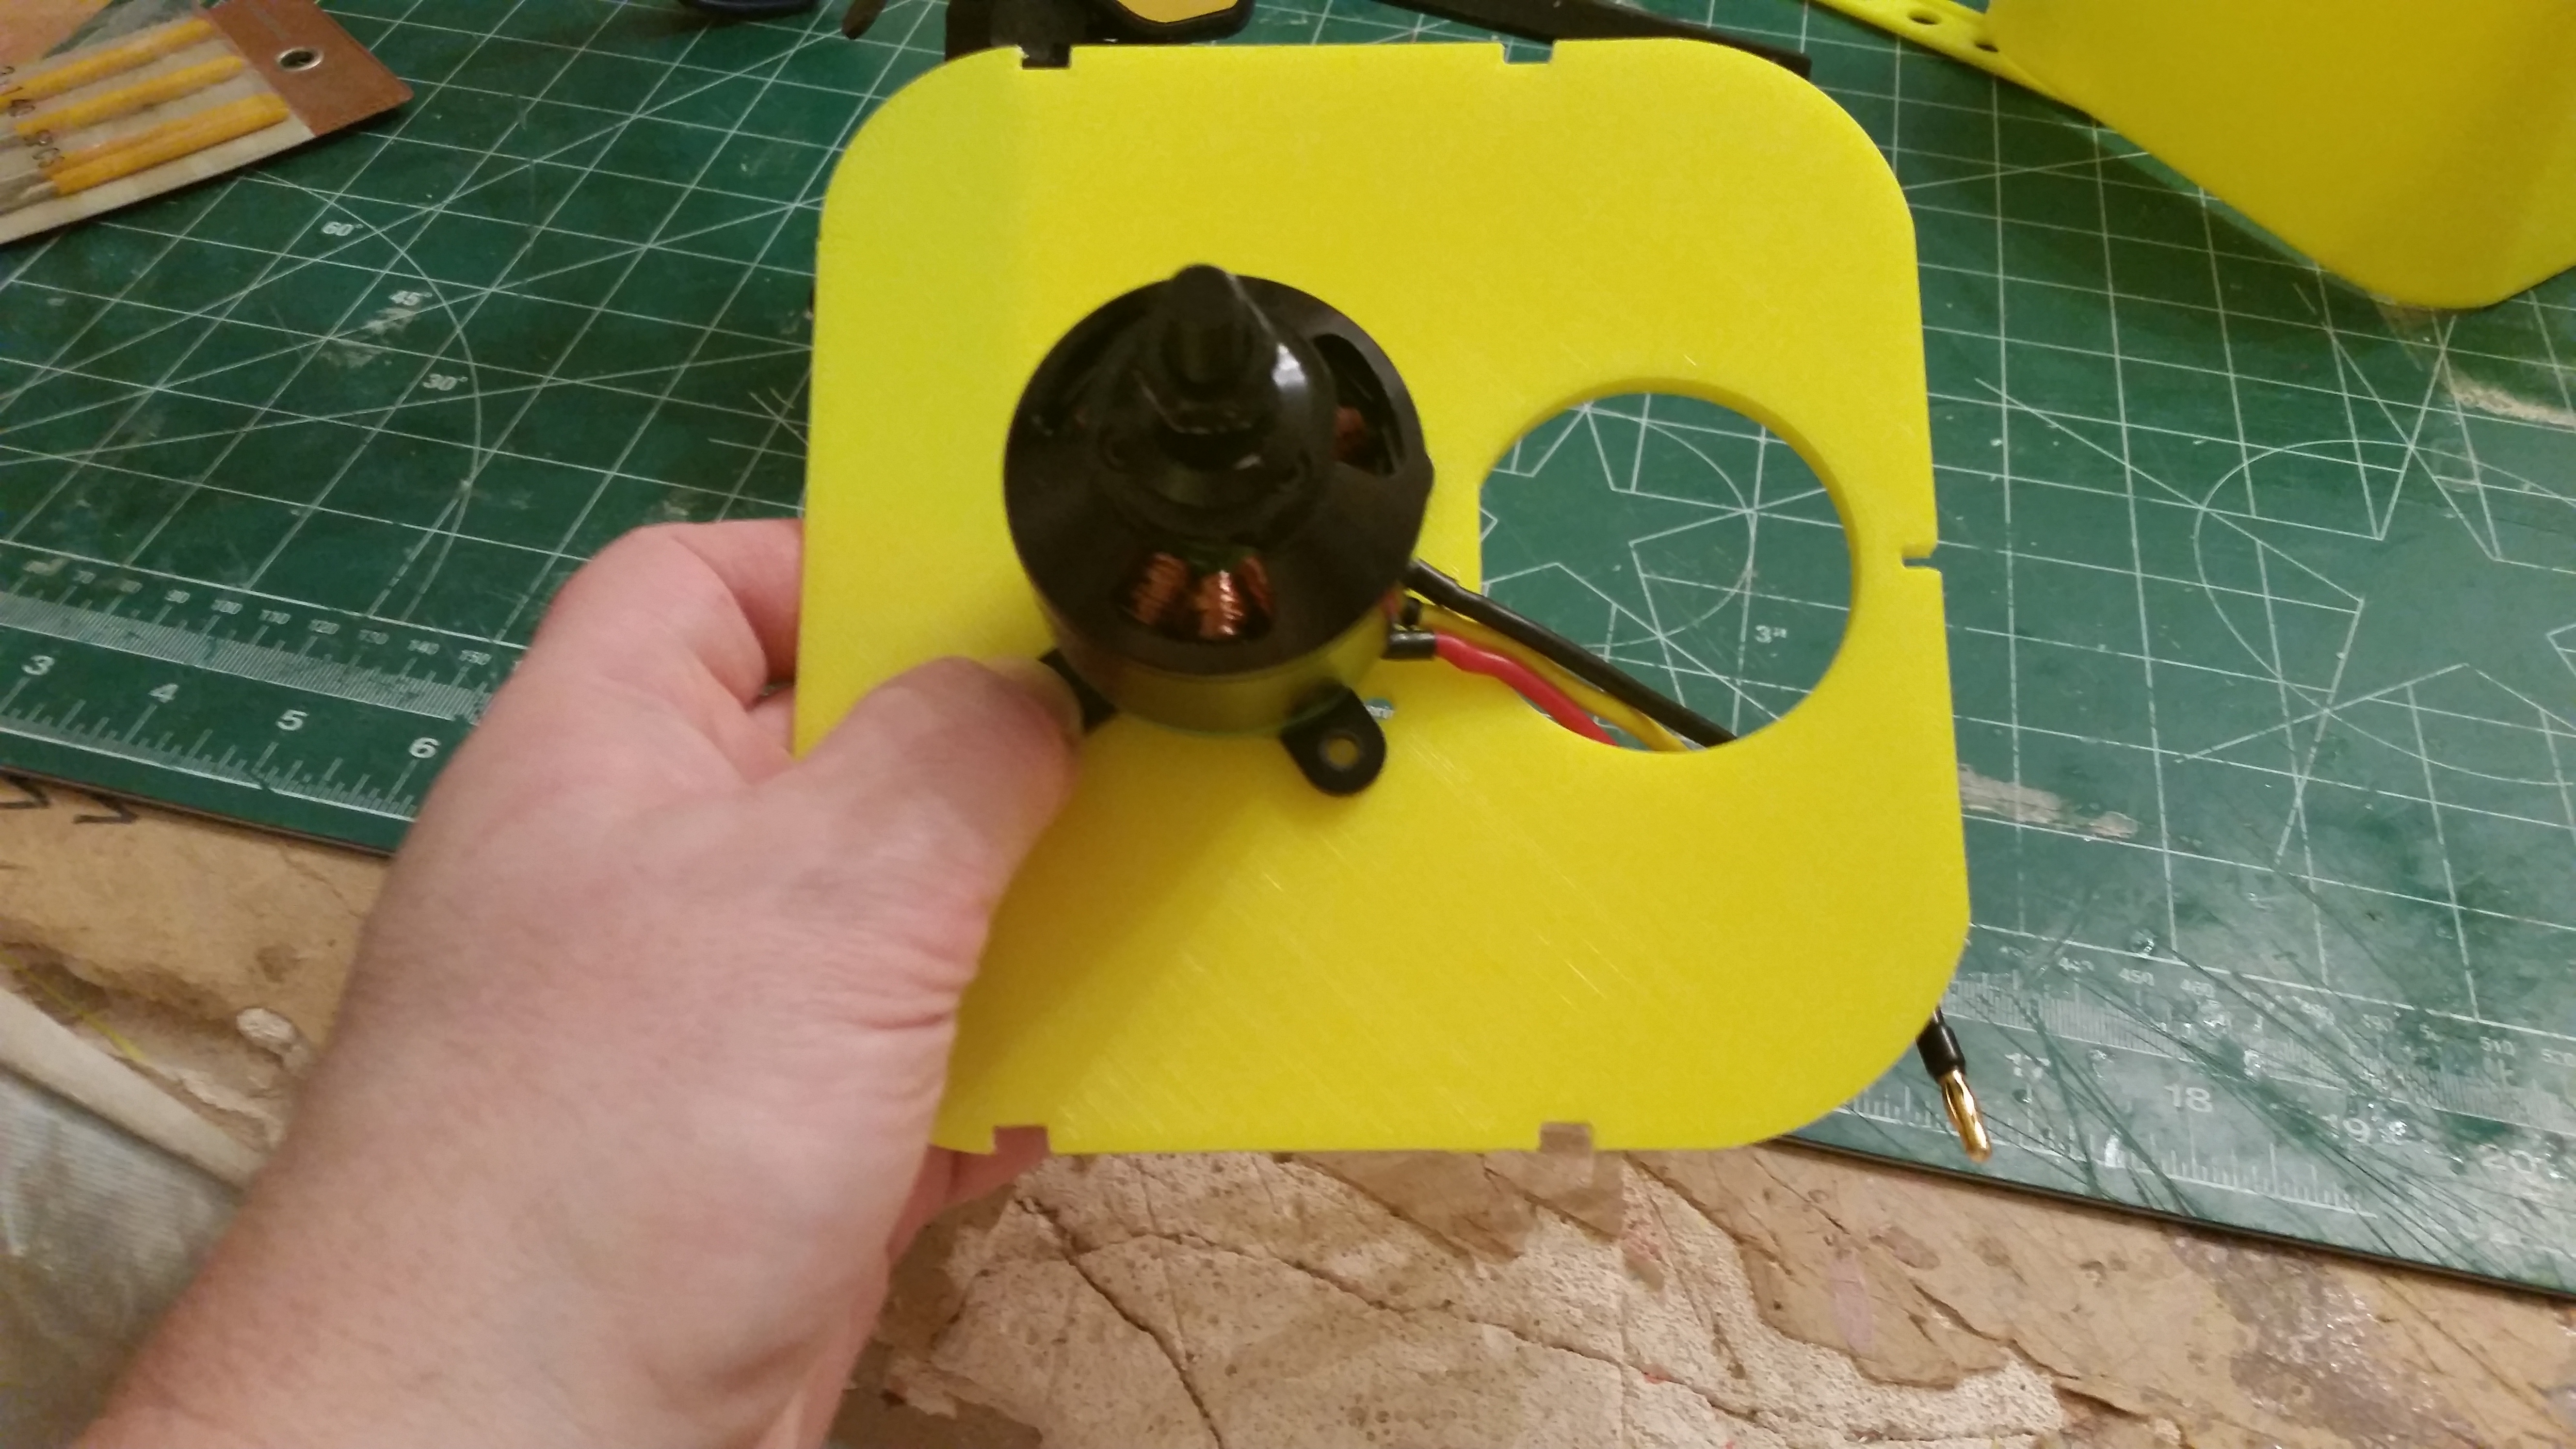
For years I have made my airplanes out of balsa wood and hand drilled the motor mount holes. I have ALWAYS had a problem getting the 4th screw/bolt in! I ALWAYS assumed it was my sloppy hole drilling! This time I used the protractor to draw it to make sure my holes were perfect! then printed the part so I should have precision right?
The 4th screw STILL did not want to go in!
So back to the drawing the board! I scanned the motor mount into the SketchUp (CAD) and lookee…
I like it. It does have a tendency to drip so you get some stringing but at $11.00 a KG shipped I can deal!
The wing was even cheaper ExcelVan PLA but I could not find any after Christmas so I tried this. ExcelVan is even cheaper but it prints better- no drips and had a glossier finish.
I have gone full circle on this project; I started off with intricate interlocking parts then could not get them to fit together on a consistent basis, so I simplified my parts and made connections bigger and sloppier. Yes, that means weaker but I think they are strong enough.
Then as I kept reading and learning here I got better at dialing in my machine and Cura and started making more intricate parts again.
I just love how the tail parts of the plane snap together. Now I won’t lie, I did do little filing on a few of the notches but still, I am very happy
with results! Short video!
So I started off by saying I am showing off, but really I am showing off for all of us because I learned how to get prints this good with the cheapest of filament here on these forums so my success is our success!
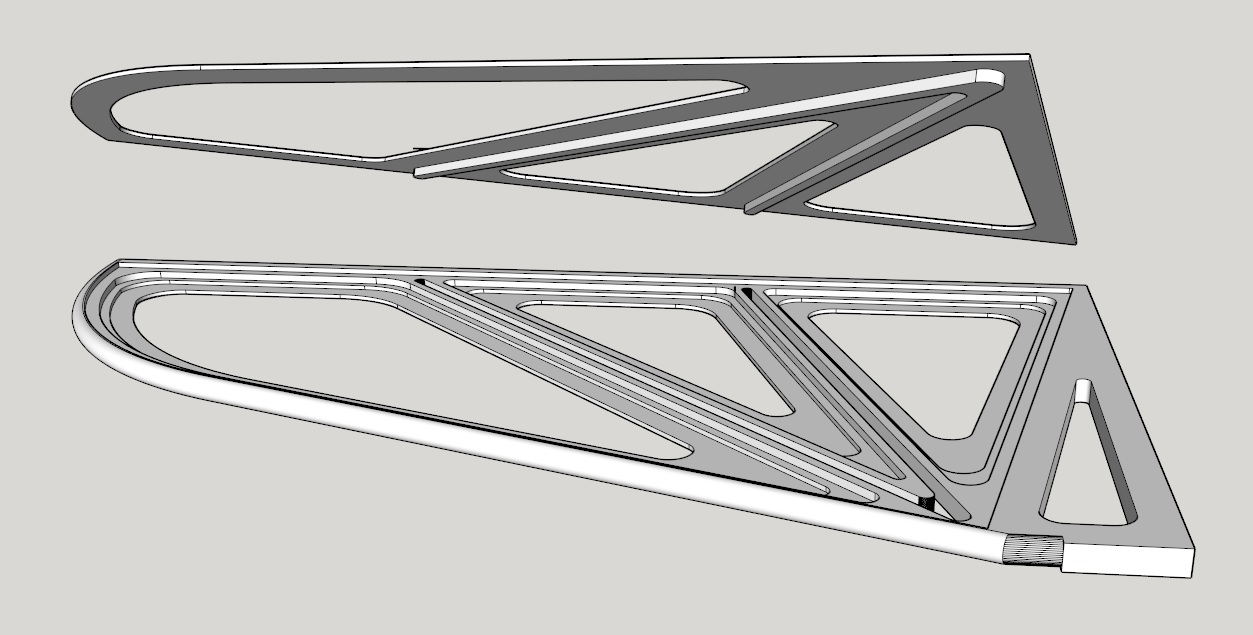
Well it is time! I am still struggling with the windshield but otherwise it is drawn…
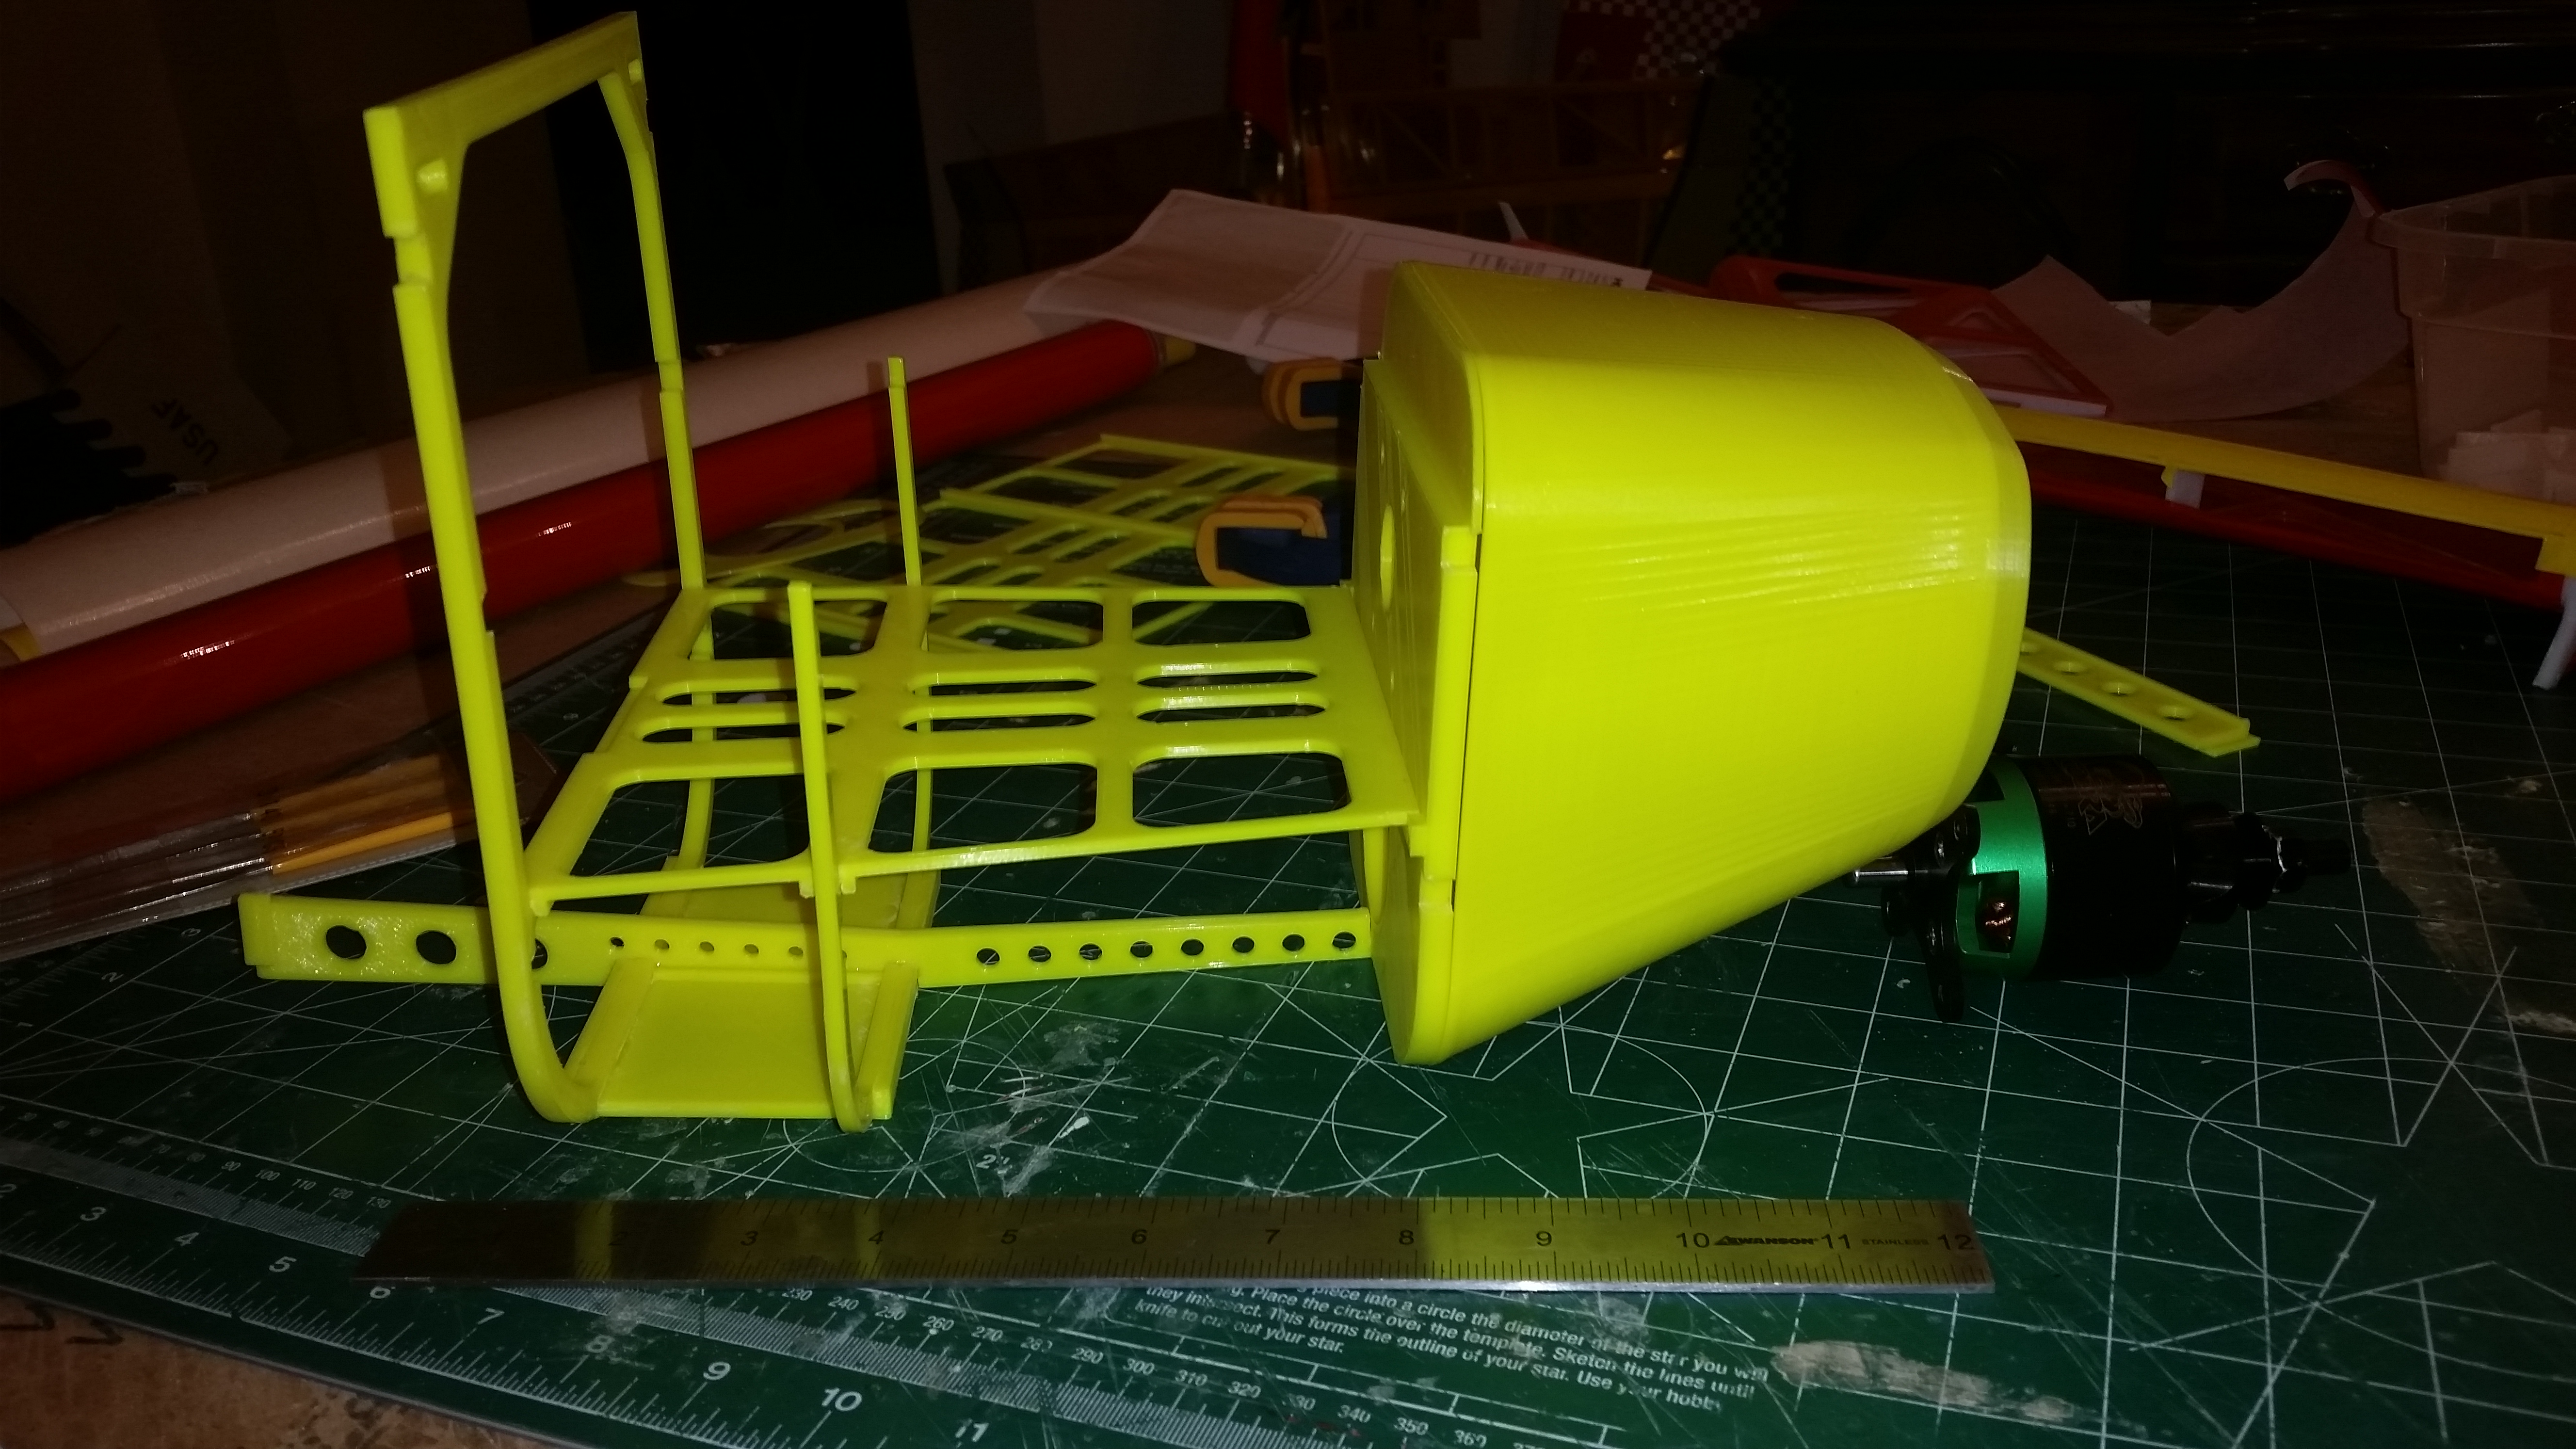
and we have the pile-o-parts printed!
So it is time to start building! The tail was easy so I knocked it out first…
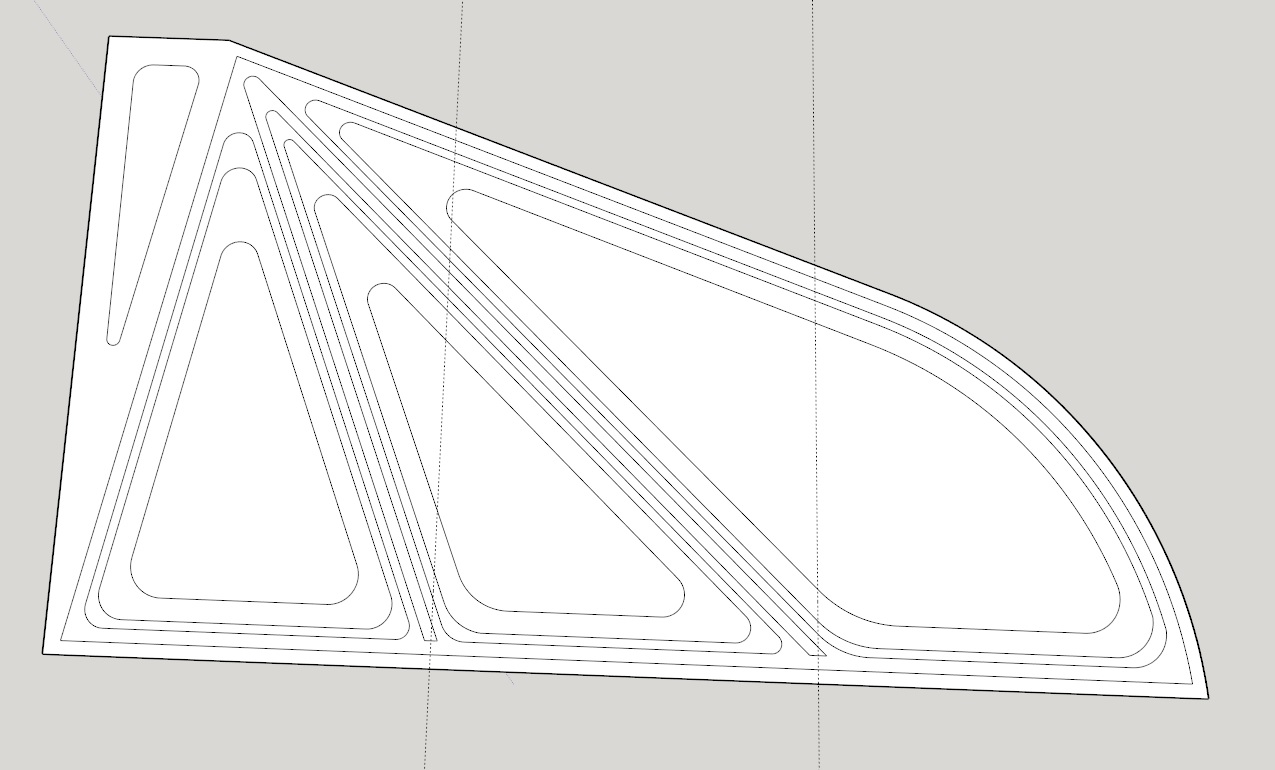
So I decided to assemble the all the longerons first. Since the plane is 5 feet long and the Taz 6 does 10.5 inches at a time the long parts had to be printed in pieces. So while I was putting them together I actually caught myself assembling them incorrectly in spite of numbering them so I went back and made all the parts key one way…
So all the long parts are assembled…
The fun part is after weeks of drawing and printing here is less than an hour of assembly time!
This is backwards. Normally it takes weeks to assemble but in this case all the parts are interlocking so I just click it together with glue! Woo hoo!
I will also like not having to sand the balsa for a weekend after it is assembled before it is ready to cover!
I hate dead/incomplete threads! So I can’t believe I have left this thread hanging since OCTOBER! OY! Bad Rob, BAD!
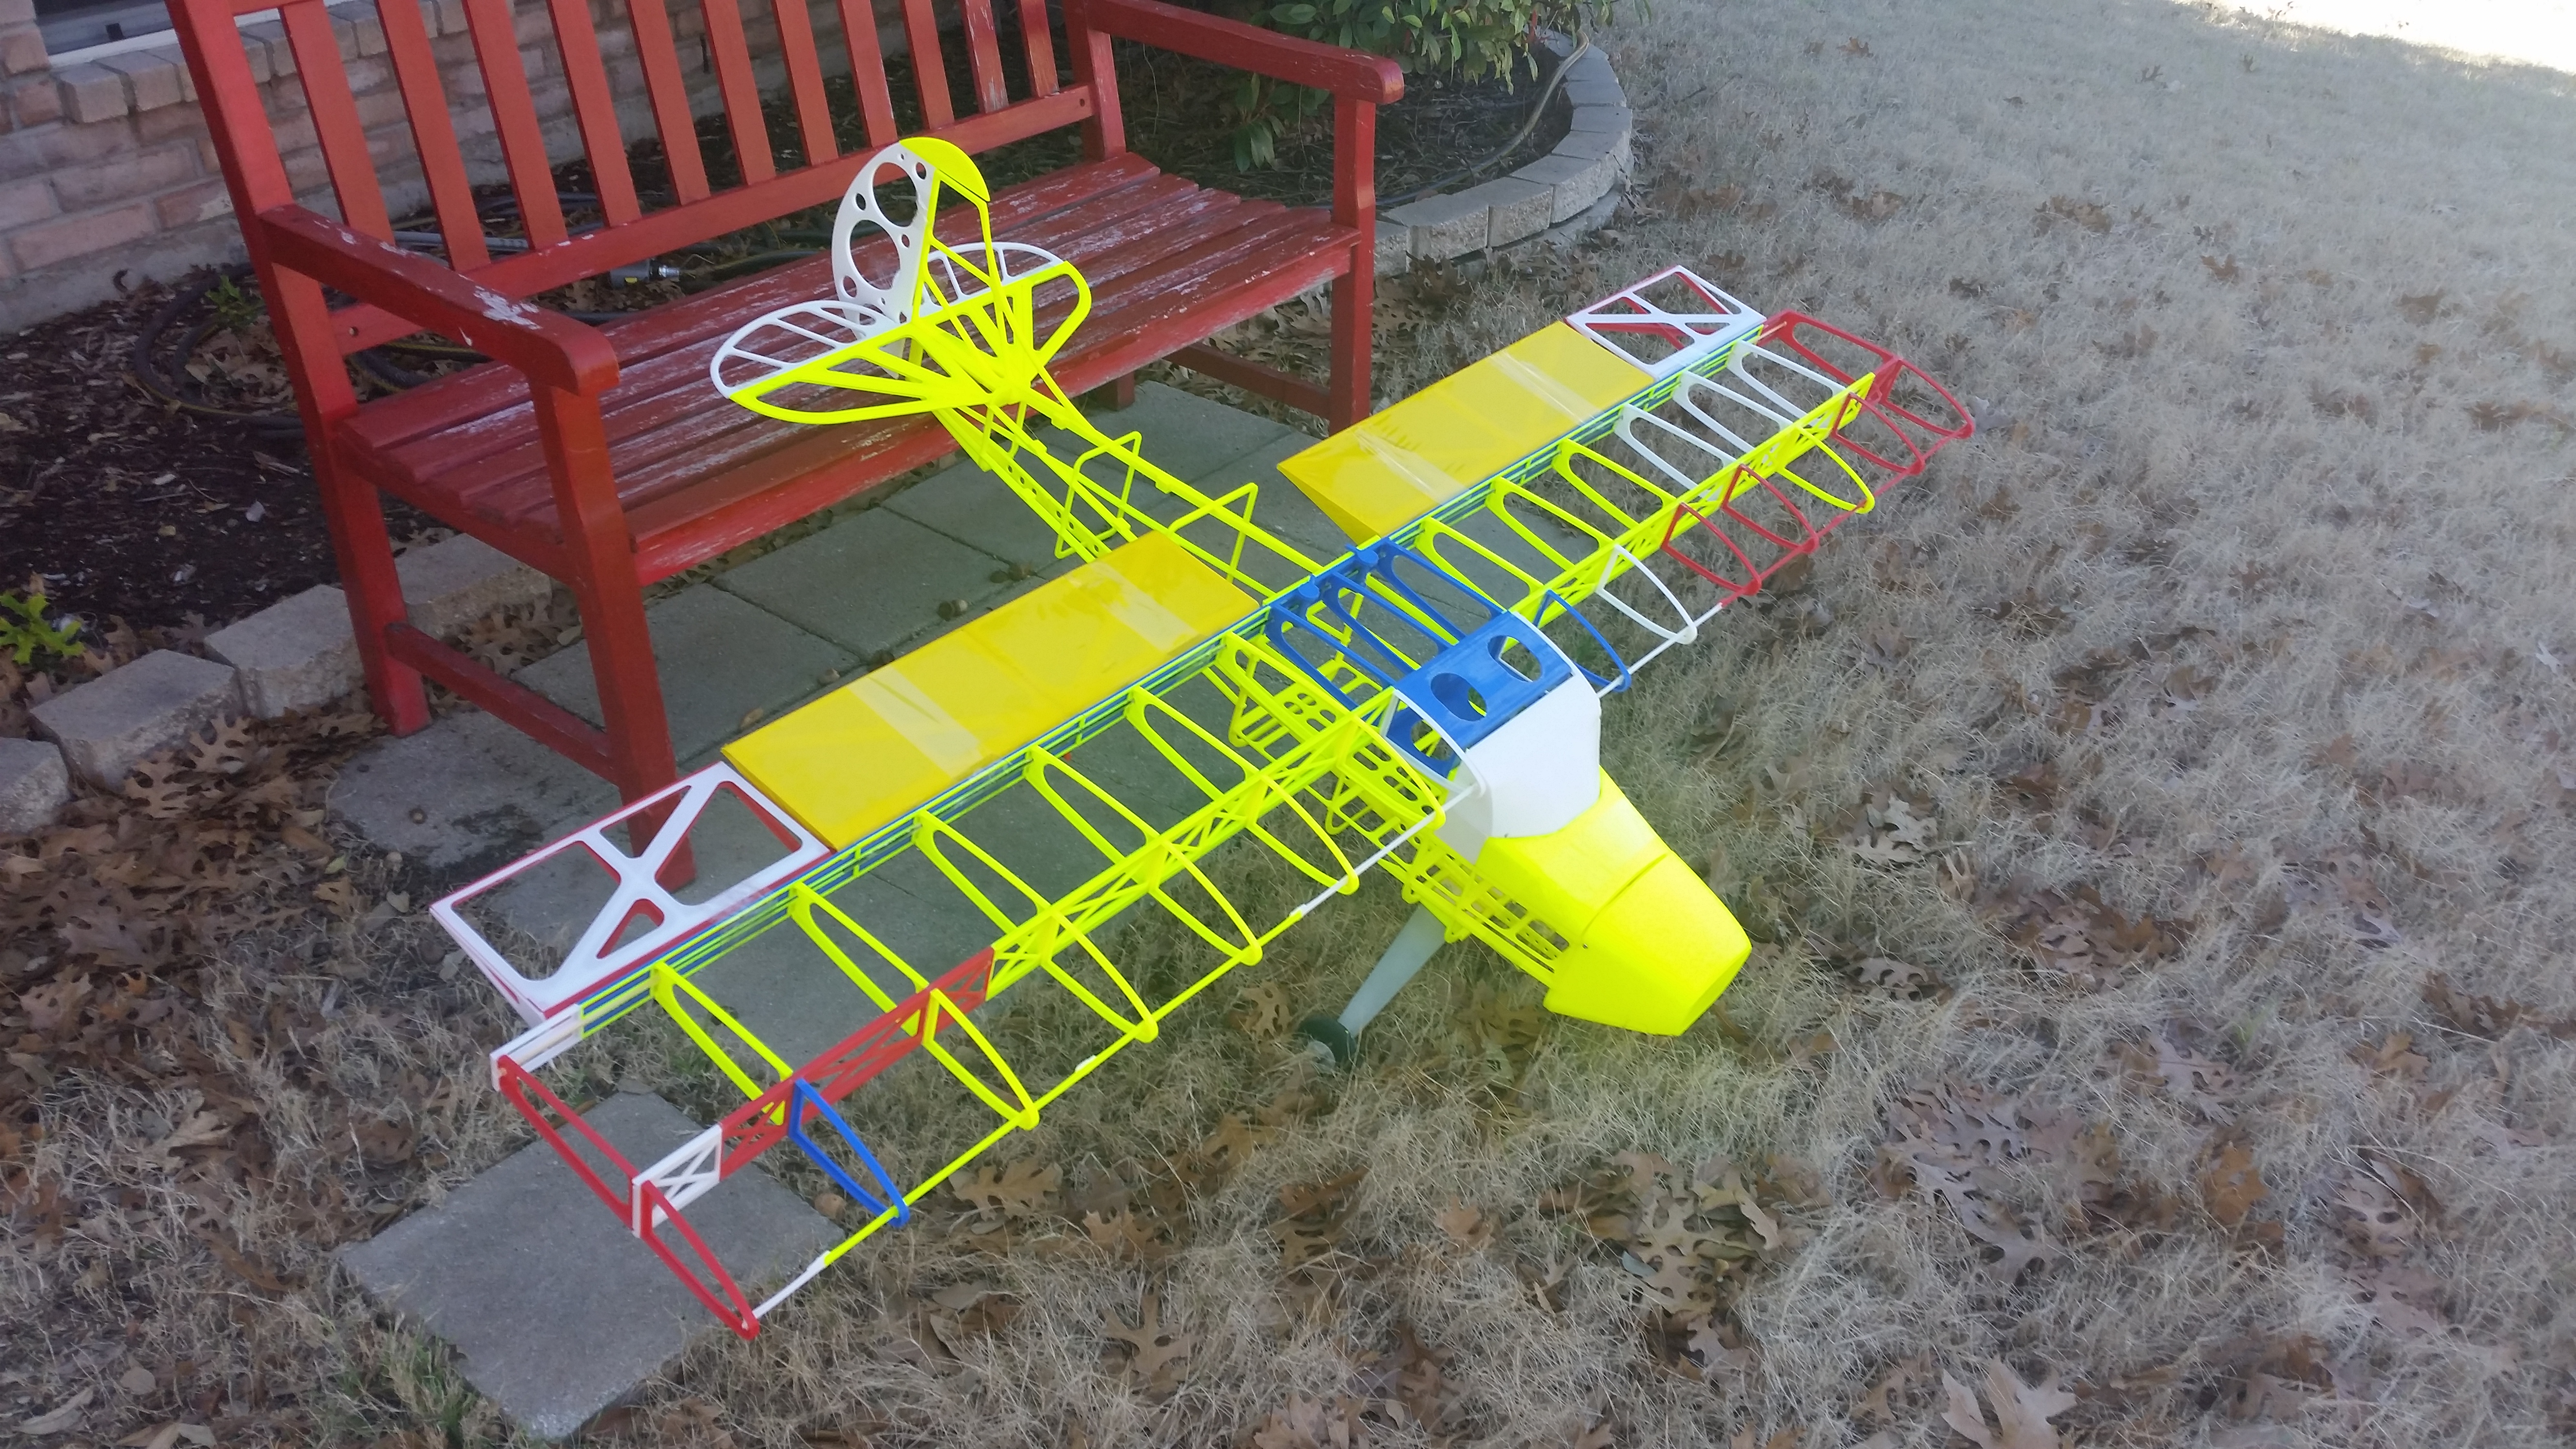
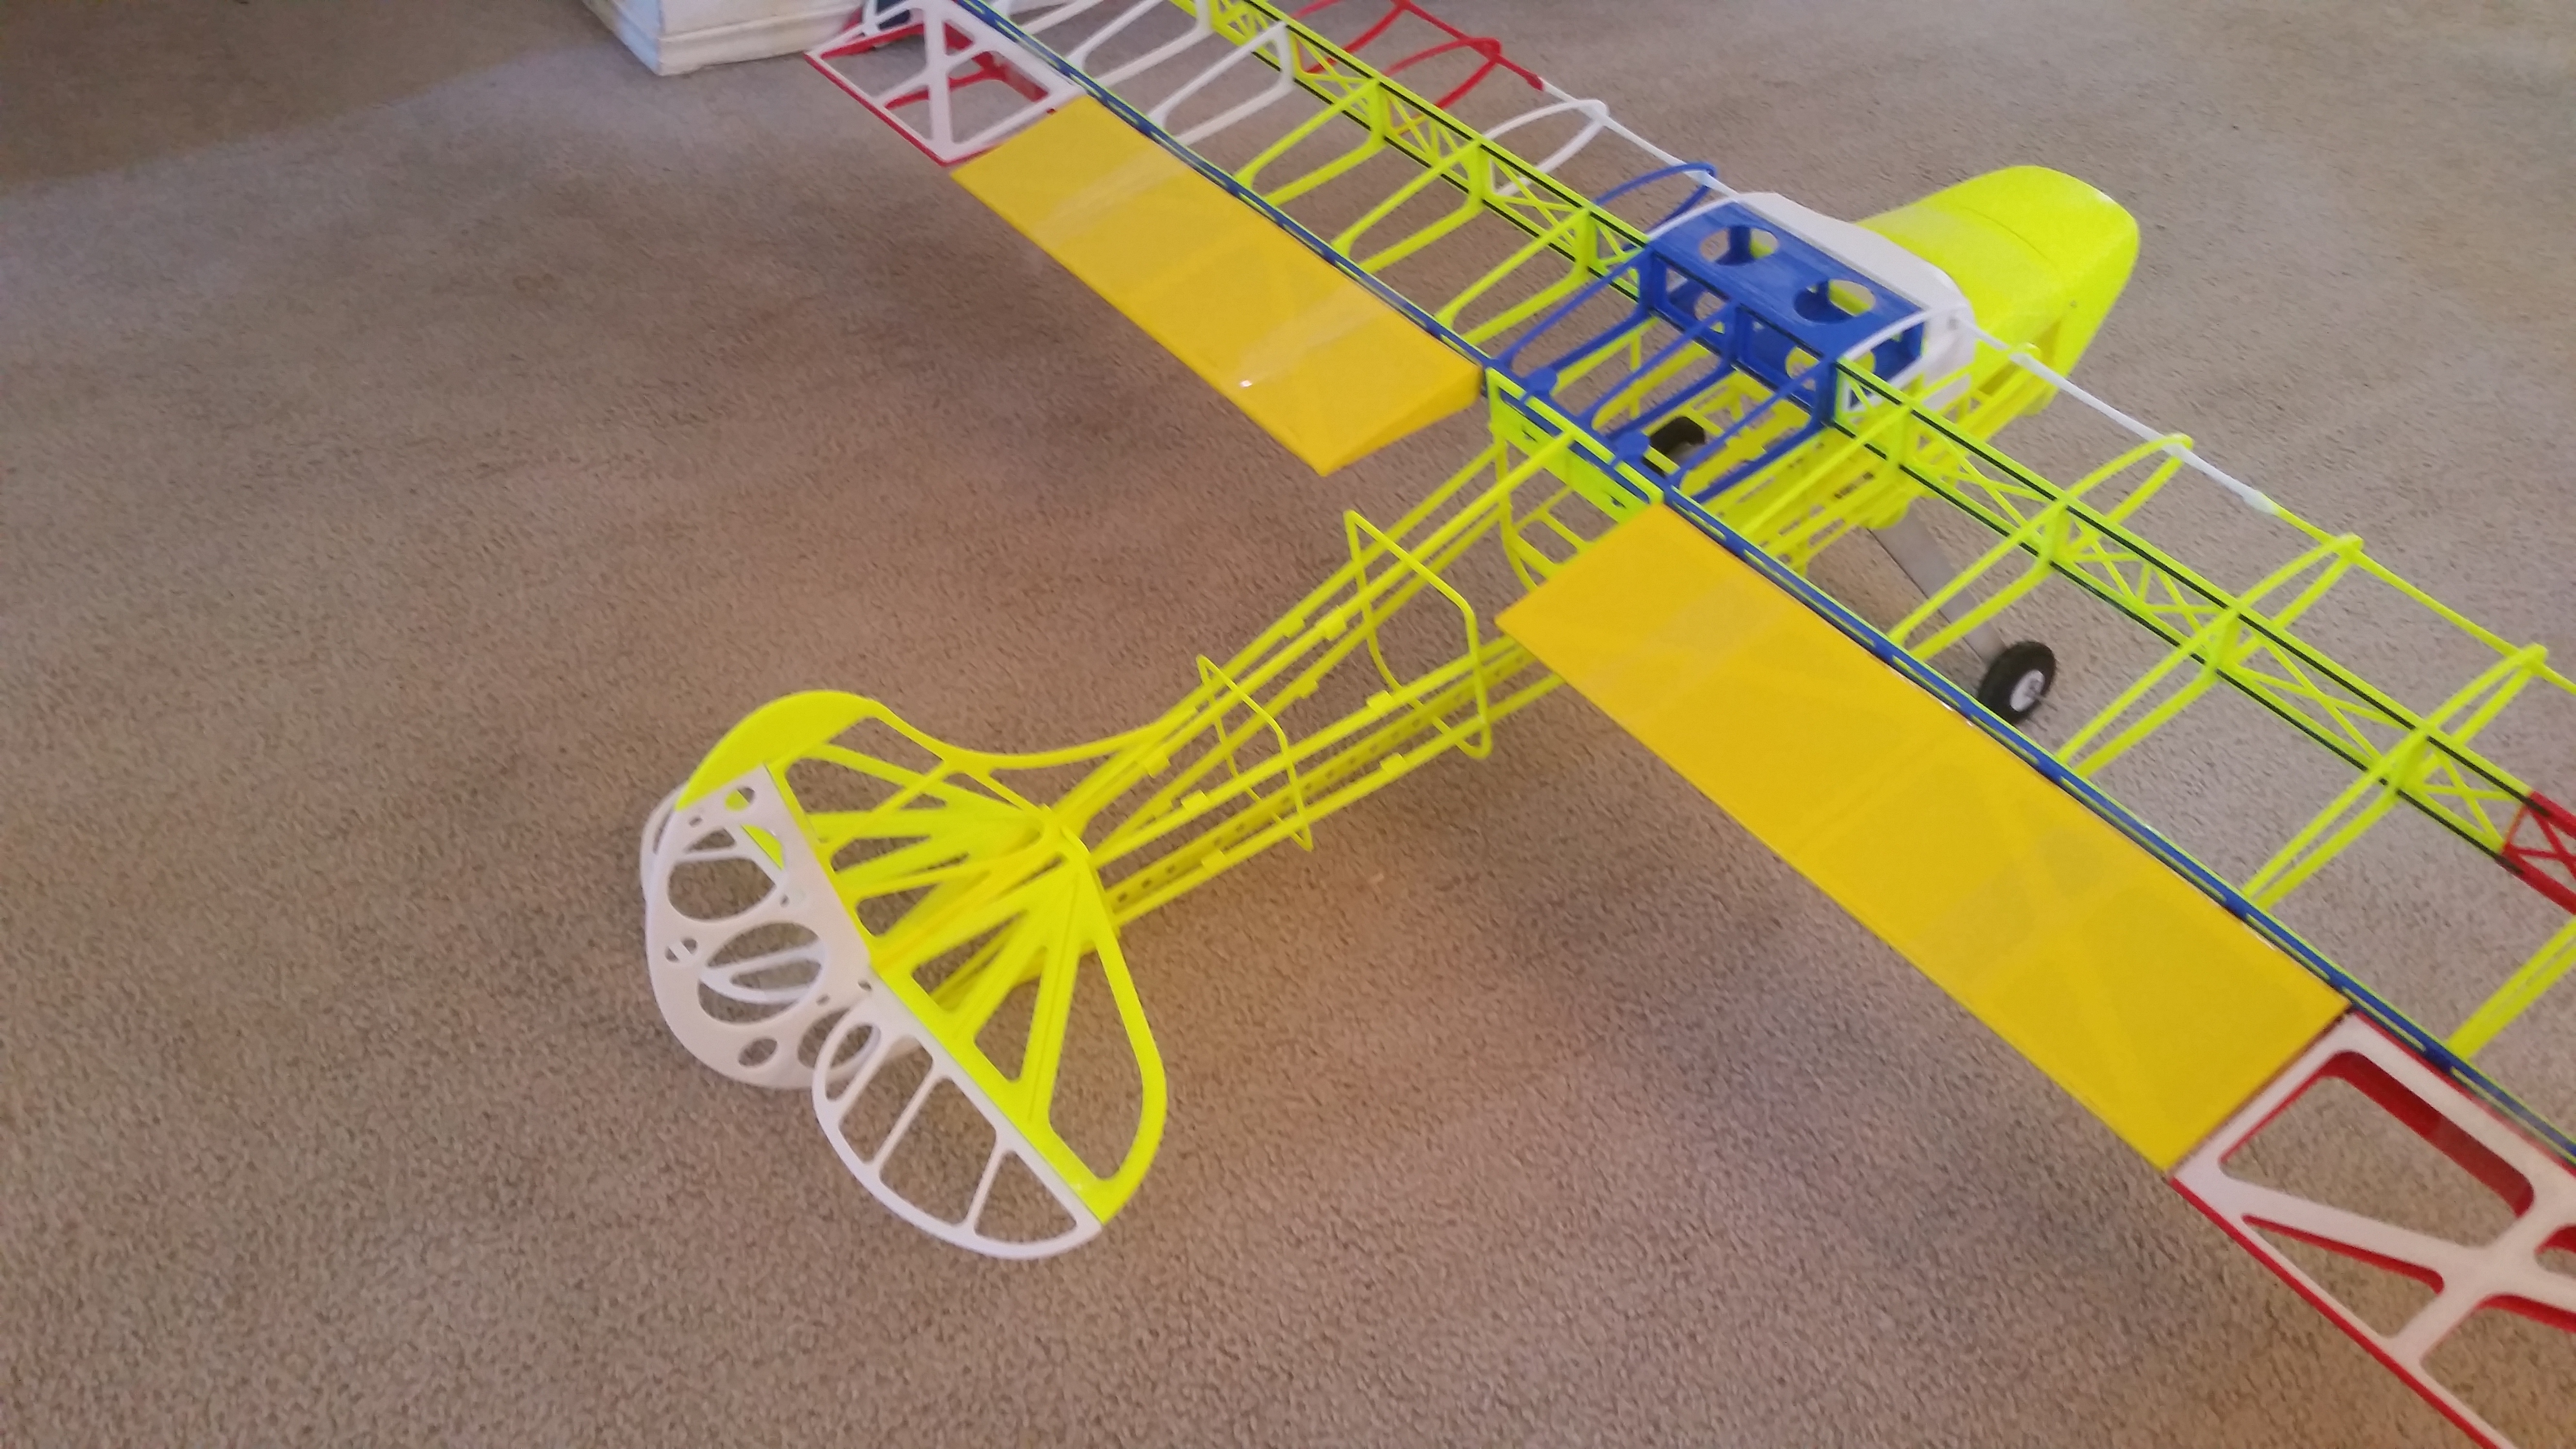
So I finished the assembly, gosh, In February! Here is a shot all assembled before covering.
I will post some covered, COMPLETED shots today.
I still have not flown it yet as spring weather has been very uncooperative- so far every weekend this year has been either rain or high winds!
Either way, this is a dead end project for me. I was using SketchUp which is a GREAT product but things like 3 dimensional compound curves that want to be a printable solid it was just very cumbersome and difficult to make it do what I wanted it to do. The windshield totally kicked my butt in SketchUp and that was when I knew I was done with SU.
That is one of the reasons I went for a covered frame on this plane.
So I have switched to Fusion 360 and I am liking it VERY much. Now SketchUp was great in that it was very intuitive and extremely easy to learn. Fusion 360 is much more, uh, complex, and the learning curve is MUCH steeper. However, with complexity comes POWER! BWUH HA HA HA! Anyway, I will close this thread out when it flies
Just wait until you see the project I finishing up now in Fusion 360! You know, the project that totally distracted me from this project! SQUIRREL!