just to avoid another possible error source: the hexagon nozzle shipped by lulzbot is .35 in diameter, right -
because i only found .3 and .4 versions for sale online in other shops…
I have found that I need to print PLA at 220-225 to get good results on my TAZ5. HIPS is 245, ABS is 230-240 depending on color and mfg. I haven’t had any issues with the nozzle fan stopping on me, but early on i was seeing issues with stripping until the temps were upped. IMHO, 205 is too cold for PLA and you will see the issues you mention.
1 Like
I was wondering about this also. The LB nozzle is .35 based on the product information. I picked up a spare .3 nozzle from makerfarm… both LB and makerfarm nozzles are etched with a “3”. The .5 nozzle is etched with a “5”. So I’m still a little confused, but +/- .05mm probably doesn’t make much of a difference. ![]()
The .5 nozzle fits the LB hex and is nice to decrease print times. The detail is good at .25 layer height… good enough for general prints. Something with more intricate features (ie. figurines, high tolerances) may be better with the .3.
thank you! i’ll try tonight.
is there a downside of printing pla at such high temperatures? does bridging/layer adhesion get better or worse? I was hesitant to even go over 210 until your post.
One thing to be wary of with PLA (I’d recommend going up in 5 degree increments) is that if it’s TOO hot, and sitting in the extruder for a long enough time (that time shortens the hotter it is) it’ll burn/carbonize, which can lead to some nasty clogs.
Haven’t had it happen to me with PLA, but I left some PVA sitting in an extruder for a while, and that was a pain in the ass to de-clog.
so there is no worse bridging or “noses” hanging down with higher/close to maximum pla temps?
Could be issues with bridging and overhangs. My slicer puts the fan on full-blast when printing overhangs / bridges to lock the extruded filament in place. If that doesn’t work, drop the temp a degree or two.
Its going to be trial and error to optimize the temp and cooling… keeping notes help.
After reading through this thread and havings tons of issues printing PLA myself. I was ready to give up and go back to ABS, but I found that the 220c mark is pretty spot on with my Taz 5. It’s currently in its 38hr of its 40hr build and no clogs and no issues. I am also running the bed at 70c with no lifting or adhesion issues. Just thought I would share for those that are having issues.
One other thing to note, is that the extruder can become slightly misaligned with the hotend over some use. This can cause a bit of friction in the PLA, or maybe the teeth divots of the hobbed bolt, which can also cause jamming. Disassembling the extruder and re-aligning the hotend with filament during re-assembly seemed to help another user in the community:
https://forum.lulzbot.com/t/taz-heated-bed-no-longer-going-up-to-temp/104/1
The above info, provided by mkainovi, fixed my pla printing woes. My symptoms were the same as provided in this thread. Part way through printing, usually after about an hour into printing my design, filament would stop extruding. Then I would need to pull out the filament, cut off the end and reload the filament. The filament had to be cut because it would have a notch in it just shy of the 7cm mark (see attached photo). Anyway, I tried everything, slowing things down, changing fill levels, wall thicknesses, orientation, supports, layer heights, calibration, cleaning, temperature up and down (just not to this degree) and nothing worked for me. I was really getting very frustrated until I found this post. With that in mind I wanted to say thank you to mkainovi and the Lulzbot community (and Lulzbot of course).
I am adding in some key phrases so this post can be found easier. Taz 5 filament stops extruding, Taz 5 stops printing part way through, Taz 5 does not finish print, Taz 5 air printing, Taz 5 jamming, Taz 5 filament jamming, Taz 5 filament stops feeding, Taz 5 notch forming in filament, Taz 5 filament getting damaged during printing.

Hello all,
I am so glad we are getting this issue resolved! I have been printing per mkainovi’s settings and so far so good except for one minor issue!
I am in the process of a 13 hour print and it seems as though the filament starts to have issues and the bolt starts to eat into the filament and then it some how recovers and continues to print. I have a attached a picture here of these weird lines that I am seeing. There is no predictability to when they will happen but on smaller prints I have had great success with 220c for PLA now on the new hotend.
Anyone else having this same occurrence? Any thoughts on what could be causing it?
Thanks,
Lunchbox

@Lunchbox, Hello, before I give my thoughts please keep in mind this is my first 3D printer and anything I write could possibly be very bad advice. That being said, are there temperature fluctuations happening around those points in the print (environment or hot end)? Have you used the pick and metal brush to REALLY clean the feed gear after the problems with the PLA? I also noticed problems in my prints when I didn’t follow some of the tidbits buried in the manual. Here are my abbreviated notes, shell thickness and top and bottom thickness were the most important notes in my opinion. I apologize if this is all common knowledge, hopefully something helps.
Layer Height - Larger is helpful for bridges and overhangs. Smaller is better for detail and curves. The smaller height = longer print time.
Shell Thickness - Outside wall size. Set in multiples of your nozzle size.
Enable Retraction - Yes
Bottom/Top Thickness or Surface Layers - Use a multiple of layer height. Thicker aids in strength, bridging and quality.
Fill Density - 0 is hollow. 20 - 40% is functional for most prints.
Printing Temperature - Leave it as 0 in Cura, set in pronterface
Retraction Speed - 25mm/s
Retraction Distance - Between 1 - 3mm
Initial Layer Thickness - Thicker gives better plate adhesion
Initial Layer Line Width - A thicker line width on first layer aids in adhesion. 125% is a good starting point.
Travel Speed - 125 - 150mm/s is recommended in the manual (175 set by printer profile though…)
Bottom Layer Speed - Slower time helps adhesion.
Infill Speed - Faster is usually ok since no one will see it. To fast ruins adhesion and leads to gobs of filament on model.
Outer Shell Speed - The slower it is, the better it looks.
Inner Shell Speed - Not visible but helps support the outer shell and inner supports. Set between infill and outer shell print speeds.
Minimal Layer Time - Tweak for cleaner crisper prints. Head slows down if it will finish a layer before this time finishes.
Tweak At Z - Change temp, print speed, fan speed at specific Z height
Pause At Z Height - Pause the printing at a specific height. Allows you to set print head placement and retraction amount as well (to stop blobs forming while paused). Most commonly used when switching filaments mid print.
I have been having the same problems as described in this thread. My Taz 5 is my first 3d printer and I’ve only had it about a month. My prints have been stopping after about an hour or two when the filament gets stripped at the hobbed bolt. Sometimes it would start printing again if I didn’t catch the problem right away but the part was already ruined. I’ve tried all sorts of different tension settings on the feeder. After reading this thread, I coated a couple inches of PLA with olive oil and extruded it through. Then I turned the temp up to 220 and I was able to complete an entire 8 hour print! I’m not sure which was the fix or maybe a combination of the two but thank you guys for posting your experiences. It was the longest print by far that I’ve done yet. These two pictures show the type of problems that I was having.

These pictures show todays successful print.


I was also having the same issues depicted in this thread.
After following two of the suggestions (printing at 220C and seasoning the hot end with olive oil, my long (~9 hours) print job completed successfully. 
Thanks to all those who pursued this and offered their solutions 
t
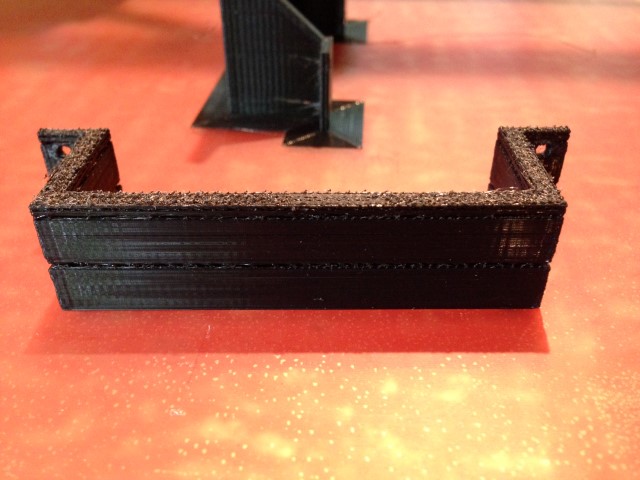
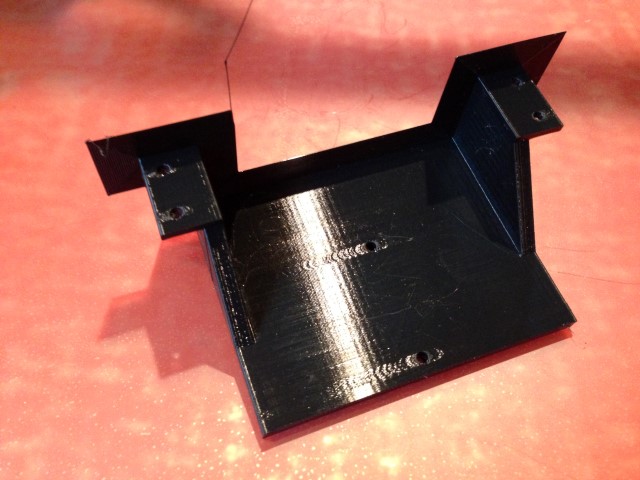
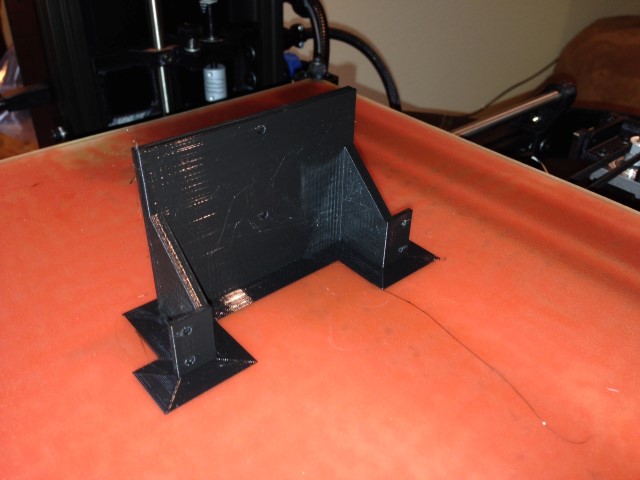
Since I’ve still been seeing jams occasionally, I created a little oiler that can be used to help keep things moving smoothly.
Just put a little cotton ball in the well and add a few drops of your favorite olive oil.
Haven’t done much testing but here’s some pics and the files for the part if you’d like to give it a try.
The design file was created using Autodesk 123d.
(Printed with support structure touching build plate only.)


Oiler Base v6.zip (229 KB)
Oiler v6.stl (3.93 MB)
I hope this is not too far off topic.
One of the advantages of servo motors over steppers is that motor current is directly proportional to the torque the motor is delivering. At least I have never heard of a stepper driver which could sense torque. And good servo drivers can feed this info back to the motion controller and/or shut down in case of an overload.
Question.
Has anyone ever tried putting a strain gage between the hot end and the hobbed bolt pushing on the filament.
At least then the print could be automatically stopped so the problem could be fixed before the part is ruined.
Edit:
Such a setup could also help with one of the problems with my Mini’s startup, which is it does not always heat up enough before it retracts the filament for the wipe and touching off the washers. The resulting notch in the filament usually means the print fails to start properly.
Andre
I struggled with this gouging effect when printing PLA on my Mini.
I think the problem is tension. Does the extruder latch jig from the Mini fit the Taz (http://devel.lulzbot.com/mini/daffodil/jigs/extruder_latch_jig_0.3.stl found via https://forum.lulzbot.com/t/hobbed-bolt-clogging-filament-stuck/1739/1)? It was very helpful for dialing in the tension.
I also use an oiler/dust catcher. I use mineral oil as olive oil will go rancid eventually.
Yes, that tension jig will work with the Mini. They use the same extruder body and idler arm. The extruder mounting block is the only difference.
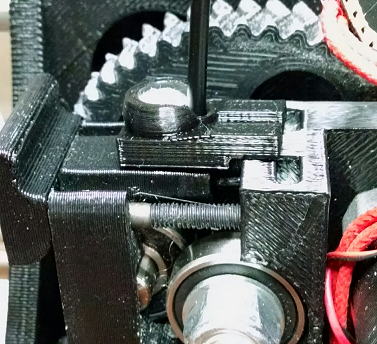
We bought a TAZ 5 a few weeks ago from the awesome folks at MatterHackers (http://www.matterhackers.com). We use it to print prototypes of our 4’ commercial robots as well as our 18" consumer robots - and it’s been an amazing workhorse. It churns out body panels, connectors, mounts, etc. day/night. Last night I watched a 12-hour print job fail while going into its 10th hour (thank goodness for streaming video). Subsequent print tests also failed almost immediately - at either the first or second layer. I searched for the answer to this particular problem and noticed that users striegel and Brew4You also posted on the same issue and observation regarding the micro blower. Then I saw theBLOCK’s post which made me look even closer at the micro blower. I hadn’t realized it earlier because the lighting is a little dim in our lab, but when I used a flashlight to look closely at the micro blower’s fan, I was surprised to see that the fan had stalled.
Background:
Prior to reading theBLOCK’s post, I started to believe that I simply had “finicky filament”. The one consistent observation was the way the filament jammed. Regardless of temperature, it appeared to jam identically each time. After the final test print with temperatures ranging from 220 down to 200 degrees (they almost all had failures within 5 minutes), I looked for the source of the problem, searched the forums and after reading the above quoted post I discovered that the micro-blower on our printer wasn’t running. With a small spin (or blowing on it with force) I saw that it would spin-up but it would still eventually stop. This indicated that there were was likely an obstruction on one end (or both) of the blower’s spindle. I assumed that if the micro-blower wasn’t running that the metal components above the hotend were probably getting too hot. I touched the cooling fins and the metal mounting plate above it and they were both far too hot to touch for more than 1-2 seconds. This was no doubt the source of the problem.
Deeper Dive:
The micro blower is spec’d to be “always-on”. When I researched the problem further, it became painfully clear that if this blower is stalled, heat will transfer upward from the hotend to the (finned) 6061-T6 aluminum cooling block all the way to the top of the 330 stainless steel heat break tube (the top of the tube is supposed to stay cool). Heat was also transferring to the 6061-T6 aluminum mounting plate! Without the micro blower the heat break tube will get hot enough to melt the filament before it makes its way to the hotend. With that much heat the filament will soften at the top end of the heat break tube. The cooling tower and mounting plate shouldn’t be too hot to touch because PLA has a low melting temperature (lower than ABS). When those components heat up (especially the cooling tower & the heat break tube that it surrounds) this will cause the filament to expand and jam above the heat break tube. At this point the hobbed bolt will also begin to chew away at the filament and, you guessed it, you’ve got a jam.
Note: In case you’re wondering what the heat break tube is, it’s where the filament first encounters metal. You can find more parts specifications directly from their publicly accessible documentation at: Index of /hot_ends/argon/pdf
jammed filament (leftmost side was inside the heat break tube, rightmost side was beginning to get chewed up by the hobbed bolt)

Solution:
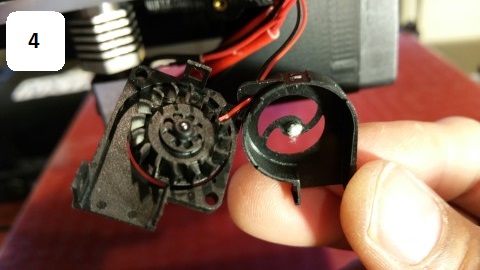
Using a 1.5mm hex key to remove the micro-blower from the remainder of the assembly, I carefully unlatched the 3 clips that keep the blower’s shroud in place and discovered that fine spider-web-looking strands of filament had collected at the outside-facing end of the blower spindle (outer housing). After carefully removing the collected filament strands, reassembling the micro-blower and bolting it back in its original location, I turned the printer on and heard the welcome buzz of the micro-blower immediately return. The metal components above the hotend are now able to be touched - even when the hotend temperature is at 220 degrees.
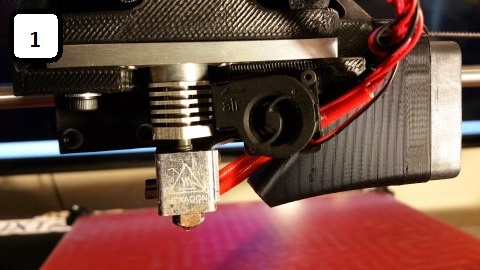
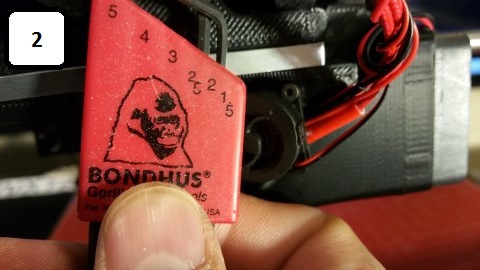
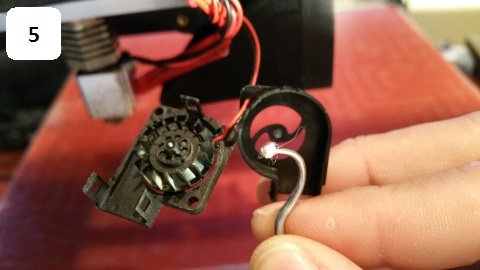
The below images are for visual reference:
the micro-blower
1.5mm hex key for removal
remove the single bolt and carefully remove the blower

collected PLA filament strands in the blower shroud
careful removal of the strands
Per three separate, and successful, tests following this procedure the PLA filament jams have been resolved. I documented and posted this in the hopes that it can help someone else save money, frustration and tremendous amounts of time if they run into a similar issue with jams and a stalled micro blower.