I have a well loved Mini 1.03, bought for personal use, brought to school to use in my classroom. Lately the print quality has diminished greatly. Layering is pronounced and surfaces are no longer smooth.
Is there a guide for going through this workhorse and getting it back on track?
I’m using Simplify3D for my slicing (it’s just easier for my workflow).
Nozzle may be worn or damaged (or just dirty), hobbed gear “teeth” may no longer be sharp or as big as they used to, such that the e-steps is no longer accurate. Linear bushings may have worn to be loose. Belts may have stretched. Z lead screws may need cleaning and lube. Filament quality may not be great either.
Nozzles are cheap (I have had great luck with hardened steel “CHT”-style nozzles from aliexpress), hobbed gears are like $12+ shipping from lulzbot. Linear bushings also aren’t too expensive from lulzbot either. The rest should be addressable by maintenance.
Some pictures of what you’re seeing may also help diagnose any specific thing.
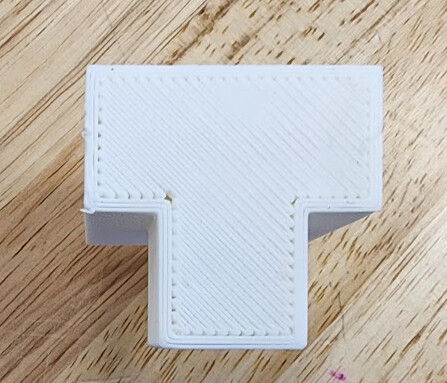
This is the bottom. I have adjusted the Z offset in S3D to .3mm trying to get an acceptable first layer. I’m going to start working in back down by .01mm but you can see the wall issues here.
At 40mm/sec with an extrusion multiplier of .9 and a layer height of .2 I’m still getting distinct layering in the vertical component of the walls. Horizontal layering isn’t too bad, it’s on par with my newer printer.
I’m sure I could use some new belts (this has been banging out prints for over 5 years), the other printer is getting about 1000 hours of printing every year (based on it’s logging) so this one has similar use.
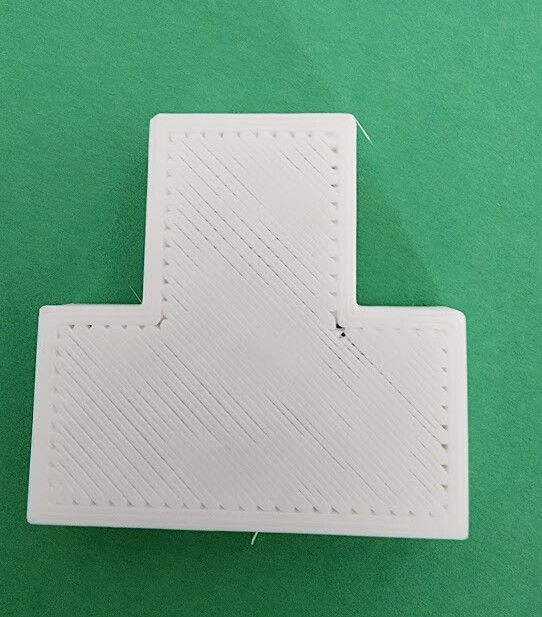
The white filament is completely blown out in the image, so almost impossible to see any detail on the surface quality. Try the photo again with a white background, or another color of filament.
Why are you using that extrusion modifier? An extrusion modifier of .9 basically means you’re 10% underextruded, which would easily account for those gaps you’re seeing.
In almost all cases, your extrusion multiplier should be one of the final fine-tuning calibration steps, and .9 is fairly significant.
I can’t remember all the gcode commands but that can help it level & I believe m500 is save command
But correct me if I am wrong because it’s a rusty thing for me I just want to steer you in the right path
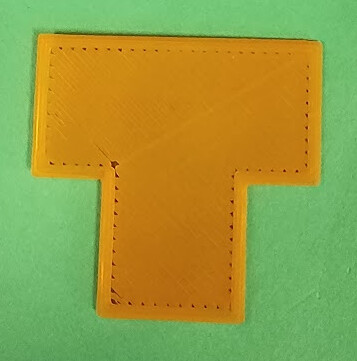
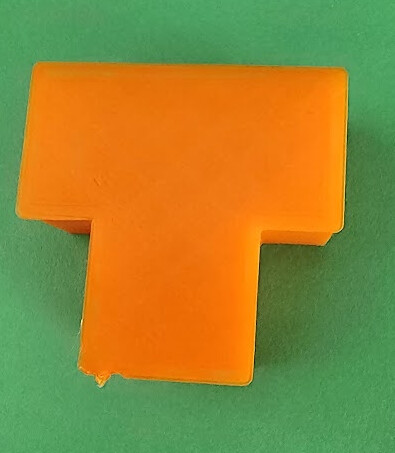
Thanks, I’ve always had the extrusion modifier set between .5 and .9 for all the printers I use S3D with (I don’t remember why) but you make a good point. I’m running test prints now with no modifier and bringing the Z offset back down to .28 mm. This is the result, walls aren’t separating (good) but the 5 layer bottom isn’t smooshed yet. I’ll keep bringing down the Z offset.
M500 stores the current offset to the EEPROM so it isn’t lost when you turn the machine off. It does the opposite of “resetting” the offset.
The last print is looking perhaps a bit too close to the bed, the gaps at the edges may be the result of going a little too fast. Make no other changes and run that again at like 75% speed and see if they fill in.
If you do a single-layer print and show the top and bottom, it’ll help to see if your Z offset is correct.
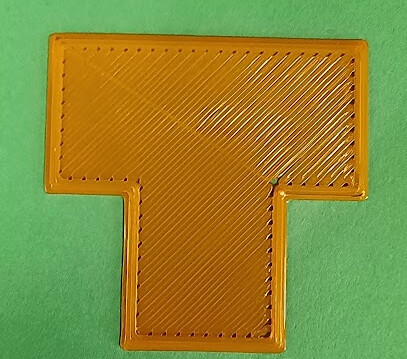
It looks like it’s still underextruding, but squished enough to compensate on the straight lines.
Please install the latest version of Cura LE with a standard, unmodified print profile for the Mini. It seems like the machine is working fine, but your profile for Simplify3D seems to have some issues.
Now I’ll play with speeds in Cura and see if I can sharpen up the corners. Would new belts help that?
Strange that the software I’ve used for five years suddenly produces bad prints, happy that the printer won’t need a whole lot of work to keep on going!
Elephant’s foot is the result of the nozzle being closer to compensate for the flow that you had been doing before. With proper flow, the offset can be set to what it should be now.
For sharpening the corners, do a pressure advance calibration. With that dialed in, the only thing that will sharpen corners with molten plastic is a smaller nozzle.
I’m running a few more tests working to get the z offset right. I started at -1.37 and still have pronounced elephant foot at -1.43, it’s getting better though.