Hey guys
I am new here with my TAZ 6 and I need some urgent help.
I started printing with PLA and normal pre-settings and it looks like that the z-axis does not raise as much as it should per layer (That is my thought). Anyway the result looks like the following:
Can you help me with my problem or tell me what I should change to make proper prints? Is it just a settings problem in the Cura or a hardware/software error in my TAZ?
I have to add that I am a beginner.
I thank you for the answers in advance. BR
What version of Cura? What version of firmware? What tool head are you using?
The more details you give us, the better answers we can provide.
1 Like
Hey thanks for replying. Here are the details:
Cura Version: 3.6.22
Firmware on the TAZ 6: 1.1.9.34
Extruder: single extruder with 0.4mm nozzle
Thanks for helping out and BR
While you are not using the latest version of CuraLE and firmware, what you are using should be fine. Don’t change until we figure out why you are having problems.
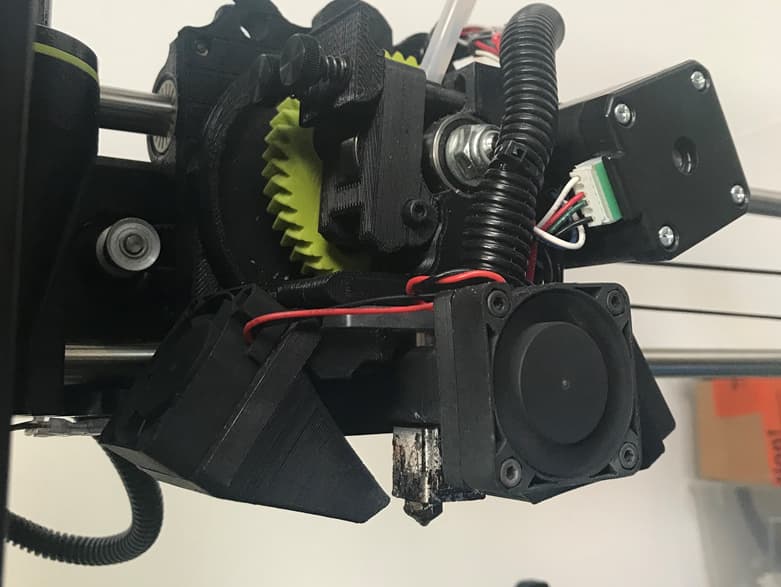
The TAZ 6 Single Extruder which is pictured here normally comes with a .5mm nozzle. Are you sure you have a .4mm nozzle instead? If so, have you changed the CuraLE settings to match?
How do you connect (i.e. send gcode) to the printer? Is the USB cable connected to the computer running CuraLE? I ask because we may need to see the output of some gcode commands manually sent to the printer and because you need to know how do this so you can calibrate your e-step value.
Next, lets use a object that both of us can identify, a 20mm XYZ cube. You can slice and print this after the e-steps calibration.
Let us know the results and we can move on from there.
Hi
i have a TAZ 6 myself and had some of the same problems in the beginning.
First i followed all the calibration guides here
https://ohai.lulzbot.com/group/maintenance-repairs/
https://ohai.lulzbot.com/group/taz-6/
That made things better.
After this I found some “broken” printed parts on my TAZ ->look for layer separations like on the stepper motor mount for the Y-axis
If you find something “broken” you can print the original part → Index of /TAZ/6.03/production_parts/printed_parts
or an updated one from thingiverse.
This made the prints even better.
After this I upgraded the original extruder with simple tools that made it better.
First look at the herringbone gears, look for wear, move them by hand and look for backlash, print new ones if neccesary
Then have a look at the hobbed bolt and bearing.
I found mine to be quite loose, the bearing was moving in the bearing holder of the extruder body
→ I found an upgraded one on thingiverse that I “customized”
After printing the upgraded one I followed this instruction(https://ohai.lulzbot.com/project/taz-6-extruder-full-assembly/hot-end-tool-head-assembly/) to assemble it and spent time to tighten the nut enough that nothinh moved and the hobbed bolt moved free enough ->have some extra washers and try different thinknesses until it works best.
After that use test/calibration print parts to finetune for the material you use.
This should make things much better 
Now it prints nice prints in all layer heights.
Only fast prints with a lot of retraction is a problem, but i think this was never the “strong” side of the original extruder.